Today I am showing you something a little different and travelling along the home decor route to produce this petty picture frame using Spellbinders Labels 48.
All the steps are shown for you to make your own and the result can be for any occasion that you wish

Other Supplies:
- Wild Orchid Crafts flowers
- Want2Scrap pearls
- Rose patterned ribbon
- Thin Acetate
Instructions:

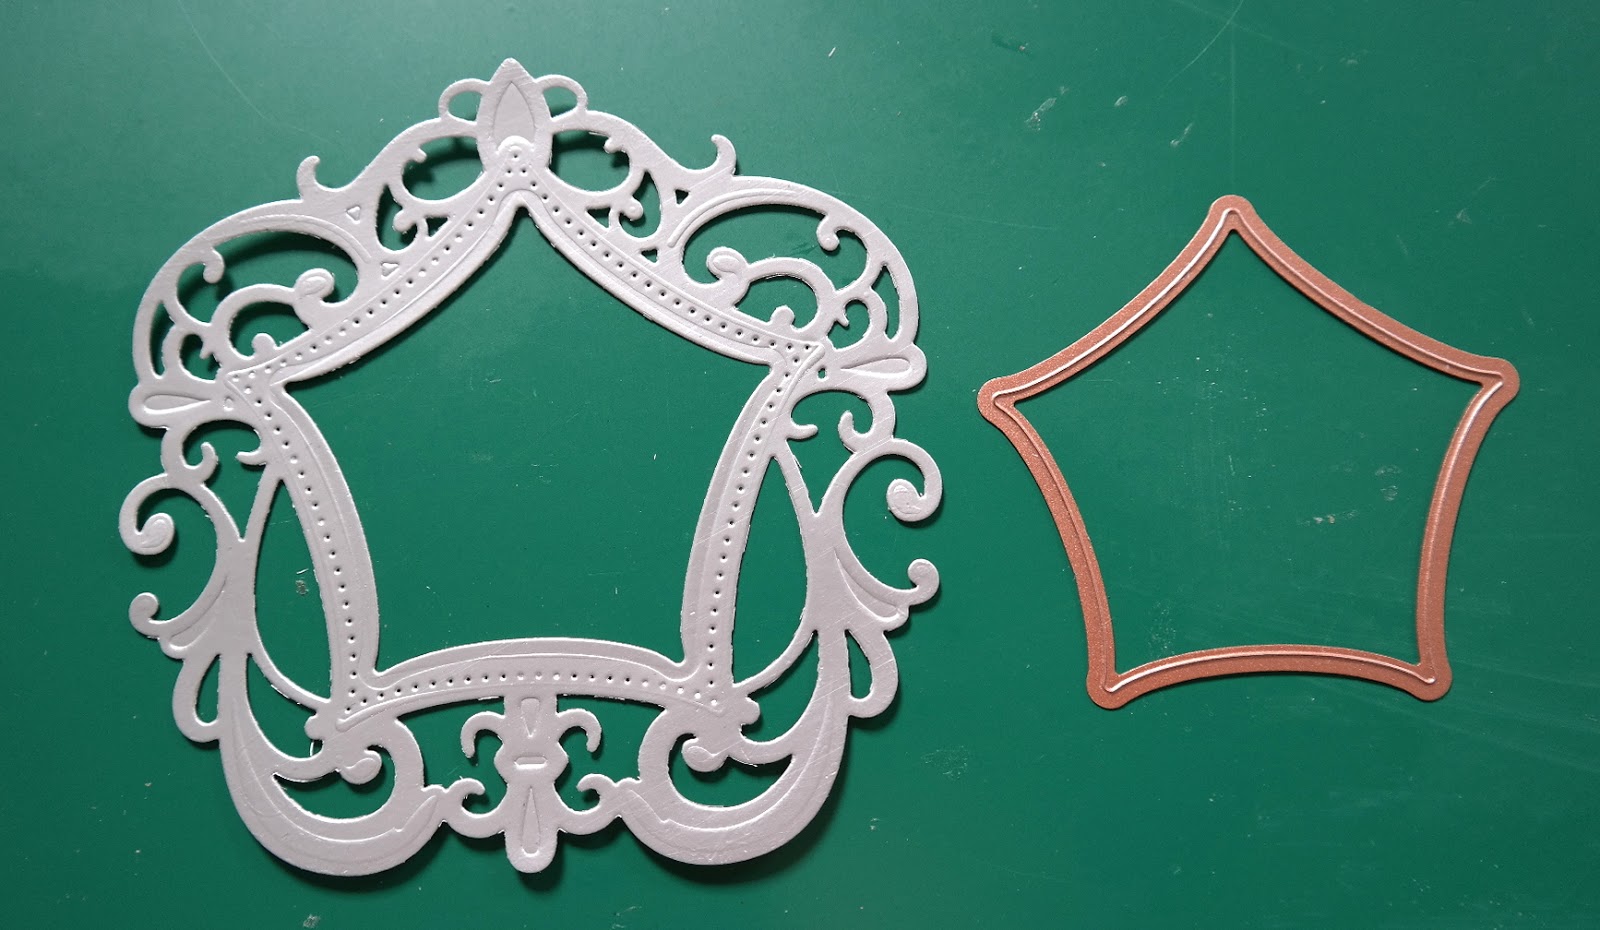
With Decorative Elements Labels 48 and dies #3 and #4 cut four pieces from silver card and marry two of them together and glue in place. this will give extra strength to the back of your picture frame

Take the glued piece and use the top scrolls on the die cut as a guide and line them up on a scoreboard and score down by about one inch.
Then carefully bend these ... but don't fold them over.
Set the third piece to one side for now
Take the fourth piece and with die #4 from Labels Forty Eight cut out the aperture

With some thin Acetate and the largest die #5 from Labels Forty Eight cut one shape

Choose the photo that you wish to use and make sure that it fits inside the die #5 and cut this out too

Add the Acetate to the frame with the aperture and glue the photo to the third solid panel.
Then neatly add some glue and place the acetate frame over the photo and press together making sure that all the scrolls are lined up to.
So now you have two double layered panels ... one with the photo and acetate and the other is solid
So now you have two double layered panels ... one with the photo and acetate and the other is solid

Add glue to the bent over area only and marry the top edges neatly together, making sure that you have the frame and photo the correct way up.
This will create the "A" frame with the die cut layers and allow your picture frame to stand.
This will create the "A" frame with the die cut layers and allow your picture frame to stand.

I threaded ribbon around my frame ... but only the front part, otherwise you will fasten it all together and it wont open and stand.
I added in the flowers and some pearls
I added in the flowers and some pearls
Make your frame from different colours to suit the occasion ... and this would make a really pretty photo frame for baby or wedding photos.
More tomorrow ...
Hugs xx
Morning Christina, this is absolutely gorgeous definately a must have die and one I don't think I have must check as I'm famous for buying the same die twice thanks for all your inspiration Christina it is really appreciated.
ReplyDeleteNancyd xx
how fabulous Christina. I bet there are many dies in our stash we could make frames with for special photos. so clever of you. thanks for showing. sending hugs.
ReplyDeleteWhat a great idea, it looks lovely
ReplyDeletecheers Kaye
Such a creative idea, Christina! Love the shape for framing the picture that you get from this die. So pretty, as is the little one in the picture.
ReplyDeleteWhat a fabulous idea Christina! I would never have thought about using SB dies for home décor. Thanks for the inspiration. Debra x
ReplyDeleteLovely project, really pretty.
ReplyDeleteMichele
Christina your photo frame is excellent ,thanks Ann
ReplyDeleteAh that's gorgeous Christina what a brilliant idea, makes a beautiful keepsake the photos of Isabella beautiful too.
ReplyDeleteKind regards
Anne Owens.
Oh Christina i am loving this idea ,so original and just beautiful.
ReplyDeleteTake Care
Elaine H X
Wow so creative,this is beautiful.xxx
ReplyDeleteWhat a terrific idea! Thank you so much for sharing. Just love all your cards and items.
ReplyDeleteWhat a fantastic idea, and as usual do able as your steps are so clearly written. Thank you. X
ReplyDeleteMorning Christine,
ReplyDeleteA wonderful use of the dies, just gorgeous,.
Lydia
X
Good Morning Christina :) Well.... Great Grandma does it again! How precious is that!! Brilliant Christina! Absolutely Love it! Thank you soooooooo much for sharing. Enjoy a most Beautiful day! Big Hugs.
ReplyDeleteMorning, Christina,
ReplyDeleteWOW...what a great project today. That's a fantastic little photo frame and so easy to make as well. Thanks for the tutorial :)
Bx
this is so cool. now i think it's time to shop for this die.
ReplyDeleteHello Christina, This is just magical! Adorable with their photo! I have young grand daughters so I must order this die! Very pretty!! Amy
ReplyDeleteHi Christina
ReplyDeleteTruly amazing. How on earth do you think up these fantastic projects. This is awesome.
Such a great idea! I would have never thought to use dies in that way. Your granddaughter is precious :))
ReplyDeleteAbsolutely adorable! What a fantastic idea:)
ReplyDeleteSherrie K
thats beautiful. love it xx
ReplyDeleteHi Christina. You have such an amazing thought process. I love all your cards and would love to win one. Thank you for all that you do for us.
ReplyDeleteWOW, WOW, and WOW. This is just super Christina - I just LOVE this. Thank you once again for your inspiration. Hugs from Galway.
ReplyDeleteAdorable
ReplyDeleteGorgeous card, thank you
ReplyDeleteLovely tutorial and great result. Another project to try (Just made my first pop up box!)xx
ReplyDeleteHI Christina
ReplyDeleteLove this idea - don't have that exact die but as another lady said I'm sure that another one that we may have could be used instead. Thanks for the idea and for showing us just how to do it .
Love & best wishes
Jenny C xxx
Such a precious picture with card and can be framed. Beautiful
ReplyDeleteSo pretty what a lovely project you have created x
ReplyDeleteChristina, Christina, Christina - What can I say. Beautiful.
ReplyDeleteWow! What a lovely die template and a most beautiful project. Love the idea!
ReplyDeleteHow cute this is. Love the picture frame.
ReplyDelete
ReplyDeleteWow the picture frames is adorable...both of them turned out fantastic....tfs
Well done Christina
Hi Christina, a totally different look and so inspiring for a lovely gift and card. I can not wait to try this.
ReplyDeleteThank you so much for sharing this beautiful idea.
xxx
Beautiful. A clever idea
ReplyDeleteoh sooo pretty!!!!
ReplyDeleteBrilliant idea
ReplyDelete