Adding a decorative edge to your cards can be easily obtained with the aid of a die, and Spellbinders have several sets that all mix and match together. This pretty card has been created with one of those sets but the same result can be done with any that you have in your crafting "Stash"
I am aware that these are old dies but some of you may have them and it is always good to re visit the older ones. After all you bought them because you liked them and you may as well put them to good use.
I have linked below to another style that is still available and at a really good price but these dies are being retired and so if you don't have one, but like the idea then grab them while you can.
My apologies that I cannot link to the actual Classic Triple Scallop set that I have used.

Spellbinders Supplies:
- E8-005 Classic Postage Stamp
- S6-001 5x7 Matting Basics A
- S6-002 5x7 Matting Basics B
- PL-001 Platinum Machine
Other Supplies:
- Oragnza and Satin Ribbons from Mei Flower
- Flowers from Wild Orchid Crafts
- Pink Pearls from Want2Scrap
- Hat Pin handmade by me
- Embossing Folder
Instructions:

With die #7 from Matting Basics A cut two pieces and Create a Hinged Card for your base
With die #7 from Matting Basics B cut one more layer and dry emboss this with any folder that you have in your "Stash"
(Please remember that die #1 is always the smallest)

In between these two layers you will need to hand cut another in the colour of your choice so that it leaves a tiny border around the edge. These layers can all be glued to the base card
I chose a deep pink for mine
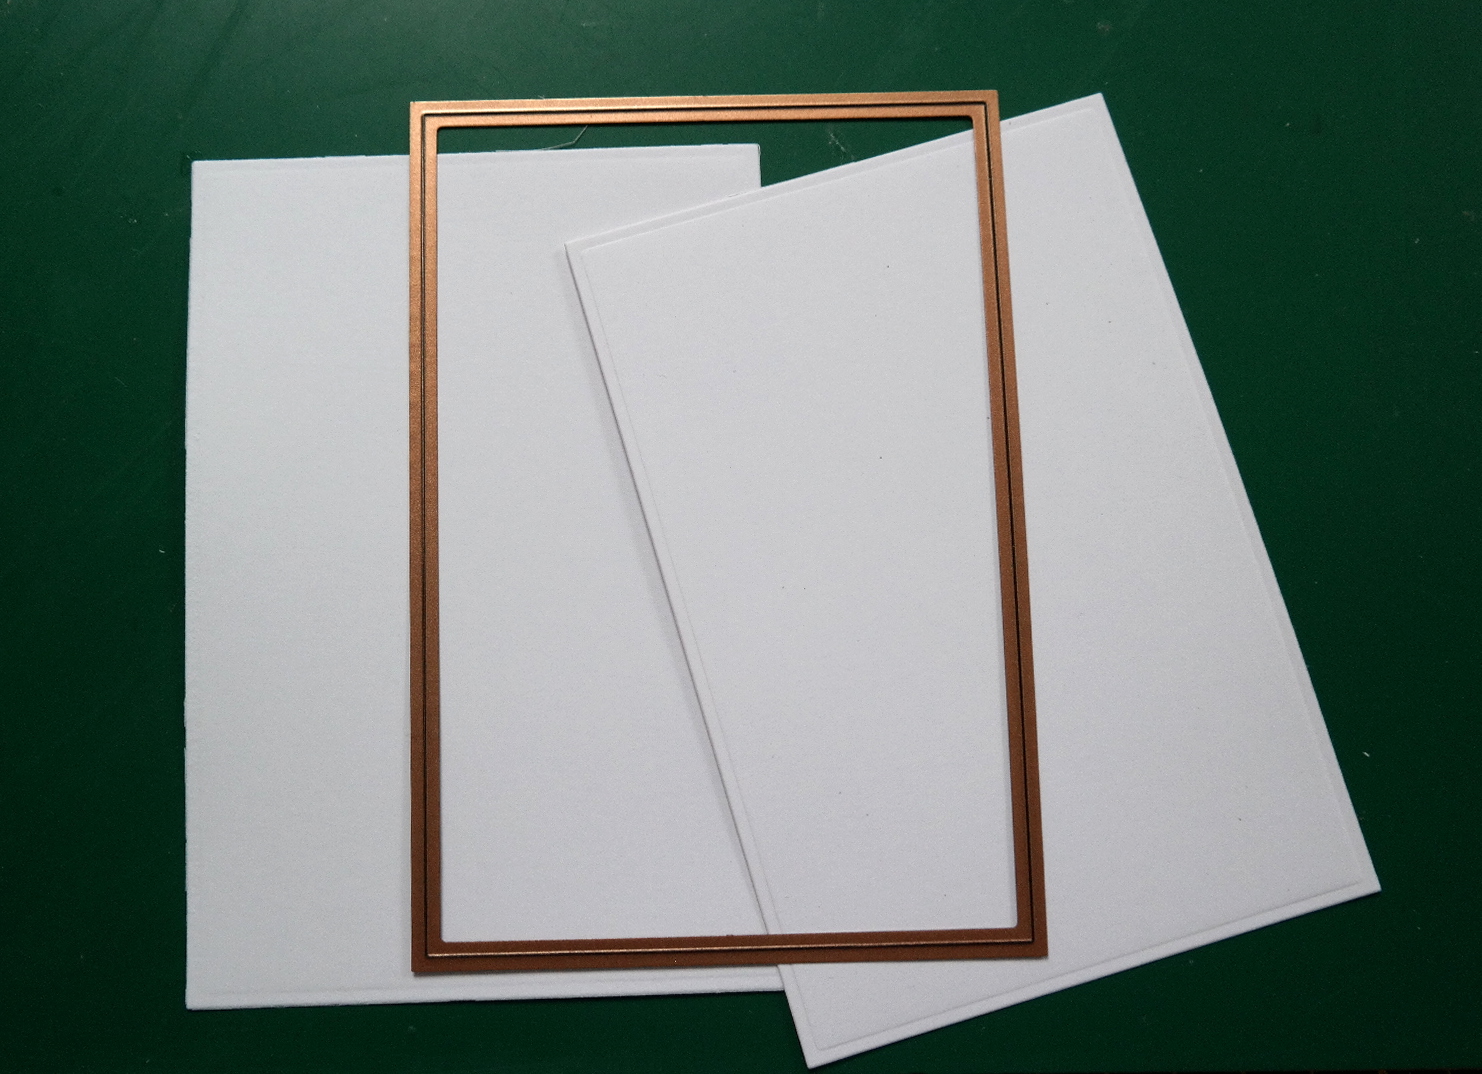
With die #6 from 5x7 Matting Basics A cut two panels and these are the ones we are going to work on first. The edges on the long sides will be cut with the die so there is no need to emboss

Looking at the dies you will be able to see the difference. The one on the left is the cutting edge and the other two are the inserts to give you the pattern. Any of the Classic Edges will be the same and there are several insert sets that can be mixed and matched

Try to keep the pattern as symmetrical as you can.
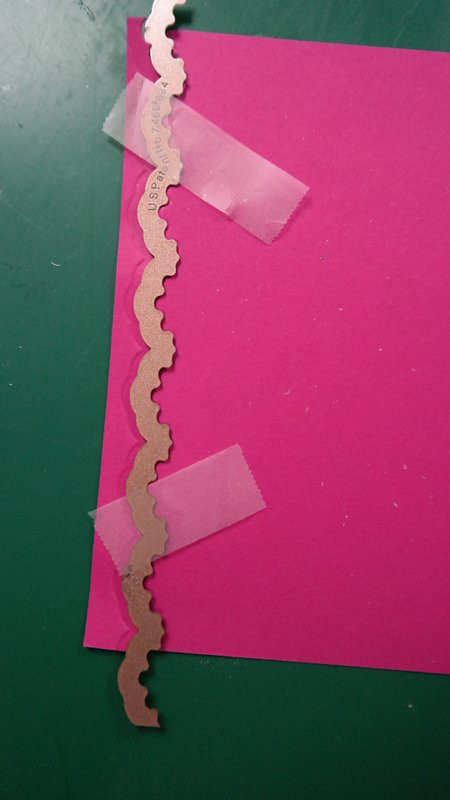

Using the white panel as your guide place it so that a small border is visible and reposition the cutting die along the other side leaving the same size border. Tape it in place so that it doesn't slip
Add these two together with foam tape in between the layers. Set aside

On the second white panel place the cutting edge on the outside and choose one of the inserts and tape together to cut.
Make this panel a little narrower than the other panel we have just layered and flip the two dies to the other side and cut this edge also.
Keep the dies as level as you can on either side and once cut I have dry embossed my panel

With some deep pink card I have repeated the process from a previous step to get a small border around this embossed panel
Layer these two together with foam tape.

I double layered wide and thin ribbon and added a bow at the bottom of the card
Here's a tip for you ... by adding the ribbon vertically down the centre top panel it will detract the eye away from any un-evenness in your edges
Secure the ribbon at the back of the panels
Stamp and heat emboss your sentiment onto some parchment and layer it on to the same coloured card you have used. Wrap this also around the panels and secure at the back.
Add all these layers to the base card and dress with the flowers
Push a hat pin into the knot of the bow for an added extra
This effect can be achieved if your dies have a separate cutting edge and fancy inserts to them. Take a look at what you have and improvise ... but most have all have fun making pretty cards for yourself.
More tomorrow ...
Hugs xx
Morning Christina, a gorgeous card and I bought the whole set of these edger dies when they were released and not used them much recently used them on some of my Christmas cards so really must as I do like them. Thanks for all the inspiration you give us.
ReplyDeleteNancyd xx
Hi Christina what a beautiful card today. I have a set of dies quite similar to these but have never used them (didn't really know how to). Will definitely be giving this a try.
ReplyDeleteThe end result is beautiful, and the double layered ribbon makes the card look extra special.
Thanks again for your brilliant inspiration. Anne Owens xx
Great idea Christina, I have a rush 50th card to do, you've saved my bacon yet again, thanks Ann
ReplyDeleteLovely card Christina,Great Tutorial and tip,i agree with you we love our dies then when we get new ones the older ones are forgotten ,was so nice to see the scallop dies again ,i will get mine out in the New Year { promise }
ReplyDeleteTake Care
Elaine H X
Lovely card, very pretty & a great reminder to use my border dies.
ReplyDeleteMichele
I have these dies and hardly ever use them, so pretty, xxx
ReplyDeleteHi love this tutorial
ReplyDeletei have had these dies ages and never used them but will
give them ago now.
Marion H
Another pretty card Christina, I have a couple of border dies so will be able to have a go - once the rush is over!= almost there! xxx
ReplyDeleteBeautiful card, Christina.
ReplyDeleteMerry Christmas and a Happy New Year.
Hugs,
Guida
Hi Christina, thank you for re visiting some older dies, it's easy to forget them yet they haven't lost their ability to look gorgeous, as your card shows. The red and white fancy edges set the card apart from plain edge layered cards. X Ros
ReplyDeleteWhat a lovely card l like all the elements and the background embossed paper so beautifully presented too! Merry Christmas xx
ReplyDeleteMorning, Christina,
ReplyDeleteOh my word, what a stunner today! It's really brightened up my morning as the weather down here is 'pants' yet again - they are saying Cornwall is going to have a very wet and windy Christmas. I just love the colours you've chosen and the tip about the vertical ribbon is really helpful :). You've added one f your wonderful pins as well, that's the icing on the cake. I have a couple of edge dies that I think I'll try out to see if I can get anything close to yours (takes a minute for Christina to get up off the floor after rolling around laughing). I don't have the 5x7 matting basics |(yep, they're on my Amazon wish list) but I've got some I can try it out with. Fingers crossed I don't tie myself up in knots with the project. I'm on a roll though as I've just managed to put together my new distress ink storage units and actually made some chalk paint to decorate them with so perhaps decorating my tree has woken up my crafty muse. As always, thanks for a great tutorial.
Bejay xx
Thank you so much for this tutorial! I have these edge dies and never use them because I was always a bit confused as to how to make them work. Now I will be giving them a try! Merry Christmas to you!
ReplyDeletethis is so cool. love it,
ReplyDeleteThank you for showing us 'how to'. Always enjoyed your
ReplyDeletetutorials because they are quite easy to follow and I will
try to do more with the dies I got,just after Christmas.
Have a wonderful Christmas with the family x
Lovely! Thanks for the reminder... I need to dig these out and use 'em!!
ReplyDeleteit's a beautiful card and thanks for the tutorial.
ReplyDeleteWell done Christina
I have this die set, so will get cracking and try making what you have shown us here, thank you for the tutorial Christina....A beautiful card is the finished product.....luv Ursula xx
ReplyDeleteHello Christina,
ReplyDeleteWow! Oh! Wow! a stunning card, love it.
I have all those Dies and always struggle working out which is which. I am not stupid (well I don't think so myself) !!! Anyway I must rummage them out and have a go with them.
Thank You for another great Tutorial
Have a wonderful Christmas if I don't manage back before the Big Day.
Patricia xxx
I have those dies and who would've thought those dinky little dies could produce such a beautiful card. Well, you obviously, Christina. You continually provide me with inspiration. Thank you so much!
ReplyDeleteHow pretty, love the red panel behind the white, really shows of the edging. Thanks for the tutorial. Have a Happy Holiday. Dianne
ReplyDeleteHi Christina
ReplyDeleteThanks for the tutorial. I have the embossing folder and a different set of edgeability dies so will have to have a go in the New Year. Too much going on at present. Hope you have a lovely family Christmas and all the very best for the New Year
Love & best wishes
Jenny C xxx
Beautiful card Christina. I have these dies and the EF you have used so definitely must have a go at this
ReplyDeletebeautiful card Christina. merry Christmas to you and your family. xx
ReplyDeleteA gorgeous card! Love the edges and happy to say I have quite a few Edgeabilitity dies. I'm inspired to pull them out and create. I do enjoy cards that are made with older does. Even if I don't have the specific die, I may have something similar and if I do have it, your project is a bonus.
ReplyDeleteMerry Christmas, Christina.
Sandra Smith
Nice to see an idea for using the edgeabilities in a different way. I think I have this set, so will be giving it a try
ReplyDeleteMargaret xxx
Such an unusual design but it works!
ReplyDeleteThis is a beautiful card. The hot pink color is so vibrant and I just love the use of the edgeabilities.
ReplyDeleteBeautiful card :-)
ReplyDelete