Adding some accent to the sides of your cards can make them really pretty and with dies that give you the pierced edges it is very easy to achieve.
There are circles, squares, ovals and shapes that all have this look to them and today I am using the Pierced Rectangles from Spellbinders Celebrations Collection.
Spellbinders Supplies:- SCD-012 Pierced Rectangles
- SCD-026 All You
- SCF-001 Framed Canvas
- Platinum Die Cutting and Embossing Machine
Other Supplies:
- Flowers from Wild Orchid Crafts
- Simply Said YOU Stamp set from Avery Elle
- Pearls from Want2Scrap
- Handmade Hat Pin by me !!
Instructions:
With die #6 and #5 placed one inside the other onto some white card, cut and emboss the panel
This will create the pierced edge around the rectangle.
Repeat the process with #4 and #3 to make a smaller panel.
Stamp your chosen sentiment in the position you want it on the smaller panel and then use any embossing folder you have to add texture.
(Stamp first as it is harder to stamp on an uneven surface once you have embossed)
Create a base card in blue that is slightly larger than the largest pierced panel.
Create another mat in blue that is slightly larger than your embossed panel
Glue each of the white layers to the blue and then layer them together with foam pads in between
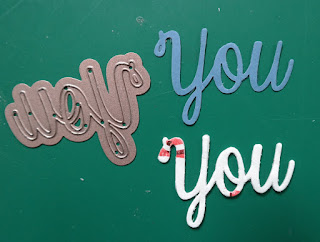
Cut the word "YOU" from some blue card and again from some double sided adhesive foam. remove the top backing sheet and layer the two together.
Remove the backing from the other side and add it to your card in the position you want it near your stamped sentiment.
The position will depend on which one you chose to use as there are many on the stamp sheet
Vary the stamped sentiment and the colours and the flowers to suit the recipient for a new look each time you make the card ... and make a batch of them in one go so that you always have some ready for that unexpected request
More tomorrow ...
Hugs xx


Lovely cards Christina .
ReplyDeleteElaine H X
Two great cards, perfect for any occasion.
ReplyDeleteMichele
Love the card Christina, and I especially love the pierced rectangles, must get some.
ReplyDeleteDi B. x
Hi Christina, love the flower spray on this card. The colour match is beautiful. X
ReplyDeleteSo Simple yet says it all in a beautiful way. Thank you Christina, have a lovely day despite the wet weather. xx
ReplyDeleteBeautiful cards, thanks for the tutorial!
ReplyDeleteMorning Christina,
ReplyDeleteLovely cards.
Lydia
X
So pretty, love the navy pin attachment.
ReplyDeletesimple to make but all beautiful. hugs to you Christina.xx
ReplyDeletelike these very much. Like the batch making idea as well! xx
ReplyDeleteThanks Christine, have used this YOU die in several different ways after you showed it to us before....so versatile...thanks for the tutorial, these cards are lovely....luv Ursula xx
ReplyDeleteHi Christina
ReplyDeleteA very classy card. Don't have any pierced dies at the moment, but I think they may go on my wish list
Margaret xxx
Lovely cards Christina. I do check out your blog all the time but my circumstances at present make it difficult to comment regularly. Have a lovely Christmas Christine xx
ReplyDelete
ReplyDeleteThese cards are stunning....thanks for the tutorial
well done Christina
Love the cards, as usual Christina. You work always blows me away with oohs and aahhs. I really love the piercing - got to get those rectangles.
ReplyDeleteSo pretty Christina, xxx
ReplyDeleteHi Christina,
ReplyDeleteAll three of the cards are beautiful, especially the red one. The main card has won my heart though because you've used one of your wonderful hat pins. It's on my list of things to try in the new year...I'm determined to see if I can make some as I think they are just beautiful and really add a touch of class to the card.
Thanks so much for sharing today's tutorial. I don't have the piercing dies but I do have a very nice piercing ruler and pokey tool so as soon as I get around to ordering some flowers from WOC, I'm going to give this a try.
Bejay x
love the burgundy colour best. thank you. Diana
ReplyDeletePretty cards Christina, thanks for the tutorial! Love your colours.
ReplyDeleteThree very pretty cards today, love the hatpins finish the cards off beautifully.
ReplyDeleteKind regards
Anne Owens
Gorgeous cards Christina, such pretty colours. Pat x
ReplyDeleteHi Christina, three really lovely cards, love the colours on all three, thanks for the tutorial.
ReplyDeleteRegards Liz.
Beautiful Cards Christina, I really would not like to choose a favourite. I really love the way you always arrange the flowers so elegantly. I have seen many of your video tutorials, and I always marvel at just how quickly you make the cards, from start to finish, and then just more or less "chuck" the flowers on them and they are always arranges so prettily! Thanks you for this great tutorial!
ReplyDeleteHugs,
Karen xx
Brilliant card Christina and another of your fantastic Tutorials as well. How lucky are we??
ReplyDeletePatricia X
I love them so unique !!!
ReplyDeleteI really like this card. The textures and dimensions are wonderful.
ReplyDelete