Beautiful Card Designs Made Easy

September 17, 2012

Poinsettia Flower Card

It's coming up to that time of year again and I have already shown you some of the cards I am going to be sending this year. 

But lots of people have this Poinsettia Flower   set and are not quite sure how to put it all together.

So what better way to show the die than ...... a video!!

Here is my latest offering for you Spellbinders Poinsettia Flower Card  and this pink version is one of my favorites.

Who says Christmas has to be Red and Green???

Not me that's for sure and maybe you want to try something out of the ordinary too.

And here is another colour scheme of cream and gold with the Pearls from Want2Scrap  around the Labels 23 shape for the sentiment.

Thank you for taking the time to view the videos that I add.

And also for leaving me lots of lovely comments on here and on YouTube... and by email to the website.

I am always available for a  chat or if I can help in any way ...  especially the new cardmakers.

The number of  views for my videos is  now at 1,170,469  and I amazed and so very grateful for the support that you give to me.

Hugs xx

September 16, 2012

Spellbinders Square Ornament

These little  Decorations have been very well received and so here is another one using up those precious dies that you may have in your collections.

So far you have two different types
 Christmas Decorations
 Heirloom Ornament

For these pretty little baby cubes I have used the Decorative Labels 1  but you can make them from any square dies that you have.
I have even made one for a Wedding and added in some of the Organza Flowers  

The Diamante "Bling" on all the cubes is from Want2Scrap

The short video tuorial  Spellbinders Square Ornament Tutorial  has been  added to the  website today.

I have another one for tomorrow using the  Poinsettia Flower  just waiting in the side lines to be added.

But  my "Film Crew" is taking me out for Sunday Lunch and so I have to go and get ready. 

Theres just no competition when it comes to a Roast Beef dinner....I can almost smell that deliious aroma  and it has to be one my most favourite meals ever.

And at least if we go out to eat then there is no washing up either ... so double bonus.

Mmmm Mmmmm Mmmmm!

Hugs xx

September 14, 2012

Exciting News ...


I am so excited about this I just have to share....

I have had an email from the lovely Sara Davies from   Crafters Companion   and   she has been watching my videos using the  Spectrum Noir Colouring System   that her company developed last year.      

This boy is the image I coloured and he is  from Mo's Digital Pencil

Sara  asked me if  would like to become involved in the Spectrum Noir Blog and I am of course delighted to say "Yes"
 
She has added my videos on colouring in Skin with these pens to her Blog and this is the post...Crafters Companion News
 
There will be more to come but I am so pleased about this offer and it is a great honor for me to be invloved in something I love doing.

This image is from Humphreys Corner and is available from Crafters Companion.
 
The pens will be out in force now as I  practise my  colouring and I will  keep  you posted as things progress.
 
But I am sure that you can imagine my delight to get this wonderful opportunity.
 
The Angels are definitiely looking after me.
 
Hugs xx

September 13, 2012

Black and White

Click to Enlarge
I have kept this card to just two colours and the Black and White always looks so elegant whenever it is used.

This one is created with the Envelope fold and the Parisian Accent border is glued underneath to look like lace.

The flowers are the Bauble Blossoms 1and 2 from Save on Hobbies  

These lovely dies are available to you at a really good price and are a good addition to your Spellbinders collection.

I have added in the Black Swrily Pearls from  Want2Scrap  

The ribbon has been made into a triple bow because it is thin and I have added a black pearl to the centre of it.  So only a short post for today ... more tomorrow!

Hugs xx


September 12, 2012

Colouring In


Baby Fairy Kiki
It is absolutely pouring down outside my window and it really is a day to stay in the warmth,  and get some practising done with my Spectrum Noir pens.
This lovely image is from Mo's Digital Pencil and she is Baby Fairy KiKi   and I think she is adorable. Her wings have been covered with the  Sakura Clear Sparkle pen.
 
The subject of colouring pale skin was covered in athe video Spectrum Noir Pale Skin and using the pens from the  Skin Tones  set and this image has been coloured that same way. 
 

Summer Fairy Finna
The skin is the same here but the hair on this image ... also from Mo ... has been coloured using the technique shown in the Spectrum Noir Dark Skin video.
I haven't made either of these into a card yet but it has been a very pleasant to while away an afternoon with my pens and see what happened as I coloured.
 
But I can't put it off any longer ... so I suppose I will have to do the housework tomorrow (sigh)
 
Hugs xx


September 11, 2012

Not A Christmas Card ....


Click to Enlarge
I thought I would have a change from Christmas cards with this one and I brought out the Spellbinders.

I have  mixed and  matched many  of the ones that I have and I really like the  look of this card.

The colour is a soft teal  and cream and the oragnza  ribbon matches the card  perfectly.

In the  centre of the bow  I have added a  Vintage button  and the  Decorative Hatpin  is pushed throught  the centre  of the knot.

The Spellbinders  are in BOLD  to highlight the ones I have used for this card.
 
The background has been run through  the  Paisley M-Bossabilities folder  and then edged with the Persian Accents borders on each side.

I have cut Floral Ovals three times using the largest and the second largest dies and added them in Teal at the back ... with the two smallest on either side and the largest in the centre.

Labels 20 has been cut and embossed and raised on foam pads to the centre of the card.  Perisan Accents corners have been placed on either side of the label.

Another Floral Oval has been added in Teal to the back of the sentiment, which is cut in cream from the Persian Accents.

The Pearly Swirl is Le Creme Finesse from Want2Scrap  and I have curled it down the side of the card and around the "With Love" sentiment.

And the  reason it is  curled around  the sentiment is  because ...  I slipped with the  wording  and added  a  mark  (idiot!) .... so  covered it up with  the Swirl.

Hugs xx


September 10, 2012

Creating Card Stands

Click to Enlarge
I promised to share  several different ways that I use to make your cards free standing ... and over the weekend this is what I came up with.

Creating Card Stands  is another short video. 

I have tried to think of all the ways that could be adapted so that cards can be displayed in a very pretty way by the recipient.

I have covered the "A"Frame that I have used for quite some time and then moved on to ways to use the beautiful ornate stands that I discovered last week

These can be made out of any  card that goes with your colour scheme and I have given you some tips on what to do to make sure that your cards don't fall over.
 I got these  little stands  from  Ebay  and the link will take you to the straight to the page

And then I have also shown you how to make the most of your Spellbinders to create a frame that will be glued to the back of the card. 
You can adapt many of the dies that you may already have in your collection as long as it fits the back of your card.


And just in case you are saying that you don't have any Spellbinders or you don't want to buy the little card stand there is also a way that you can freehand cut a stand ... and so there is no excuse at all not to give this a go.


Hugs xx

September 09, 2012

Spellbinders Heirloom Ornament


Click to Enlarge
I have been busy playing again and this time I have used the  Spellbinders Heirloom Ornament to create more  decorations that could be suitable for Christmas.

These are quite big  as I have used the largest die in the set but they are cerainly a statement piece.

I have added Glitter, feathers, tassels and ribbons as well as my  Diamante from Want2Scrap

This selection is showing some of the ideas that I came up with and the video has been added to the website .... here is the page ...  Spellbinders Heirloom Ornament

The second ornament from  the left has been  decorated with flowers and  butterflies as a more summery theme and  I also think that this could  be  suitable  as a  Bridal arrangement and made to look really  luxurious.

This one has red gingham ribbon for the carrying handle and it has been glittered with Glamour Dust.

 I went on to add the wine coloured feathers  and some wooden snowflakes as a bit more embellishment to this one... it is the second  from the right in the picture.

The Holly paper is from the Crafters Companion  Christmas CD
 
Hugs xx


September 07, 2012

Retro Mod Clocks ...

Here is one of the fun Spellbinder dies that are available from  Save On Hobbies  and this one is called  Retro  Mod  Clocks.

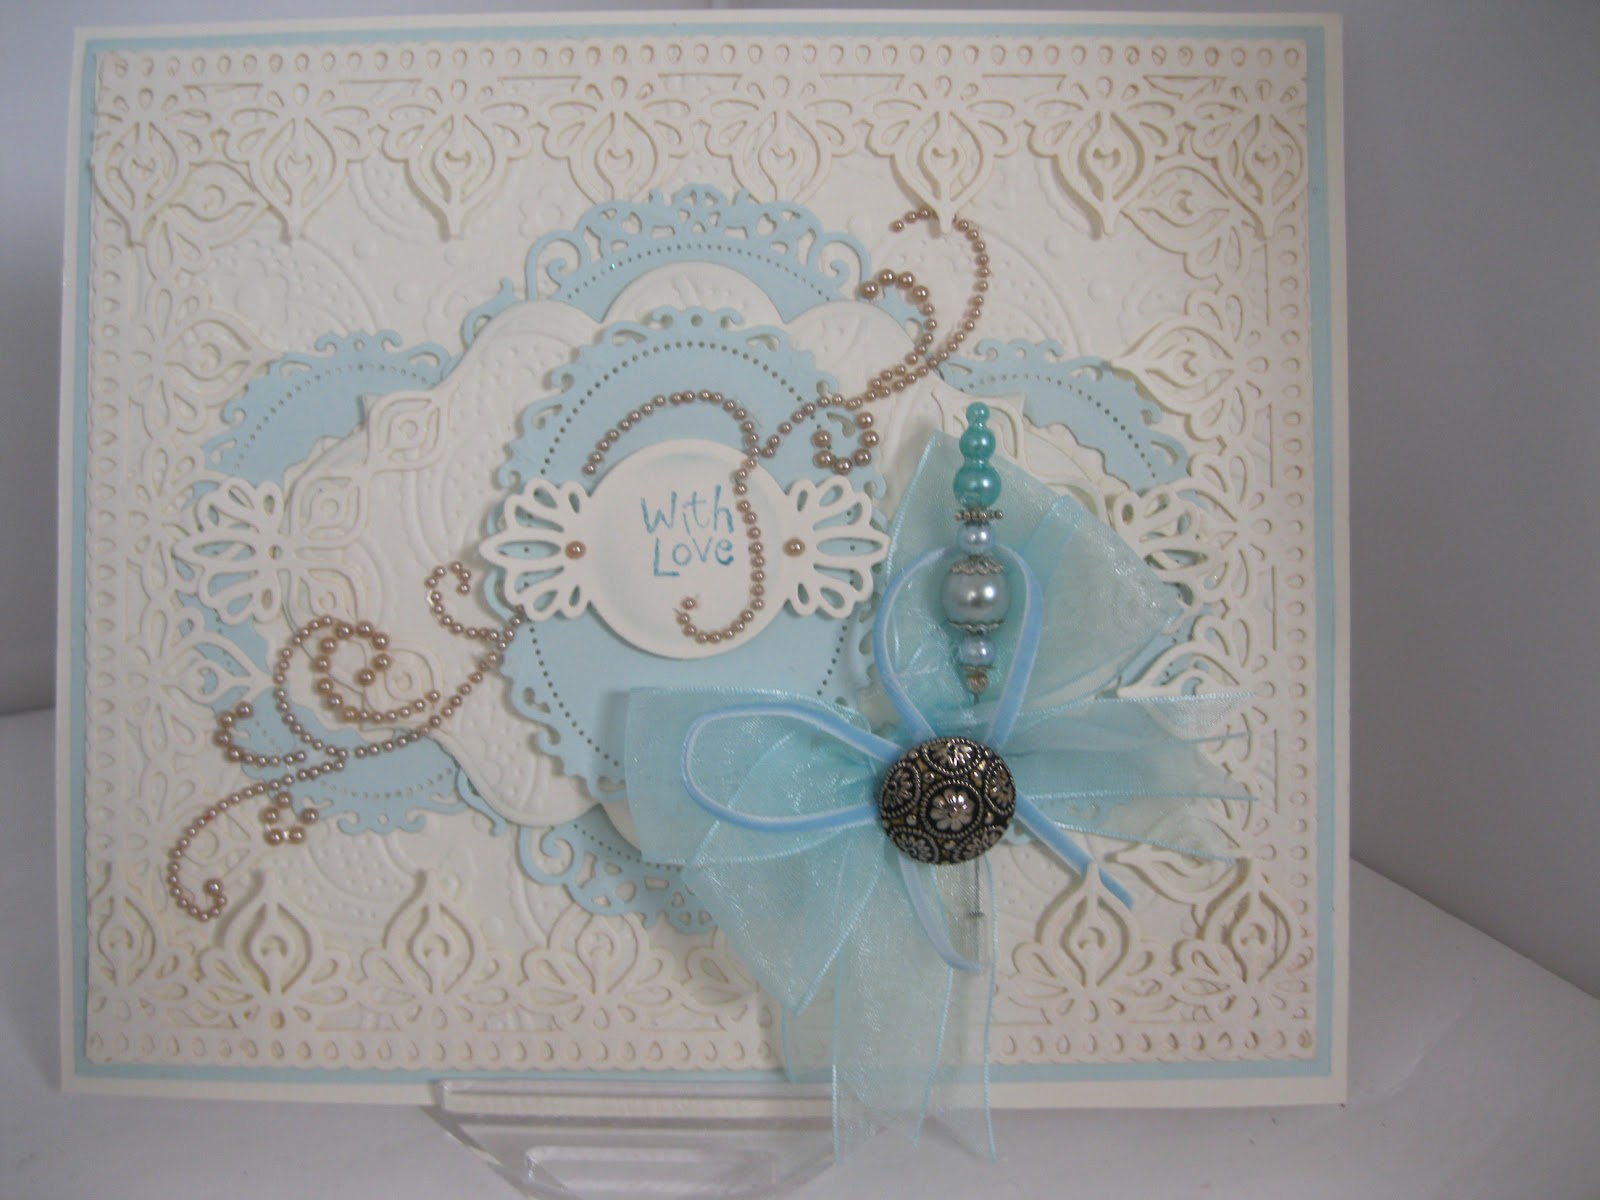
I have used  it to make this  New Home  card and added  in tiny jewels,  for the numbers on the clock  face,  from  Want2Scrap

It has  all been  matted and layered and the cream card has been  embossed to add some  texture.

The ribbon  is from my stash and  matched the colour scheme perfectly.

The same  pink card that has been  used for the matting has  also been made into a  frame for the back of the card to  make it  stand ... and is  one of the ways that will be  in this weekends  video.
Many of you have been over to Save On Hobbies and bought the incredibly cheap dies that are for sale.  I also know that some of you in the UK have had an extra charge added to the cost before you can get your parcel from the post office.
 
I have discussed this with the owner of Save On Hobbies   (Scott)  and he  is deeply concerned that this has happened,  and  he has  made some  changes to the way  the parcels  are being sent out to hopefully solve this problem in the future ... and so keep the cost of the dies at a really good bargain price. 
 
But I have to say that it is neither Scotts ...  nor my fault that this charge is applied ... it is an import duty by Customs and way beyond our control.
 
I have had a few emails telling me that I should have warned everybody about this charge but I can honestly say that I did not know about it or I would.  And I have also had to pay this charge on one occasion.
 
So for now please be aware that if you order the dies there may be an extra cost added that needs to be taken into account .... but having said that ... even with this extra they are still an incredible price and well worth considering as you build up your Spellbinder collection.
 
And if you are in the USA then postage is free for you .... aren't you lucky ????
 
Hugs xx


September 06, 2012

More about Card Stands


These pretty little card stands have certainly sparked your interest.   I first saw these on  Marie-Louises' blog   and  I really liked the look.
Her cards are so pretty and these stands gave them the finishing touch.  So of course I had to go looking for them.
 
They are from a company called  JoyCrafts  but this link direct to ...  Ebay  ...  will take  you straight to the page for the different styles that you can buy.... and they are not expensive.
 
They are a  metal  die that is used with your  die cutting  machine but you will need  to read the instrucions  on layering up the  cutting plates for your  individual cutter.
The result is a very  detailed stand that will take  smaller cards  and hold them perfectly... but it will not hold larger cards... the weight of the card will simply make them fall over. 
 
For that you will need another method .... and guess what ???     Another video on these and making larger stands for any card you make.
 
I have found that it is better to cut two stands the same  and then glue them  together  for extra strength.
The card  in this  photo  is made to an A5 size but it will not stand in Portriat position and so has to be used Landscape.
The stand  can then be tucked inside the envelope for the recipient to display the card on their mantle shelf.... and you can make it in any colour to match your project.
 
Hugs xx


 .


September 05, 2012

Thank you , thank you ...

Click to Enlarge
Every time I make a video tutorial I am always concerend that people will think that I am talking down to them ... and as I have explained in the past that is not my intention.

But never the less I go ahead and make a film.

Over the weekend I made a very short tutorial on  some of the things about buying and using card that beginners find confusing.

And I made this based on some of the emails that I get with questions like ...
What size card do you use?   How thick is the card that you use?   What is an A4?    How do I fold card without it cracking along the spine?   How do I add an insert?    What are the weights of card?   What do you use to print or stamp on?    What card do you use to make flowers?

So I thought I would answer all these questions in one go.... and  then I wondered if I had done the right thing... and I waited for the response.

Within hours I got the response ... and the comments that I have had have been very humbling.

So many people have emailed me or left comments on YouTube that they have found the information so useful and learned tips and tricks that they didn't know. 

Here's the link to the video ...   Cardmaking Weights and Sizes

All I can say is ... if you are a seasoned cardmaker then please don't be offended by the information ... and if you are new then I hope it has helped in some small way ... and  if you left me a comment  on YouTube or took the time to email me and let me know that you enjoyed what I had done then THANK YOU so very much.

And  if you just didn't like it ...  then I blame it all on my "Film Crew"  it's  ALL  his fault!!!

Hugs xx


September 04, 2012

Wherever we go ....

This is more from the magical pencil of  Mo Manning   and this is the "Back to School" images.  I bought all four in the set and they are  boy and girl with curly hair and boy and girl with straight hair and they will cover just about any thing you want.

I have coloured them with Spectrum Noir pens from Crafters Companion  and I added two of them together for effect.

I hate cutting out with a vengence ...  and so I have left a thin border around each figure.

I have used Pinflair Glur Gel to give the girl image some  height and that way it looks as if he is in front of her ... hurrying off to school.

And I added some shadow underneath their feet.

The  techniques are overed in   Video Tutorials  about this colouring system

The background has been embossed with the Wall folder and then inked over with Antique linen.

The verse has been cut with the Postage Stamp die from Spellbinders ... and I  have wrapped  Bakers Twine  around the spine.

I think this card is  simple but so cute and would be perfect fo children starting school for the first time ... they could be twins going off together.

Yesterday I watched the views to my YouTube videos roll over to 1,111,111 and I am overwhelmed at the incredible rate it goes up each day ... Thank you for your support  


Hugs xx 

September 03, 2012

Card Stands ...

Click to Enlarge
Well I ordered  the little card  stands from Ebay
and made up several of them for my designs.

They look very pretty and I am pleased with them. 

But I do find that I need to use a thicker card to support my designs.

And they will not hold up the bigger cards that I like to make, so for these I will add my "A" frames as usual.

So the one pictured here is an A5 card in Landscape and the front is embossed.

The rose is handmade and I have added in a Hatpin  as an extra embellishment. I realy do like the simplicity of this card and it is a really soft shade of pink.  All the cards have the addition of Want2Scrap  Diamante on them


This card is made from the Labels 20 and fits on the stands just perfect ...  and again the flowers are handmade using the Spiral Blossom and Bitty Blossoms from Spellbidners.

The difference in the lighting is becoming fairly obvious now that the daylight is fading.
The top and bottom pictures are done in the lighting booth and the middle one is in daylight.  I prefer the daylight look but as Autumn wears on the choice is being taken away and so more will be done under artificial light.


Hugs xx


September 02, 2012

New Video ...

Click to Enlarge
The video for the   Cut Fold Tuck  dies has been added to the website and I have had so much fun playing with these. 

The link will take you to the page on the website. Two cards have been made on the video and this is one of them.

There is such a lot that can be done with them to alter the look.

This is using all the smallest dies as flowers along the bottom of the card, and the background has been embossed.

I have added  Want2Scrap  gemstones  swirling out from the flowers and in the heart at the  top of the card.

The video is only a short one but the posibilities are endless with these lovely dies.

I had a gift from Griff yesterday too. He had a big parcel delivered and he said "Open it ... it's for you". It wasn't heavy and when I looked inside I had to laugh.

He had bought me a ....... frying pan!!  Now the reason behind this is because a while ago I bought an expensive Circulon pan and after I had used it he very kindly cleaned it for me.

But he used a Brillo pad .... because he said ... "The inside of the pan was black" ...  And for those of you who don't know what a Brillo pad is well it is made from steel wool and is used to bring off really burned on  marks.

I explained that because the pan was non-stick it was supposed to be black .... but it wasn't when he had finished with it and of course it was ruined...... so that is why he bought me a new frying pan ... Awwww Bless !!

Hugs xx

September 01, 2012

Cut, Fold, Tuck in Pink...


Here is another of the Cut, Fold, Tuck dies but this time I have used a double sided paper in Pink.

The backgound paper is a check and it has been  matted and layered onto some  pink card.  The Persian  Accents border has been used twice  and some  ribbon double layered  in the centre.


The paper for the shape has stripes on one side and hearts on the other and I have used a white layer in between ... and the bottom layer and the sentiment have been covered in Micro Glass Beads
Here is the close up and I have added a small piece of Card Candi to the centre.
The ribbon is a Pink Silk  underneath and Snowflake one on top and the bow is created from the Snowflake ribbon.

Hugs xx