Beautiful Card Designs Made Easy

May 19, 2012

21st Birthday Card

I made  this card  a  while ago for my  Grand daughter to give to her friend  for that very special birthday.

She wanted it to be pink and flowery so that was easy for me as I love both.

I made this as the  Bow Front Card  and added the instructions to the website. 

The pearly swirl is created  using  a  Bazzill  Basics template and I  bought  mine from The Hobby House

The card was well recieved and of course I had to make a box to go with it.
The flowers on the box and the inside of the Acetate front are from   Wild Orchid Crafts

Hugs xx

May 18, 2012

Organza Flowers

I found  an  old piece of organza in my "Stash" and being the fugal crafter that I am I decided it had to be put to good use.

I washed  and condtioned it to make it smell nice and then I set to work with my Spellbinders.

And so this is how the tutorial for the  Organza Flowers  came about.

The flower has been added to a mix of others from Wild Orchid Crafts 

The centre is a pearl brad  from the  The Hobby House   and that holds all the layers together.

And the  leaves are from the Ash  Branch punch from L-Em

This is a stamped  image from Lili of the Valley   and  they have both  been coloured with Promarkers.

This was in the days prior to me discovering the "Bling" and so there are no pearly bits on either of them.

But I have used the Spellbinders and self adhesive pearls just to soften the look.

At the time I was very  pleased with these cards and the flowers have been re-created many times on other cards that I have made.


Hugs xx

May 17, 2012

Enamelled Roses

A while ago I added a post and a tutorial to the website, on making Paper Roses for your cards, and it proved to be very popular.

I had many emails about them and lots of photos added to the Gallery  of  how others had made their flowers look.

The tutorial showed you how to create the flowers without any special punches.... just make your own template.

You  could then make them to any colour and paper that you have in your "Stash" and then they would always blend in with your design.
But the next step after this was to enamel them and make them look glossy... and so the video for the Enamelled Rose  came about. 

This process needed some Embossing powder and it needed to be heated until it melted... so not a good idea to use around children.

But the effect was to give the Roses a glass like appearance and they are very strudy once they have cooled.
And certainly made them look different from the paper roses that we started out with.
Hugs xx

May 16, 2012

Glamour Puss

As part of their Christmas Gift I made for each of our daughters a large decorated box and added cards for all occasions to them so that they would always have cards on hand to give to any of their  throughout the year.

And as it is used up I have promised to replace the cards as needed.

In each box I added about 25 cards of all colours and images and I tried to do it evenly to suit each daughter.

My two daughters have children that are grown up now and so they would need more adult type cards.

But Griffs two daughters each have young  children and so I added cards that they could send to their  friends too.
But in each box I added one of these as I just love the image and the glamorous pose she has.

I know that they would be suitable for most age groups and I am happy to say that the gift was appreciated by all four daughters.

Hugs xx


May 15, 2012

Pink and Pretty

Today I thought I would make a card in pink  and cream .... just for a change.

 I have added "Congratulations" to the front but this could be for any occasion.

The image, papers and the sentiment are all from the Sugar Plum Daisy CD from   Polkadoodles  and I love it.

There is so much on there and the papers are lovely.

And the beauty of it is that everything matches and blends.

There are lots of little girl images too, ready coloured or line drawings that you can colour in yourself.

But the finishing touch for me is the beautiful pearly swirls and the ornate  "Bling" on the sentiment tag  that make it look extra special.

The sentiment is cut from the Labels 3 and the Bling matches it perfectly.

It is made by Want2Scrap  and there are lots of styles for you to choose.

They ship worldwide too so it is within your grasp, and can make such a difference to the look of a card.


Hugs xx


May 14, 2012

Pierced Edges

Another easy to do technique that just adds a little bit more to the finished card and I have made    Pierced Edges  into a video for those new to cardmaking.

I have included Spellbinders in the video title because it uses the same set of dies that I introduced in Starting Your Spellbinder Collection

And as many of you have written to tell me that you went out and purchased these dies  we need to make sure that we get as much use from them as we can.


I also like to find ways to add that extra bit to the cards I make. 

So this is piercing and it really adds an extra dimension to any of our projects.

The "Bling" as always is from  Want2Scrap  and it adds a  luxury look to any card. 

It comes in many different colours and finishes and some of the styles match and compliment the Spellbinder shapes

Although I have kept to a monochromatic colour scheme nothing is lost for the lack of colour.
If you haven't got your corners tidy then you can always add in a pearl or flower to disguise the mistake but I think this makes for a very pretty card and I hope you do too ...

Hugs xx

May 13, 2012

Gift for Isabella...

Last October my Great Grand-daughter  Isabella was born and  I wanted to make something special for her.

Something that would last,   that she would be able to look at in the years to come.

I bought this large beech picture frame and added a mixture of flowers to the cute images.

Some of the flowers are die cuts,  and others are punched,  but there are Mulberry flowers from   Wild Orchid Crafts  in the spray too.
I used the Floral Flourish, Foliage, Spiral Blossom 1 dies from Spellbinders  and   added them all along the edge of the frame.

The little girls are from the  Pretty Sweet  CD from  PolkaDoodles  and they are just adorable.

Between each child I have added a border frame and some Polkadot  ribbon from  Fantastic Ribbons   and everything is framed  within a cream mount board.

At six months old Isabella doesn't have an opinion on the frame just yet,   but I  am pleased to say that her parents have added it to the nursery wall and have said that they love it.     Hopefully she will too...

Hugs xx

May 12, 2012

Rocking Cards

The  Rocking Card   was another short tutorial that was added some time ago to the website and is just another that a new  cardmaker  may want to try.

It is easy to do and after a while we all get fed up of just folding card in half.

So this will give some variation and keep your interest going in this lovely hobby.


The image is Lottie and her friend,  and she is from the Humphreys Corner collection from Crafters Companion

They have  been coloured with Spectrum Noir Pens from the same company.

The flowers are from  Wild Orchid Crafts and are a mixture of different varieties.

But if you are going to make the front look pretty then don't forget tha back of the card too ... it is just as important.
And you may aslo want to consider making a box to send it in and decorating that in the same way.

Hugs xx

May 11, 2012

Mosaic Card

This is a very pretty technique and if you are new to cardmaking it is also one that is also very easy to do, and yet the results will get the comments.

The    Mosaic Card is available in a video tutorial.

It is a  good way to use up any of your scraps of paper but you will need some double sided adhesive sheets.

Then you can use glitters in between the gaps or as I have gilding flakes.

The top one is done with silver and the one to the left is gold.

The one below is done with a dark blue glitter.


 All the stamped images  are from  Lili of the Valley  and I have coloured them in with Promarkers.
All pretty cards but the top one could have been modelled on my grand daughter ... a real girl with attitude ... Bless her !!

Hugs xx

May 10, 2012

White Wedding Card

A few days ago I posted a cream card for a Wedding that I was going too ... where the Grooms mum asked me to make her a card as well.

She wanted hers to be white and elaborate and so I went to town on this one.

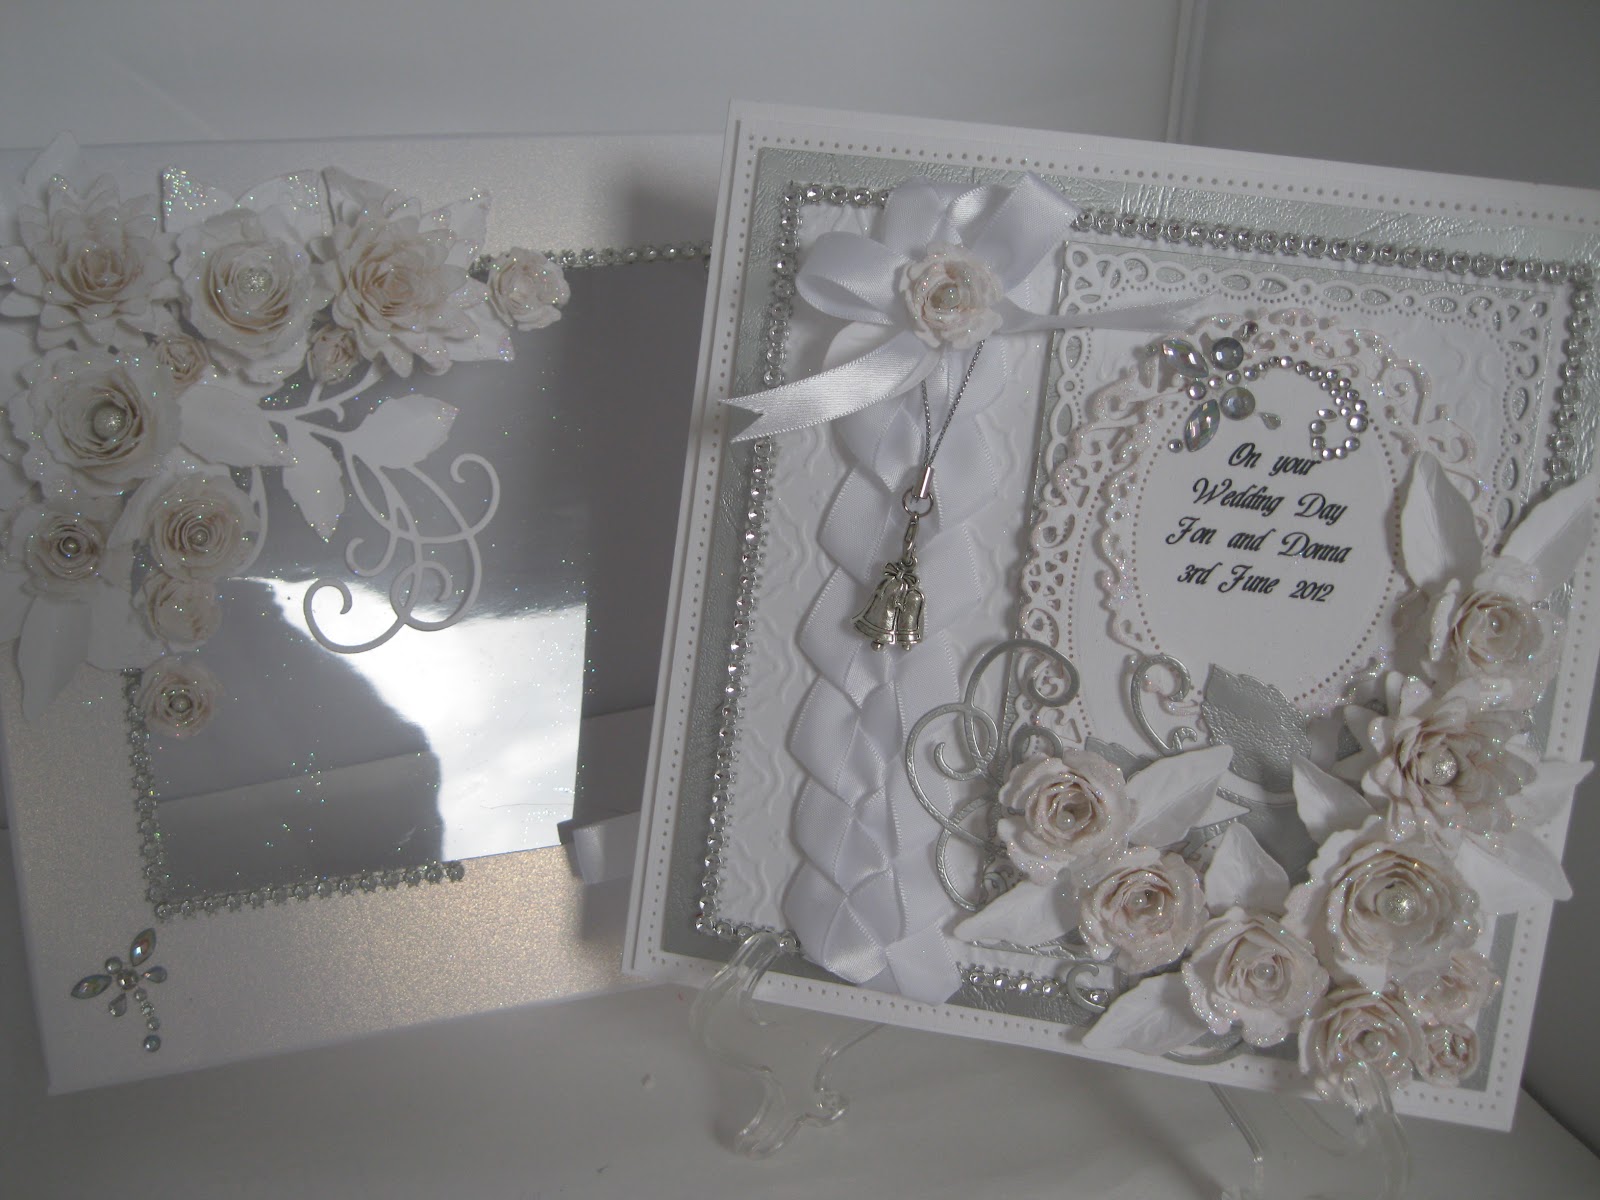
It is made to an 8" size with an easel back so that the card will stand, and it has been matted and layered in silver and white.

I pierced the outer edge and added Diamante all  around the inner edge.

I  used the technique in  Braided Ribbon   along the left side of the card,   added a bow  and a white rose to the top and attached a bell charm.

The Spellbinders used for this card will all be in BOLD so that you will know what has been used
The Brides and Grooms name and the wedding  date have been layerd up with the two largest dies from the Floral Ovals with all the edges sparkled with Glamour Dust.

The piercing in these match the ones I have done around the edge of the card, and they are layered onto the largest  Romantic Rectangle which has been layered onto silver card.
All these layers are seperated with foam pads

The flowers are created from the Bitty Blossoms, Spiral Blossom 1 and 3   and the silver flourish under them is from the Belle Rose
All the flowers centres have a had either silver glitter balls or  pearls added to them and they are from the Sparkles Group  

They are offering you a 5% discount on any purchase and they do the beautiful Hatpins with end protectors that I feature on some of my cards. Add CGDIS5 at the check out to get your discount


The box needed to match the card and so more of the blossoms have been added with the flourish behind them too.
All the petals have Glamour Dust on the egdes and the lid is inlaid with Acetate and edged in Diamante.

The Butterfly and it's trail on the card and the Dragonfly on the box lid are Diamante and they complete the look.
I am very pleased with the result and will be happy to see the happy couple accept this from his mother... with lots of love.


Here is the finished creation and I have since added silver tissue paper to the box to protect the card

Hugs xx