Beautiful Card Designs Made Easy

May 05, 2016

Patterned Panels - Floral Bloom - Tonic-Gold

Hi Everybody,

I have a new video that has been added today on YouTube that you may like to try.

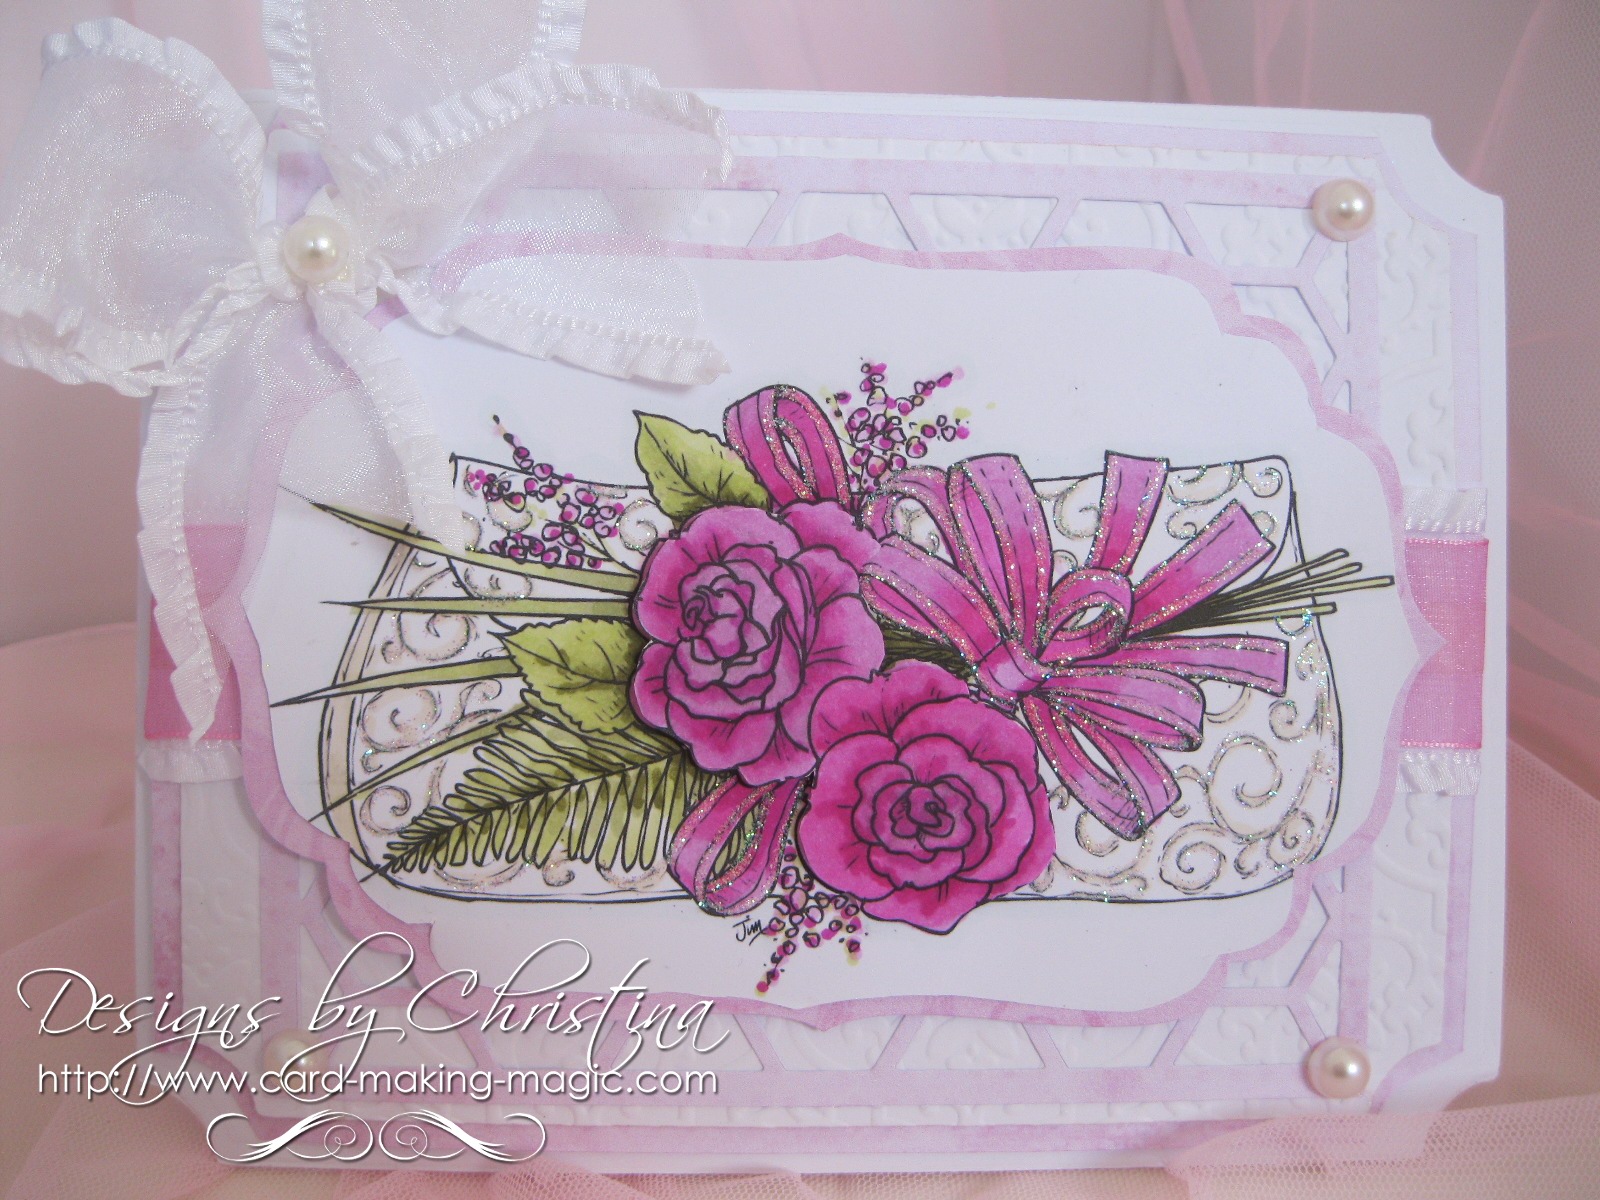
Click this link to go to the tutorial  Water Colours and Dies   to create this super easy card and if you are not delighted with the results ... well I'll eat my hat !!

I promise you it is really easy though you may think it looks a mess to start with but you need to bear with me and all becomes clear

Don't tell me that you can't draw or paint because you don't need any painting or drawing skills for this card and yet the end result is really quite pretty

You can use any water colours that you have and any water colour card too.

I have used deeper colours to get my look as there is a lot of distraction with the die cuts ... but I am happy with the look.

Dry the colours between each layer to stop the paint from bleeding into each other and then add another layer to deepen the colour even more.

You can use any floral background die that you have in your "Stash" but for mine I have used one of the new Patterned Panel dies from Tonic-Gold - Floral Blooms

As a final touch I added Glossy Accents to the top of my die cut words and allowed it to dry to a raised and shiny finish.

More tomorrow ...

Hugs xx


May 04, 2016

Water Colour Wednesday - Wedding Purse

Hi Everybody,

This card was taken from the CD The Next Big Thing and sadly it is now retired from Just Inklined.

It is an image that I have coloured before but this one is done with Water Colours.

I printed off the image three times and coloured them in layers so that I could decoupage the flowers onto my card.

No dies for this one though so I had to fussy cut them all with scissors.... not my favorite task.
But I think it turned out all right in the end.

I added glitter to the bow then added it all to a white die cut shape and then onto a white base card

More tomorrow ...

Hugs xx


May 03, 2016

Tuesday tutorial - Persian Accents & Motifs

Hi Everybody,

Continuing with the older dies from Spellbinders this week I am featuring another requested set and this one is Persian Accents and Motifs.  
A really pretty group of dies for a lovely intricate look without too much effort on your part. 
Spellbinders Supplies:

Other Supplies:
Instructions:
With die #7 from Matting Basic A cut two pieces of white card to Create A Hinged Card
With two blending pieces of paper add them as shown to your card base and stamp and heat emboss the sentiment of your choice to the bottom right of the card
With the border strip from Persian Accents cut one piece in white and two pieces also in white from the square die #5
With die #4 from the Motifs cut two pieces in Lilac card 
(Please remember that doe #1 is always the smallest)
Add the border strip to cover the join and trim as needed at the top and bottom.
Then layer up the Lilac pieces with foam tape ... off setting them as you add them to the card
Add the two white shapes in the same way and add small pearls to the end of each point
Curl the edges up slightly to look like petals
Add in your floral display to the top of this centrepiece and dot the petals of the flowers with glue that dries clear.
Sprinkle the flowers with glitter for a sparkly effect 

More tomorrow ...

Hugs xx


May 02, 2016

Cherish The Moment-Tonic Studios

Hi Everybody,

Todays card created with a beautiful Tonic die and this one is called Cherish the Moment  and it comes in four parts

It is featured in a video that is "Live" on YouTube   today so I hope you will pop over there and view it.

I have given you two variations with the same die but the larger one uses some beautiful flowers from Wild Orchid Crafts

The lace is also from WOC and I think it adds a really feminine touch to any card.  I added some trimmed lace as leaves with the flowers on the left

And rather than throw away the bit that I trimmed off the lace I added them into the top right and bottom left corners with a little diamante centre.

My blog posts for the rest of this week will all be scheduled because today I am flying off to Portugal with my youngest daughter and her Granddaughter the wonderful Isabella (My Great Granddaughter)

We thought it would be good fun for the three generations to have a girly week away before Isabella starts school in September.  A week with a four year old should be fun (????) and I will take some photos while we are away.

So I hope you enjoy the blog in my absence and I have lots more planned when I get back

More tomorrow ...

Hugs xx


May 01, 2016

Birthday Blue ...

Hi Everybody,

This pretty blue card is created in the Shabby Chic Style and is full of flowers from Wild Orchid Crafts  I have added white Gesso to the petals to make them appear more shabby and then added the Dries Clear glue and sprinkled it with Glitter.
The card is 5x7 and the base is a 255 gsm White Hammered Card from the Papermill Direct
They are a UK company and as buying card is so heavy you will need to check for yourself if they ship to your part of the world.

The papers are digital ones that I have printed from my PC and I have had them for a long time and use them often. The sentiment is the same and I have added that with foam tape behind to raise it up.

The flourish is from Spellbinders and is the Foliage Flourish it makes a really pretty addition to any of your floral displays

The Honeycomb die is also one that I have had a long time ... and it is one of those that have been sat at the back of a drawer and not used ... so I had to dig it out and make it work again. But I cant remember where it is from 

The little polystyrene balls are from AnnaMarie Design   and if you have watched Anna Marie on Create and Craft then you will know the wonderful work she creates and you will be pleased to know that she has started her own YouTube channel to show you what she does.

More tomorrow ...

Hugs xx