Beautiful Card Designs Made Easy

June 10, 2017

Card Winner

Hi Everybody,

Just a quick short post today to announce the winner of yesterday's Shabby Chic card as I am trying to do this on my IPad and in a bumpy car at the same time and I keep hitting the wrong key. It's taking me ages to type what I want to say .....

I have Ruby and Dougal settled in the back of the car and we are all off to Wales on our jolly holidays

It's been raining earlier but at the moment it is cloudy and fine. Griff is driving and has picked a number from the amount of comments and the name today is yours ....

PattyB
Please send me your postal address to
christina@card-making-magic
and the card will be on its way to you.

I won't be able to post it to you till next week so please be patient

More tomorrow ...

Hugs xx

June 09, 2017

Friday Freebie 22 - Shabby Chic

Hi Everybody,

Todays FF is a 6" square card that is decorated with a cameo and flowers.

There is lots of interest on this card that does not show up in the photograph

The sentiment says to To My Friend but if you wanted to use the card then you can always change this if you wished

It is in shades of pale pink and delicate green with lots of sparkle.

Would you like to have this card ??? Then all you need to do is leave me a comment at the end of the post and come back tomorrow to check

A name will be chosen at random so you will need to come back and check if it is YOU.

I may be a little late posting this one to you as I will be on holiday in Wales for a week ... but you will get it as soon as I get back home

More tomorrow ...

Hugs xx 



June 07, 2017

Enjoy the Journey ...

Hi Everybody,

The title of todays blog post is the stamp and die set that is free with this months Die Cutting Essentials 25

It consists of dies to create the car, foliage and flowers and stamps to compliment the items and help you to create your own scene

It was a lot of fun to play with and there are many more ideas within the magazine itself.  Plenty for you to get your teeth into.

It will be on sale on the 8th June so keep a look out for it on the shelves.

For this card I have teamed it with the Happy Hooves die set that was the free gift with Papercraft Essentials mag on the 1st June

All the free gifts with these magazines are quality items and they will help you to build up your "stash" quite quickly and give you a good read at the same time.

So grab a brew and settle down to watch the video featuring this kit and 


More tomorrow ...

Hugs xx
June 06, 2017

Tuesday Tutorial - Celebration Banners


Hi Everybody,

Todays card is a fun celebrations one that would suit childrens parties or events. 
Make it in bright and bold colours and get the kids to help create invitations for their own parties to give to their friends. 
 Really easy to do and with supervision from you they will be something that children can be proud to make and happy to give.
Spellbinders Supplies
  • SCD-004 Day Dreams 
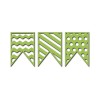
  • SCD-019 Banner Trio 
  • SCD-029 Celebrations Fun Sentiments
  • S5-131 A2 Matting Basics A
  • S5-132 A2 Matting Basics B
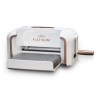
  • PL-001 Platinum Die Cutting Machine
Other Supplies.
  • Coloured Card
  • Fun Foam Sheets
Instructions:
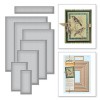
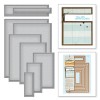
With the largest rectangle die from the A set cut two panels in deep turquoise for the base card
With the largest die from the B set cut one panel in a paler turquoise for the layer
Wrap thie layer with turquoise twine for the banners to attach to and then add to the base card
Cut the banners in the colours of your choice and layer them onto another colour. 
Carefully cut around the outside edge to give you a two colour banner
Cut the sun and clouds and ink lightly to give some shading to the shapes
Cut Celebrate from white card and again from fun foam and stack together for dimension
Arrange the banners along the twine and add foam pads underneath to raise them up.
Arrange the clouds and sun as you like on the card
Add the sentiment to the top of the banners
Quick and easy 

More tomorrow ...

Hugs xx

June 05, 2017

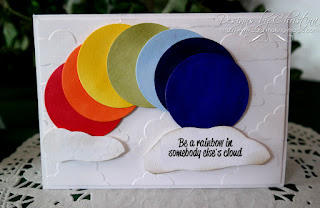
Circles Rainbow Card

Hi Everybody,

For todays card I have used just one circle die and cut seven of them.

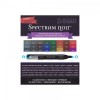
Then I coloured them in with Spectrum Noir Pens in rainbow shades.

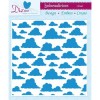
I added them to a cloud embossed panel with varying thicknesses of foam underneath some of them.

If you don't have a cloud die then roughly cut some by hand and add a little shading with some pale grey ink.

I added them in an arc to the embossed panel and placed a cloud at each end. The sentiment is from Crafters Companion and it was stamped and heat embossed on to the lower cloud

Quick and easy to do with just a few circles and could be for any occasion ... male or female, young or old.

More tomorrow ...

Hugs xx