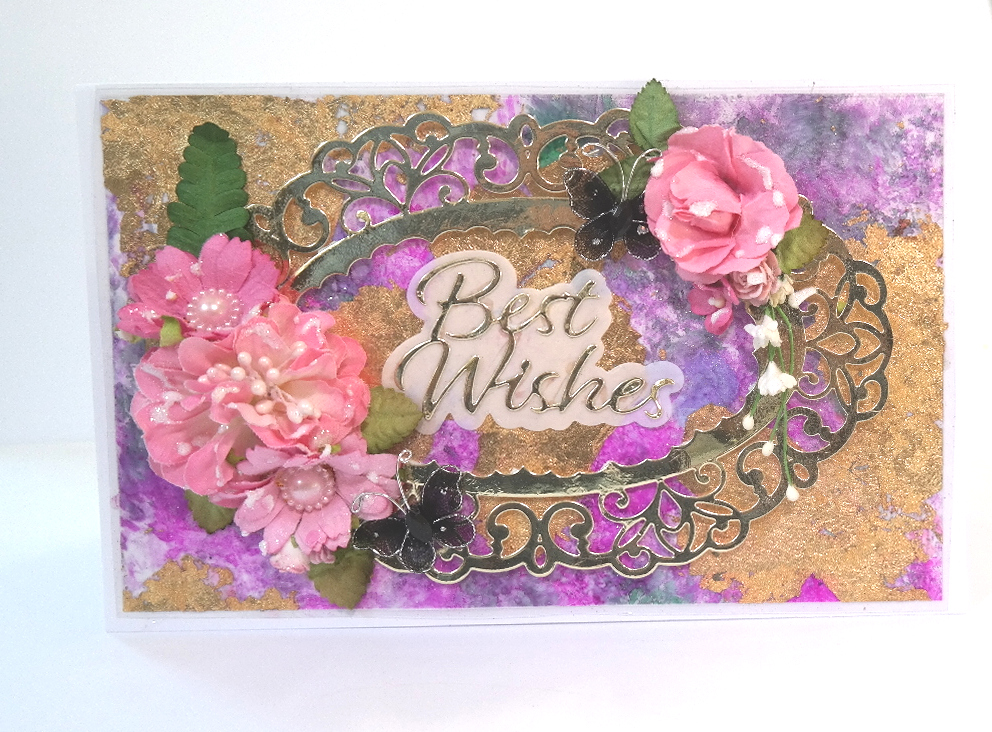
Beautiful Card Designs Made Easy

Showing posts with label Floral Card. Show all posts

November 29, 2023

Laminated background

Hi Everybody,

Todays card has a background that has been created with a laminating pouch, alcohol markers and some gilding flakes.

It was very easy to do and the result is lovely and rich looking.

I opened the pouch, which I got really cheap from Lidl, and scribbled alcohol markers onto one side of it and spritzed it with a little Isopropyl to make the colours run.

Then I added some gilding flakes to the mix and closed the pouch. After running it through the laminator this was what I ended up with and it is an A5 size. Just a perfect size for my card. I added some glue to the parts that wouldn't show and adhered it to a white base card

I used the Nested Oval Fancy Frames die and gold mirror card for he centre and added toning flowers and leaves to the edge of the frame.

The "Best Wishes" is from the Special Words die set and I cut the shadow in parchment to make it stand out more on the busy background. 

The flowers are from my stash and they have been sparkled with some fine glitter and there is the addition of two tiny black organza butterflies near each group of flowers. I also used pink pearls for the inside of two of the flowers

Hope you like 

More tomorrow ...

Hugs xx

May 23, 2023

Flower card

Hi Everybody,

Todays card has used a paper pad that I bought from Home Bargains and it is a beautiful double sided pad that is foiled on one side.

But I wanted to dress it up a little more so on the foiled side I added in a text stamp in a random way and allowed it to dry.

The foiling on this piece is bronze coloured dots scattered over the paper.

Once it was dry I trimmed the panel down and matted it onto black card.

 I used the other side of the paper to layer onto some smaller shaped panels and added them to my base card in the top right and bottom left of the white 5x7 card 

The text piece has been added with foam pads and the Happy Birthday is cut from parchment and  Bronze glitter card for the bottom of the card.

I selected the flowers in different sizes, and I used roses and tulips and the long Gypsophillia stem, and I cut lots of leaves, in two shades of green, from the Rose Flourish die set. I also used the Eucalyptus die set that was free with a magazine, some time ago, to fill out my bouquet.

The last thing for me to do is add my glitter to the flowers and the finished card is much prettier than the photo shows and I am happy with the end result. 

More tomorrow ...

Hugs xx

December 08, 2022

Birthday cards ...

Hi Everybody,

I have been looking back at some of the cards that I have made over the years and there are many that are my favourite ones.

As we are coming to the end of another year I thought it an ideal opportunity to re visit some of them here.

They are all cards that I enjoyed making, and as you can see most of them are pink and floral as that is my style of card making. 

Making this style gives me an immense amount of pleasure and many of these cards have been given away to family and friends either for the occasion shown or for them to  give to someone else.

Some of them have been sent to my readers, both here in the UK and abroad, and some have gone to the Charity shops I support.

I love adding all the embellishments to them. The flowers, ribbons and pearls.

Some of the flowers are bought and Mulberry ones like those to the left, and others , like the ones here above are handmade by me.

But all add that certain grace to a design that I cannot resist.

I know that my style is not for everybody as to them it is too fussy. 


But it is something I enjoy doing and will continue to do in the future.

I used to give away one of my cards each week on a Friday before I started to give away the magazines.

Many people who got them wrote to me to say that they had framed the card to keep it safe, and that was always a wonderful compliment to me and my cards.

And finally, here is one with lots of  Mulberry flowers that is not pink !!
But it does feature the beautiful a rectangle die  from the Perfect Panels & Lovely Layer Collection that was out a few years ago and which at present is no longer available.

I hope you enjoyed this little look back in time and there is of course a lot more to come in the future.

More tomorrow ...

Hugs xx


May 17, 2021

Card Layout

Hi Everybody,

So this is a card layout that I was trying before going ahead and making it completely.

I had tried the flowers in various positions to see how I liked them and this is something I always advise you to do before gluing.

A dry run will save you any remorse if you don't like the look because you can always move things around  until you are happy and then glue them in place 

This was a card I was asked to make for a special occasion and the buyer was very happy with it.

It also had a matching box to go with it and I wrapped the finished card in pink tissue paper before adding  it to the box.

I usually add any of my embellishments with a hot glue gun, which makes it even more important to try the look out first.

Because once they are fixed with hot glue there's not much chance of moving them again without causing damage to the rest of the card

More tomorrow ...

Hugs xx