Beautiful Card Designs Made Easy

June 30, 2012

Charlottetown

We have really enjoyed our stay here in Canada and the people are so friendly.

One of the things we were invited to do was dine with Troys parents ...Yvonne and Bob at their beautiful home.

We had a lovely visit and it was so strange to be sat in a Canadian home with lovely Canadian people .... chatting about .... Coronation St.

It is a much loved programme over here although they are several months behind us in the UK.

And this is the lady that gave us a wonderful meal and made us feel so welcome in her home.

Thank you Bob and Yvonne

Hugs xx


June 29, 2012

Craft Shopping ...

Today we decided to make a trip into Charlottetown  and of course the main reason was to go to the big craft shop here called "Michaels"

We spent a long time wandering around and Ooohed and Aaahed over lots of things.

Naomi wanted  the Grand Calibur and that was the first thing crossed off the list.

There it is in the photo with some of the other "Goodies" we bought.... and of course we had to play later in the evening.

One of Naomis friends had paid us a visit and needed a card for her daughters wedding this Saturday and so this is what we came up with as  a joint effort.

Patricia is coming to collect the card today and we are hoping that she will like it as much as we do.


Hugs xx

June 28, 2012

Anne of Green Gables

What a lovely trip out we had today and the weather was lovely for us .... all day.

The roads out here are amazing and so straight.,, and for mile after mile we could have been the only car on the road.  Griff has really enjoyed the driving and I have sat back and enjoyed the view.

We drove through the countryside and  many pretty towns on our route.  St Peters was one of the beautiful places we passed.

Eventually we arrived in Cavendish, and found the heritage site for   Anne of Green Gables.

I read the book many years ago and had forgotten just how enchanting the story was.

But coming over on the plane it was one of the films available to watch.... and so awakened my curiosity again about the place itself.  And it was one of the areas to be visited while we are here.

As we walked through the Haunted Wood a lady offered to take a photo of the two of us.... and here it is.

It has been a really good day and we have lots planned for the rest of our stay.

Hugs xx

June 27, 2012

Prince Edward Island

My Canadian adventure has started and this is the first post from  our holiday on Prince Edward Island.


Our flight from Heathrow  was delayed by two hours and so it was quite a long wait to finally get going.  But once in the air we settled down for our 6 hour flight.... and we spent our first night in Halifax.


We rented a car and once we finally collected it we went to our hotel.   The next day we set off on our trip over to the Island and we took the ferry from Pictou   for the sailing across to the Island.


As we got to the ferry point they were staring to load it up  and we drove straight on. We were the last car to get on so consequently we were the last to get off.  But as we drove towards the terminal we saw some crazy people standing at the side of the road waving a huge Canadian  flag.  


It was Naomi and her family waiting for us and the meeting was such fun. Griff  was driving and as I got  out of the car Naomi had the biggest hug for me. It was lovely to meet them all Naomi Troy and Michael and the welcome was so warm.


We had the next day to settle down and then it was off to start exploring this lovely island.and the sun shine was lovely. 


Naomi took us to East Point and from there we discovered lots more.


This picture was taken on the  Singing Sands and we had such a laugh trying to make them "sing"

Of course my "Film Crew" was on hand to film all the silly aspects.  But we certainly made those sands sing....

It was lovely to explore and we went to the top of the lighthouse and the view was amazing.

We had coffee in a little cafe there and took some more photos and this is Naomi expecting some rain....

There is so much more to do and I will add more photos as I take them.


Hugs xx

June 26, 2012

Big'N Juicy...

I posted a while ago about  Water Colouring with Distress Inks  and I said that the "Big'N Juicy" inks could also give a good effect.  They are good value for your hard earned cash as there are about five different colurs in each pad.

But what ever you do  DO NOT  store them upside down .... or on their side ...  as all the colours will run into each other and you will just have one horrible mess.
Store them right side up and level ...

Because of the amoung of pigment in these pads you would need to take care,  and personally I feel that they are a little too vibrant to get a good skin look.

For this floral image I have used the inks to get the soft look in the petals  and I am quite happy with the result.... and I have used the Hydrangea ink pad. 

This beautiful Poppy stamp is from Clarity Stamp and who says poppies have to be red....

This is another style of flower and and is from  Inkylicous  and this has been coloured using the Waterfall  ink pad.
If you press the closed lid firmly down onto the inked pads then you will get some of the ink transferred to the inside of the lid and this can then be used as your palette.

Alternatively use a white tile so that you can see the true colours.

Hugs xx

June 25, 2012

Not cheap ... but useful

A useful addition for any cardmaker and one that can save you lots of time and frustration if you hate to cut out shapes ..... like me!

I really can't be bothered with all that fiddly stuff and so  I bought myself  a  Die Cutter   a long time ago.

The first machine I ever bought  was the Big Shot from Sizzix, and it has been a little work horse for me from day one.

It can do everything that I need it to do from cutting out shapes to taking some of the embossing folders.
But as the years have gone on and I have started to use more and more Spellbinders  I decided to invest in the Grand Calibur.
Not because there was anything wrong with the Big Shot but purely because of the cutting area.

The Big Shot will only has an A5 area where as the Calibur has an A4 which means that I use the larger Grand dies and the Impressabilites all from Spellbinders.

But whichever one you decide to go for ... and there are lots on the market all with varying price tags ... just make sure that it will do what you want it to do because they are a considered purchase for you to add to your list.

Hugs xx

June 24, 2012

Scoring Board

To me this is an essential piece of quipement and one I use every day whenever I have a card or a project that needs to be folded carefully.

This is the Ultimate Pro from   Crafters Companion  and is one of the best things I have ever invested in.

With this I can score card and papers and the sizes I need are all marked on the  board.   I can make boxes and envelopes to suit my cards and several different styles of card including K-cards, aperture cards, exploding boxes, drawer cards and many many more.

The inside is where I can store my trimmer and bone folders ... which come with the board ... and there are adjustable pegs that will enable you to tie perfect ribbon bows everytime.        It even has it's own paper trimmer stored inside too.
It comes complete with a booklet that gives you all the measuring ...  ready done ... for several box and envelope sizes and detailed instructions on how to use the board so that you can get the best results.

Hugs xx

June 23, 2012

Paper Trimmer

I find a   Paper Trimmer   very useful in my cardmaking as it enables me to get a neat edge to my project.

You can get them with straight edges as well as fancy ones to vary the look on your cards.

This was my choice and I got it for half  price in the local craft shop sale ... so was I pleased or what????

It is  both a  Rotary trimmer and a  Guillotine combined and the trimmer has different cutters that can be changed at the twist ot the knob.

The cutters can also be used freestyle too.

It is from  Purple Cows  and the two pieces seperate to be used individually.

The 12" cutting platform means I can use larger papers and card for everything that I want to do.

Hugs xx

June 22, 2012

Heat gun

So yesterday we got started making cards and we got together some of the basics.

One of the things that will help you is a   Heat Gun   and they are all different prices to suit your particular budget.

This is the one I use and it has a dual heat setting.

The little metal stand at the front of the gun will allow you to stand it down without burning the work top

It was not expensive and I use it to heat  embossing powders to give a raised edge to my designs.

I can heat set any stamped images, dry ribbons that have been coloured and Enamel my flowers.

I can also use shrink plastic to make small embellishments .... and if these terms are alien to you then you can always visit Card Making Magic for a more detailed explanation on each subject covered.

There are lots of other ways to use the tool and there are many on the market ... so shop around to get the best one for your money.

Hugs xx 

June 21, 2012

Tools of the trade...

Everybody needs some basics to start cardmaking with and most of the stuff we need we already have to hand.  You will need the obvious .... card, paper and some glue to stick 'em all together ... and envelopes to send the finished card in.

Then get together ...
  • A space to work in ... could be the kitchen table.
  • A metal edged ruler ... raid the toolbox ... or invest in a clear ruler with a metal edge
  • A craft knife and some scissors .... a pair for paper and another for ribbon.
  • A self healing cutting mat ... to preserve that kitchen table

And that will get you started cheaply and easily.  I used my dining room table for a long time and made lots of cards that I sent to family and friends. 

The only problem is that as you start to gather together items for your "Stash" it doesn't take long before that "Stash" out grows your chosen space and fills the house.

I am sure many crafters are nodding their heads at that statement as they know exactly what I mean and that is when you need to invest in some storage .... or utilise everyday objects.

But that is another story which we will get too in due course ... but for now back to tools of the trade.

So we have got the basics and we have started to make some cards.... Yes??? well it won't be long before you will  want to invest in some of the bigger stuff to make life easier for you as you get addicted to this lovely hobby.

But over the next few days I will cover some of the pieces you may want to get ... but not all of it is needed ... even if you want it.

Hugs xx

June 20, 2012

Silver and White Wedding Card.

This will be my last "live" post for a few days as I am all ready to go on my Canadian adventure to meet Naomi and her family. 

The cases are packed, we have the tickets, the dollars and the insurance all sorted, the house is clean and tidy and I am so excited about this trip I can't sleep.

My "Film Crew" has all his camera batteries fully charged and he is raring to go.... complete with the silly hat !!

But of course to family nothing changes and at the last minute my daughter has asked me to make  her a special wedding card.   This wedding has been planned for months ... but last night she asked me and it is for this Saturday.
So what could I say???
Click to enlarge
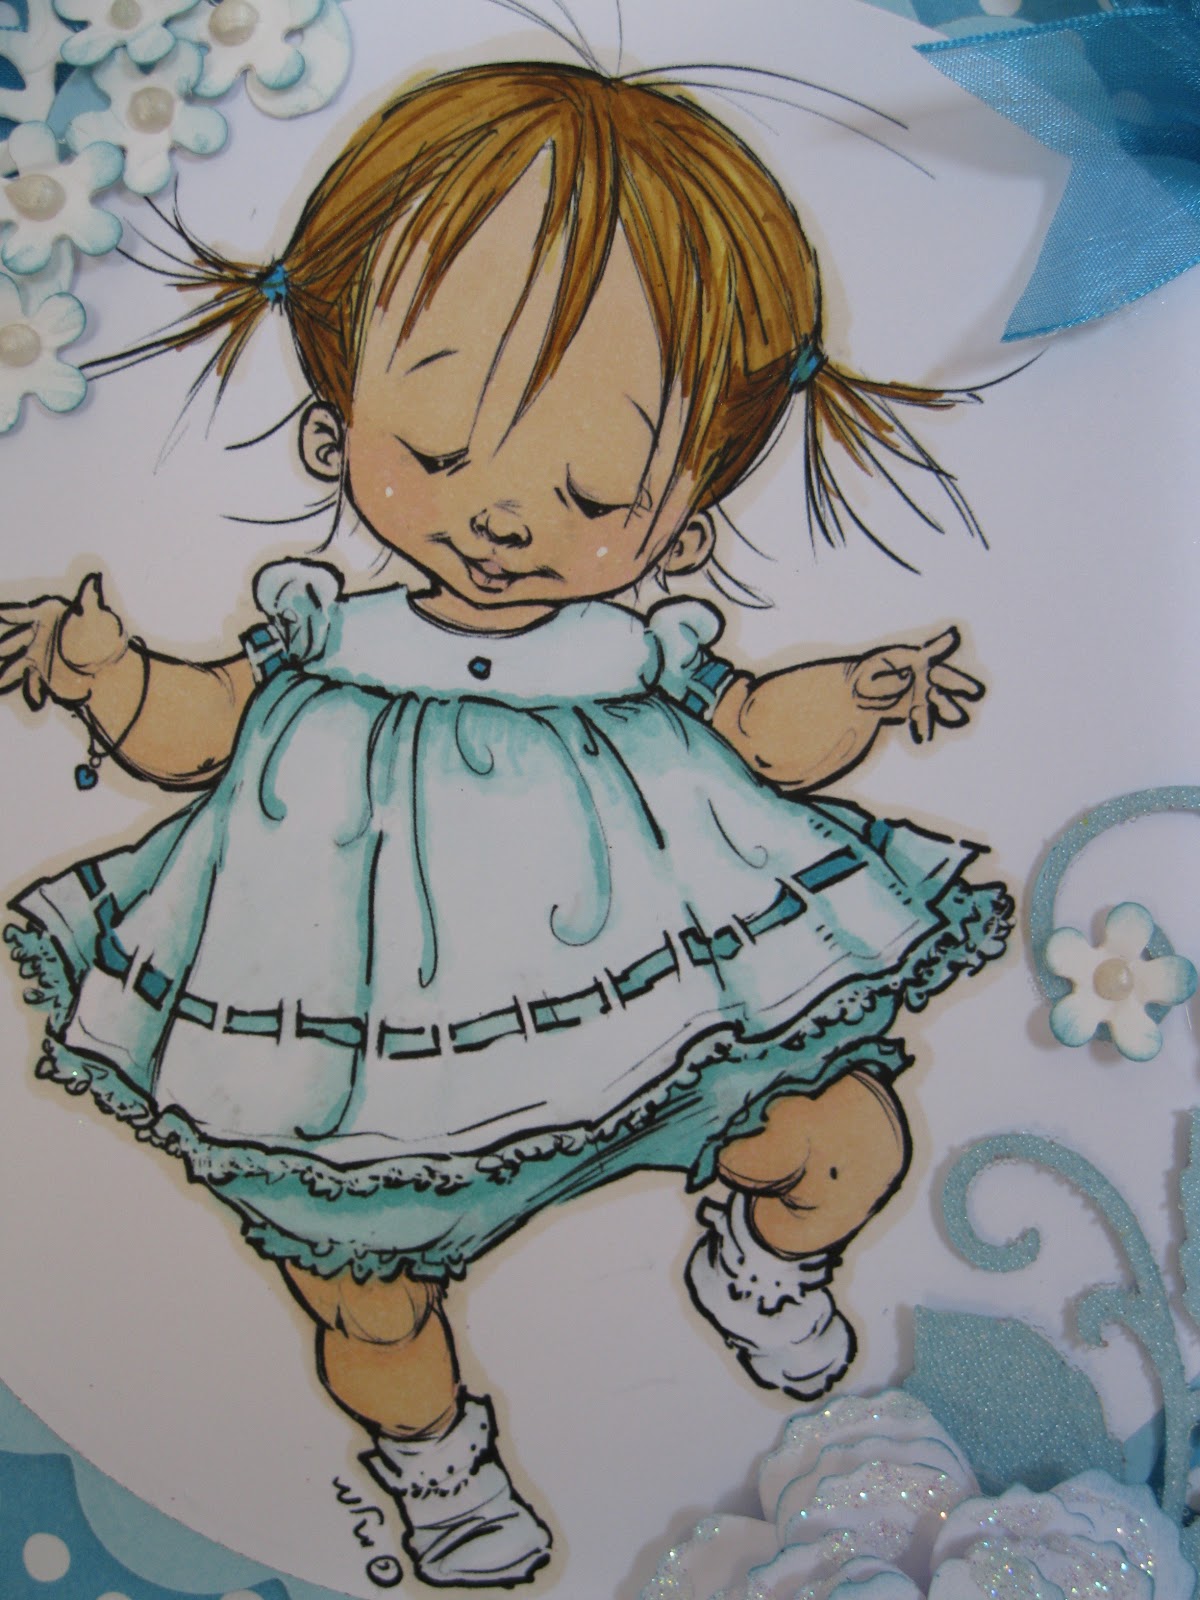
Once again the remit was for the ever popular white card with flowers and so I obliged ...and this is what I came up with.


The silver was added in to the blend to give some sparkle.


I have used two different types of ribbon and layered them at the top of the card and added a bow from the same two ribbons with a Diamante centre.


The  beautiful Diamante  "Bling" is from Want2Scrap
 The Spellbinders used will be in BOLD so that you will know what I have used.
Click to enlarge
The  background is created  from the   Regal M-Bossablities folder.

 The sentiment has been layered onto the Floral Ovals and the Labels 20 with  matching "Nestabling" added to the centre Label 20

The flowers are Spiral Blossoms 1 and 3, with the smaller Bitty Blossoms added into the spray and each of the flowers has  had a silver glitter ball glued into the centre.

I have used the small leaves from the Bitty Blossoms and larger ones from the Foliage set.

Click to enlarge
The Diamante has been used around the edge of the card and of course all self respecting wedding cards need a box and so I have added the flowers and the "Bling" to this as well.

The lid has an acetate centre so that the card can be seen through it ...but at the last minute I decided to add silver tissue paper to keep it safe.

So that is it until I get to Canada ... the next few days posts are all done and scheduled to go out each morning .... fingers crossed.

Then once I get settled Naomi and I will be doing some projects together and of course my Film Crew will be on hand to take some lovely photos or our trip to Prince Edward Island .

Thank you for all the lovely messages about my holiday... both here and by email to the website.

Hugs xx

June 19, 2012

Dads' Day

The 17th June was Fathers' Day here in the UK and between us my "Film Crew"  and I have four daughters. And to show their love and appreciation for the things that Griff does he is given a token of their esteem.

It can vary from year to year .... sometimes he gets useful stuff and others it is something funny or frivilous .... especially from Griffs'  youngest daughter ... and this year was no exception.


I had to share this gift with you as we did no amount of laughing over this. 

They like to have their little jokes about us getting on and how they are going to spend their inheritance .... but we are making sure that we spend that before we go !!

So what did Donna get her dad this year ??

 Well it was this  large and rather smart  Ceramic cupcake money box all studded with little gemstones....


Click to enlarge
... but to get the joke you need to read the inscription on the top of the cake.

And she has added a picture of her dad on the cherry ... complete with moustache... it just has a bit more hair than he does !!

But we aren't past it yet and can still give them a run for their money.!!


Hugs xx

June 18, 2012

Water Colouring with Distress Inks

I am sure that you have a collection of Distress inks and that you have found many ways to use them... from distressing the backgrounds and corners to your cards to inking through your Spellbinders to give the edges some definition.

But they also make an excellent medium for water colouring  and the results are superb.
This pretty Christmas image from Lili of the Valley  has been coloured with a limited palette ...  but the card looks very soft.
This is another using the Dusty Concord Ink and of course the Spellbinders.
Because I was asked how to get the look I added three videos to cover the different aspects on the image.
The  First video on Skin  will give you the links to the two other parts on hair and clothes.

And the image I used was from the SWALK collection from Crafters Companion 

The videos cover the skin, hair and clothes and I have used the Water coloured card from the same company.  And because the image is being water coloured then you will need to use a waterproof ink such as StazOn.

This is also a good way to put your   "Big'N Juicy"   ink pads to work too though the colours from them are a lot more vibrant..... so take extra care.

Hugs xx


June 17, 2012

Plaited Ribbon

This is another way to use  your beautiful ribbons and it uses a  Spellbinders  border shape to plait the ribbon through.    
It is not the same as the Braided Ribbon featured yesterday and does not use as much ribbon as it is only plaited.

But this is  another video   and if you have  any  Spellbinders  borders in them then this is one way you can use them for   Plaited Ribbons   

Adding ribbons can really make the card very feminine and the doily in the backgound of this card has the same effect.
The image is from the SWALK collection from Crafters Companion and has been Water Coloured using Distress Inks.

One more Ribbon technique to add to your list is the Ruffled Ribbon  and this creates yet another pretty look for your designs.

Hugs xx


June 16, 2012

Braided Ribbon

This ribbon technique is one I learned years ago but it now seems to be coming back in fashion... especially on cards.
The only drawback to this feature is that it takes a lot of ribbon to get the look.   This wreath took about 4mtrs of 1cm wide gingham ribbon to create and the card is an A5 size.

It has been added to some glitter card and the gold corner piece is metal.   The Spellbinder shape has the sentiment heat embossed in gold and is  raised on foam pads.

I featured a PolkaDoodle card earleir in the year with the same  Braided Ribbon   and I added a video to show how to create the look.

This pretty baby card has some really pale pink ribbon and the flowers on both cards are fromWild Orchid Crafts   and they have been sparkled up with Glamour Dust. 
The pearls in the corner just add that little extra and I always like to add that extra bit to all my cards.
The Teddy Bear image is from HunkyDory  and the edge is foiled in silver.

 Hugs xx

June 15, 2012

Brown Haired Baby Fairy

I am so delighted with these images from  Mo's Digital Pencil that  I have been colouring them in for days.
This one has normal coloured hair ... but then fairies can have whatever they want... well the ones at the bottom of my garden can. 

I have coloured this one with Spectrum Noirs from Crafters Companion and I am getting quite a lot of emails on this colouring system.    Many are asking me to compare them to Promarkers and Copics.
To be fair to any of the mentioned pens it is not about comparison as each brand has it's own merits ... and each perform well in their own individual ways.  I have pens from all and I enjoy working with each just as much as the other.

So if you are wondering which to buy then I would suggest that you buy a small sample of  each brand,  say some of the skin tone sets,  and see which is your prefered choice is,  for the budget that is available to you.

For this card I have double layered the ribbons, and the flowers are from Wild Orchid Crafts and the added "Bling" is from Want2Scrap   The image has been layered onto a Spellbinder Oval and then the Scalloped Oval

The very pretty papers are some that I found on my computor and I have no idea where I got them from ... so if you recognise them then please tell me... they have been matted and layered with some pale lilac card.

Hugs xx


June 14, 2012

Another Baby ...

This beautiful image is another from the magic pencil  of  Mo Manning  and you will find many, many more at
     Mo's Digital Pencil

This is called  "Walker"  and can be found in the Kids section on the website.

I think it is adorable ... and it would make a lovely gift for my Great Grand-daughter.

And here is some exciting news ...
 I have written to Mo Manning and asked her permission to feature her images in a series of videos, that I would like to do on colouring in,  and she has very kindly given me that permission.

I don't profess for one minute to be an artist ... but they will be based on what works for me and maybe it can help you too.

And I think these images would be perfect to be used for various aspects using alcohol marker pens and covering areas like skin, hair and clothes.

And maybe wings on the Baby Fairy images like the one featured a few days ago.

The  self adhesive Pearls in the corner are as always from Want2Scrap  and I have used two different sizes to decorate the corner.
The large white flower is one of the  Bauble Blossoms  from Spellbinders.

I really like this card and I will be using the images on many cards and buying more from such a talented artist.

Hugs xx

June 13, 2012

A Personal Story

Card Making Magic is now just over three years old and this has been the most extraordinary journey I have ever made.  I knew absolutely nothing about websites  and ...apart from sending the odd email  ... nothing about the internet either.

But I went ahead and dived in and, with a lot of hard work over those years,  it has gone from strength to strength. And then I had the idea  to add videos to the pages ... and that took it into another dimension... and the response from those tutorials has amazed me.

Through  YouTube  I started to get "followers" and some of the comments they leave me are wonderful.... some of them have been following me for a few years now.  They spur me on to do more and many many of my followers email me with questions and stories of their own.  I now have requests to do tutorials on things that people want and I do my best to accomodate them. 

One follower in particular asked if we could communicate more privately away from  YouTube and we started to email each other. We have built up quite a friendship and it was Naomi who encouraged me to start Blogging. She helped me every step of the way and I will always be grateful for that help. We went one step further and started to chat regularly on Skype.

And then she asked  if  I ... and my film crew  ... would like to visit her  in Canada.  Of course we debated this for a while and then we said "YES" and so then the planning started from both sides of the pond.

Last week we booked our flights to Nova Scotia and I am so excited to be going to Prince Edward Island.  It has come around so quickly and now it is just over one week away and I will get to meet Naomi.

She is like a kid in a candy shop and is planning all sorts for us to do in the two weeks we will be with her and her family.  On the 22nd  June we will fly from Heathrow and I can hardly wait, it is going to be such an adventure for us all.

In the meantime I have scheduled posts to go out for my Blog and I will be adding more to the pages from Canada ... and maybe show you a project or two that Naomi and I have created together.

Wish me Bon Voyage for the 22nd ....

Hugs xx


June 12, 2012

Spellbinders Bauble Blossoms

A little while ago I had an email from a lady who had bought this  Bauble Blossom die  and  was very disappointed with the result.

She said she didn't like the look and all the petals where bunched together instead  of flared out  form the centre.

So as a picture paint a thousand words I thought the best way to explain how I use the die was to .....
    make a video!

Spellbinders Bauble Blossoms  is a short tutorial on how to get a really good look for the flowers that you want to enhance your designs.

This is another of those Baby Fairies from Mo's Digital Pencil  and I hope you have taken the time to have a look around some of the cutest images there are.

I have used Spectrum Noir pens to colour the image and this has started off a whole new set of emails asking about the colouring of these.

So gues what I will be doing soon ....... more videos!!

The "Bling" as always is fromWant2Scrap  and the flattened look with the pearls was a happy accident I made a while ago.

But the mistake looked OK and so I have used it several times on other cards and decided to share the idea with you.... you may like it too.

Hugs xx

June 11, 2012

Baby Fairies...

I am always happy to pass on any good finds that I make and so I just have to show you these. Now this may be a website that some of you already know about ... but I have just joined the band wagon.

I  bought these delightful images from  Mo's Digital Pencil  and I  love, love, love 'em all they are so cute.  My favorite one is the baby with the ladybird that I have coloured with blue hair.

There are loads of really gorgeous images for you to choose from  and they are not expensive.
I have coloured all of these with  Spectrum Noir pens from Crafters Companion  and I am very pleased with the results.  They have all been matted and layered onto Spellbinder shapes.

There is a mix of images here. The top left and bottom right are from the "Baby Fairies" collection.
The child with the cupcake is "Kai is 1" and the other is "Girl on the potty"

But once these are made into a card ... well how could you not be pleased with the result.
The "Bling" as always is from Want2Scrap and I think it makes the card look really special.

I have used the pearly Finesse Swirls for this card and added them to the image itself... saving one pearl for the flower centre... and used the Diamante borders along the edges.

The flowers are from Wild Orchid Crafts and I have dotted some glue along the petals and then sprinkled them with Glamour Dust.
I will be having a lot of fun using these images in the coming months ... so keep a look out for them again in different colour schemes to ring in the changes.

Hugs xx


June 10, 2012

Nestaboard ... Labels 20

This has to be one of my favorite shapes as the Labels 20 is so versatile.

I featured this card earlier in the year but it is well worth showing again.

This time the Nestaboard shape has been treated to a  technique using Silver Gilding Flakes.

You will find it explained in the video  Mosaic Card

For this I used two of the shapes from the Nestaboard Labels 20  and layered them together.  The lace along the bottom adds a really feminine touch.

The Roses are handmade and the  video Paper Roses  will show you how to make these for yourself.   You will always have flowers to match your projects if you use the same ones as the base card.

The Nestaboard is available from Want2Scrap  and they will ship worldwide so that you too can enjoy their lovely "Bling"

Hugs xx

June 09, 2012

Nestaboard ... Lacy Ovals

This pretty shape is created from the largest Nestaboard shape in the  Lacy Ovals  and gemstone Nestabling frames the shape.

Both of these products are from   Want2Scrap  and are explained more  in the video  Alternative Spellbinders

The Skeleton leaves,  White Gardenias  and Roses  are  from Wild Orchid Crafts 

There are also some stems of pearls on gold wire but I can't remember where I got them from ...  soreeee!
I have used Gilding Flakes to get the Gold effect and the bottom of the oval has had some tear drops from a pair of un-used earrings added to it.
I also glued into the oval some matching pearls to complete the look.

The sentiment is layered onto a Fluer Di Lis Accent and I cut another in gold card as a shadow effect.  I used the smallest peice of gemstones from the Nestabling to frame it.

Both shapes are suspended from one of the Elegant Posts.

Hugs xx


June 08, 2012

Nestaboard ... Labels 2

This is another shape from the Nestaboard  family and this one is the Labels 2 that matches the Spellbinder die.

With this one I have inked it up with Versamark and covered it in red embossing powder then heated it and sprinkled in some Glamour Dust while it was still hot.

Around the back of the shape I have added some white lace and  on the front I have used a red Rose  from Wild Orchid Crafts  and curled  the wire from the flower around a  cocktail stick.

Once added to a card it looks totally different ... and with this one I have used a white square doily in the baackground.
The ribbon technique is explained in the tutorial   Ruffled Ribbon  and  is very easy to achieve.

The Nestaboard and the Pearly Swirls are from  Want2Scrap and make a real statement to any card.

Hugs xx

June 07, 2012

Nestaboard ... Scalloped Hearts

This is a product called Nestaboard from  Want2Scrap

It is compressed board that is used to match ... or instead of the Spellbinder dies. 

It is an excellent alternative to buying the dies ...  as they are pricey and you may not want to buy them.

But these are much less expensive  .... and they give a really pretty effect that you can dress  up anyway you like.

There are several shapes in decreasing size to each packet for you to create your own toppers.

And the company will ship worldwide too.
This is the largest one from the  Scalloped Hearts  I have covered the shape in  pretty pink paper and then edged  it with the matching  pink gemstones from  the same company.
The flowers are from Wild Orchid Crafts  and this is the topper that was made using all these wonderful products.

But when added to a card front with a lacy square doily in the background and  the result is very pretty.
The addition of the organza ribbon and the punched butterfly add the final touch and is a card I would be very happy to send for any occasion.

Hugs xx


June 06, 2012

Matting and Layering

A cardmakers term that  needs to be explained as many new  cardmakers are stopped in their  tracks by words  that those of us who know  how to make cards use  willy nilly.

I remember going to a computer  class many years ago and being asked by the tutor  "Do you know anything about computers?"    To which 80% of the class said a most emphatic "NO!!!"

She then proceeded to tell us to use the mouse to add the cursor to the search box ... and click,  add the title  "Whatever it was.... "  and hit enter.

Most of us spent the next few minutes looking for furry creatures running around, wondering what a cursor was,  why we needed to hit anything and  where and what it was we were entering. 

So a not very  helpful tutor and a not  very explicit lesson, as she clearly didn't understand  the answer "NO" to  her own question in the first place.

I know when  I started to make cards it was something I had never come across and I  couldn't find a detailed answer to  my question   "What is matting and layering?" ....

Having been asked the same question ...  and  not wanting to be tarred with the same brush as  my earlier  tutor with the PC's, ...  I decided to make a short video to explain  exactly what  Matting and Layering   is.

It is aimed at those people new  to this hobby  who don't know all  these terms  that are bandied about.

It has had a good response from lots of people ...  so I seem to have hit the correct level and I am happy to be of use to the many many  people joining the growing band of new cardmakers every single day.

It is for  You  that  Card Making Magic   was born.

Hugs xx

June 05, 2012

Choosing Colours

Some of the questions I have been asked lately ...  in emails to the website ... are concerning colours and patterns for the cards that I make. 

"How do you choose colours?"
"How do you know which patterns work together?"
"Do clashing colours work with each other?"

If you are a seasoned card maker then maybe to you the answers are obvious.

But the website is created for those that don't know the basics and so I tried my best to answer these questions as easily as I could.

I kept in mind that many people are a little scared of colours and patterns ... unlike me who goes ahead and tries anything with anything... and I wanted to build up that spirit of adventure in the newest of cardmakers so that they will be happy with what they come up with.
So I have done two more videos that will deal with this subject,  and maybe answer some of the concerns that arise when someone is faced with any array of colours, patterns and textures and they don't know where to start.

And judging by the response on YouTube ...  and in yet more emails it has been very well recieved.

Choosing Colours  is under five minutes long  and yet I hope it gives the information that a "Newbie" will find useful the next time they want to make a card.
And this card proves the point of not being afraid of colour and just playing with the papers that you have in your own "Stash" and seeing what works together.

The image is from Humphreys Corner  from Crafters Companion and has been coloured with Spectrum Noir pens. 

Floral Ovals from Spellbinders has been used to layer the image

The "Bling" as always is from Want2Scrap and is well worth checking out.

Hugs xx