Beautiful Card Designs Made Easy

Showing posts with label CMM New Dies. Show all posts

January 04, 2022

Happy New Year

Hi Everybody,

I hope you all had a good break over the Christmas Holidays and are now looking forward to  2022 

To start the year off well I have a new collection coming out and this is the Decoupage Delights

There are three flower dies sets and three beautiful background dies as well as some sentiment stamps to accompany them.

The featured card is complete with its own box and I have used the Hellebore flower for decoration. 

There are videos on the way about these new dies and more news in tomorrows blog post.

These dies were launched on the Craft Store with Lou Collins yesterday and they have been coupled  on the TV shows with the Emerald Card and Box die set. 

These box dies have been around for a little while and I did two videos using them when they were first introduced. I will add the videos here to show you the dies and refresh your memory if you bought them. 


I hope you enjoy the videos again or if you are new to the blog then this may be your first time seeing them. 
All my collections are available at 

More tomorrow ...

Hugs xx

November 02, 2021

Ribbons and Lace Collection

Hi Everybody,

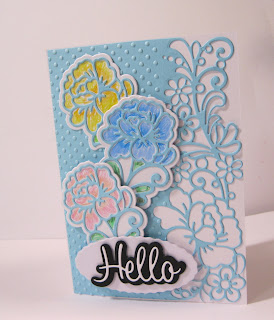
This pretty card is created with the new Ribbons & Lace Border and the finished card is a 5x7. This is my favourite size card to make and is the one I mostly use whenever I am in my craft room creating.

For this I have used the border di along one side and I have embossed the other side in the Simply Dots embossing folder from the same collection. 

The fold has been kept to the side for this card which is unusual for me as I like a op folded design better. 

For the flowers I have cut them out but kept the fallout pieces in the die. I have used Arteza Colouring Pencils to add the shading to the petal and then backed them onto their corresponding panel 

These pencils blend really easily and are an excellent alternative if you are not comfortable with paints. Perfect if you are new to colouring and need to build up your confidence. 

The flowers have been added with foam tape to give some dimension, along one side of the front panel and the word added at the bottom. onto a die cut oval. 

Perfect for any occasion 

More tomorrow ...

Hugs xx 

October 26, 2021

Lovely In Lace


 Hi Everybody,

Today I have a video for you and I hope you will enjoy it and the cards that I made.  I made two cards of different styles and in yellow. 

Both are 5x7 and one is a gatefold design which I am sure many of you are familiar with as it is an easy card to make.

Yellow is not a colour I use much as I much prefer my pink one. But a change is as good as a rest so they say


Both these cards are created with the same set of dies and yet they look totally different by simply arranging the flowers at a different angle or even the amount of flowers that are used. 
The video will show you how I made the top one and the Gatefold.

I have also used the Simply Dots folder which is fast becoming my favourite one as there is quite a lot you can do with it.

Here's the video and I hope you enjoy it....


More tomorrow ...

Hugs xx

October 21, 2021

Beautiful Butterfly Die Sets

Hi Everybody,

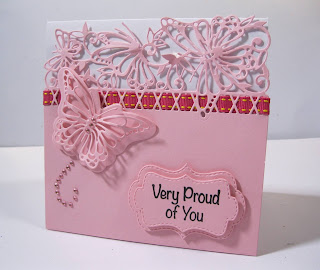
All three of these cards are created from the same die set and that tis the  Beautiful Butterfly Die Set. 

I have used portions of the Ribbon Threader dies so that each card is different, and to demonstrate the versatility of each collection.

The first card used the all the dies as they are intended and it creates this pretty card front for you to add some thin ribbon through.

For this card I inked up the background and then spritzed it with water and dried it with my heat tool.
I added white leafy strands cut from the dies and glued them in place.

The butterfly I cut several times but I carefully placed the dies so that I could use that panel as a backdrop to my third card,

I layered up five of the butterfly die cuts and add them to the top of the leafy strands. The sentiment was stamped in black and clear heat embossed at the bottom of the card  
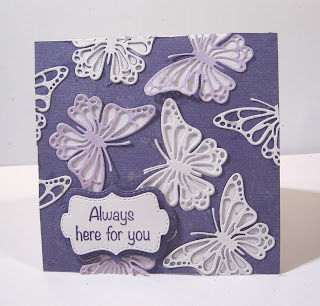
For this one I used the panel I created from die cutting the butterflies in the previous card and added it to a 6" square base. 

I used the butterfly die and cut several of them in different colours to add back into the opening left by the die.

I then added a second butterfly to the top of these for depth and trimmed the edges. I spritzed the whole front with Perfect Pearls and allowed iot to dry.

The sentiment banner is from the die set and all the sentiments are from either the Special Occasions or the Thinking of You stamp  sets 

I will add all the links below so that you will be able to see what I have used. I hope you like the cards and that I have shown you some ways to get more bang for your buck from these new collections.

More tomorrow ...

Hugs xx

October 11, 2021

TwoFer

Hi Everybody,

Don't you just love getting a Twofer whenever you are card making. And in case you don't know what that is it means two cards for the price of one.!!!

These two card where just such an event and yet they look totally different. 

Each uses the same dies and embossing folder. The same inks and both are 5x7"  cards with the fold at the top

So let me tell you what I did to get these looks.

 First I created the base cards and a white mat to go on top.

For this white mat I inked up the debossed side of my embossing folder and ran it through the machine to add the pink spots to my card panel.

(This  Spotty Embossing Folder is one that will be in a new collection coming soon, and I love it) 

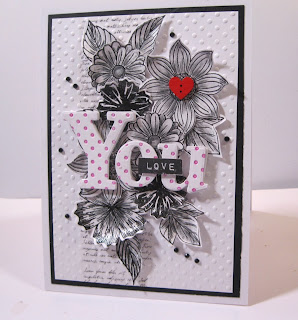
I used the upper and lower case from the Alphabet sets and cut out the word YOU into the centre of this panel and put the actual  spotty words to one side. Add this to the base card

Cut the same word several times from white card and stack them up. I coloured the top letters with pink ink.

The flowers  and leaves where stamped and cut lots of times to give me as many as I needed, and some of them I coloured with markers. The others I placed to one side for now.

I added the coloured word into the cut out word on my panel and arranged the flower and leaves around it and to the centre of the flowers I added small wooden buttons, and dotted the rest of the panel with pink pearls

I added Glossy Accents to the word YOU and left it over night to dry

For this card I embossed my spotty panel and added it to some black card and then onto my base card.

These flowers have been coloured with an ordinary pencil and I used a paper stump to smooth it out. They have been added to the embossed layer with glue and foam pads

The spotty letters  have been layered onto more white ones to add dimension and added to the top of the flowers. 

I dotted some black pearls around this cards and the little red heart just adds the finishing touch.

The little sub sentiments for both cards are from Altenews Label Love

I really love the look of both of these cards and there was no waste from making them either. 
So a win win situation 

More tomorrow ...

Hugs xx
September 20, 2021

Slimline and DL Cards

 Hi Everybody,

As this was Slimline Collection was officially launched last Friday I thought I would show you some of the cards that I took with me to demonstrate the different styles that can be created from these die sets. 

I will go into more detail in a video this week to show you what I did. And I also said that your envelopes could be made out of coloured paper instead of card.
 
This will cut down on bulk and also postage at the same time and is still strong enough to go through the mail.

I decorated both my cards and envelope the same here and that would be far nicer for the recipient to get through their letter box than a bill..

I did the same with this one also and I think they look really special. 
Now I added a video featuring these new dies but I kinda jumped the gun a little because they were not officially for sale at the time.

But now they are and so just in case you didn't see it I am adding it again. 

So Friday was a bit of a bumper day  ... in one way or another ... with the launch of two collections.

The Slimline and the Snowflake sets of dies, stamps, folders and stencils. Quite a lot to keep you busy.

Here's the video, I hope you enjoy 
 
The difference in the two sets is the slimline is 3 1/2" and the DL is 4" and both are 8" long.
 A box or an envelope can be made for your card from either set, and the border strips can be intermixed as you like. 

More tomorrow ...

Hugs xx


September 13, 2021

Card & Matching Envelope

 Hi Everybody,

Because this 5x7" card is relatively flat I thought it would be a perfect match for an envelope, and be easier to give at the same time.

So I made myself busy and created this video  to show you how I did it and I am quite happy with the results too.

I was originally only going to make one envelope for the card but as I made four cards I carried on and made the envelopes to go with them. 

You can create your envelopes from copier paper if you prefer and then obviously they will be a lot thinner.

You could also use fancy papers too and that would make them really pretty especially if you had used some of the same paper on the card too.

Keep them clean and safe and they are always there ready to send when the need arises. 


I have added the links at the bottom of this post to show you what I used and some of them are affiliate links. All this means is that if you purchase through the links then I get a small commission and it is at NO extra cost to you.

I hope you enjoy the video and like  the results at the end and should you have the dies then I hope you will give this a try.

More tomorrow ...

Hugs xx

July 21, 2021

Leafy Corner Die Set

 HI Everybody,

Todays card is created using the Leafy Corners and the colour scheme for this one is simply black and white.

It is a 5x7 card base and I have embossed the front of the card. 

The top panel had been die cut from white card using the largest corner die in the set.

I have created one panel from the backing die and then another panel and used the filigree piece and both have been added together.

These have then been added to the top of the card and trimmed off along each side to fit. I found a lovely piece of corner diamante in my stash so I have added that to the panel to enhance it some more..

The flowers are a mixture of daisies, roses, and some black poppies and I have glittered them up to glitter in the sunshine.

It looks much better in the hand than on the photo

More tomorrow ...

Hugs xx

June 20, 2021

Rose Decorative Corner

Hi Everybody,

This very simple card was created with the Rose Decorative Corner that was introduced a short time ago. 

I have used some of the paper that I have had for a long time ... in  fact I think I brought this back from Phoenix with me when I went over there as a Spellbinders Ambassador. Many moons ago !!

I have added the filigree die to the patterned paper and cut it out and this piece stays in the card unless you add the outer frame to it 

It has been added to the top of some Rose Gold  metallic card, with foam tape in strategic areas, and that gives a very subtle shadow to the effect.

The other flowers from the pack have been cut with black card and added to the front, but rather than paper piece the drops outs back in, I have simply coloured the spaces with a black pen.

It gives a very dramatic look to the card and the black glossy sentiment finishes it off. There is no other embellishment to this 5x7 top folded card. 

x Thank You x

A few days ago I sent out a newsletter from Card Making Magic, and I haven't done one of those for a long time. I thought it was only right that I explain my long absence to my readers of what has been happening to me over the past year.

I asked my readers there, as well as on here to add their email addresses again to the new  box I have added if they wished to keep on following my posts.

I can tell you that the response has been over whelming and I have had some wonderful emails from all over the world from my lovely readers saying how they have missed me and that they do wish to stay with me in the future.

THANK YOU so much to everybody who has now re signed their email addresses and I promise i will be more regular with newsletters and blog posts both here on this blog and on Card Making Magic.

The Biggest of Hugs  

June 08, 2021

Tapis Builder Card & Envelope

 Hi Everybody,

Here is a new video featuring the Tapis Builder Die Set and another way to use them.

I have also created an envelope for the card from the 5x7 Card & Box die set that would be sturdy enough to send through the post if needed.

I apologise for the sound of my voice on the video but I have an awful cough at present that is keeping me awake at nights.

Cough medicines don't seem to make any difference and it is much worse when I lie down. And I cannot for the life of me sleep sitting up. Ruby gets off the bed in disgust when I start coughing as I keep her awake too. 

Any way here is the video and I hope you enjoy it all the same.


I have used some gold card that I got from Craft Stash for the card envelope and the decoration on the card front. The champagne coloured card is from Tonic and it was with a kit that was on sale years ago.

The finished result is very pretty and it could be for any occasion that you needed. And you could always make up a batch of envelopes ready to send whenever you make this flat type of card.

More tomorrow ...

Hugs xx

June 01, 2021

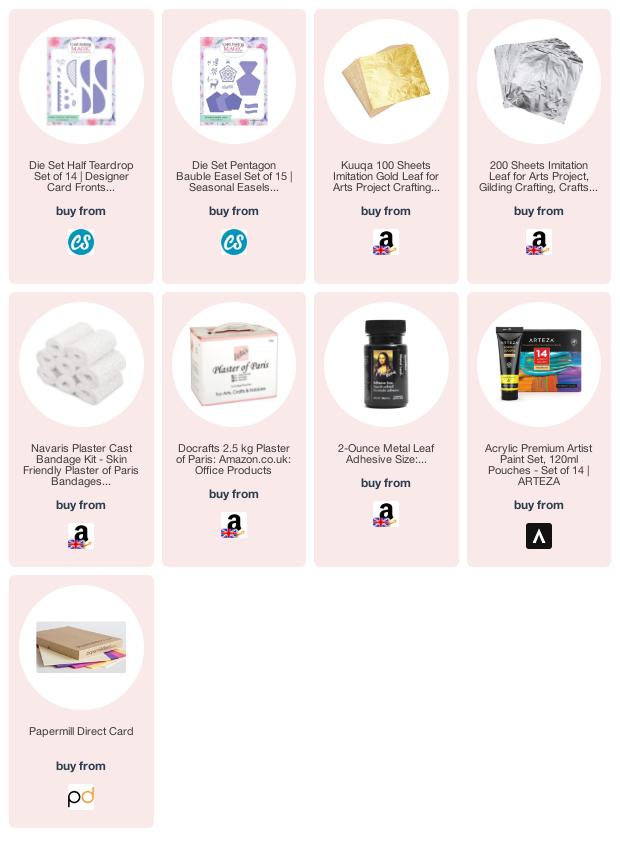
Half Teardrop Vase

 Hi Everybody,

After all the waiting time for the layers of the vase to dry it is now ready to show you and I must admit that I am very pleased with the end result.

I have dressed it with faux flowers and it looks lovely in my room ... though I have not yet decided where it's permanent home will be.

I found tucked away in the back of my garage a really old ceramic plant column that used to be my mums.

 It must be at least thirty years old if not more and it was filthy with dust, dirt and spiders !!

But I am glad to say that once it was cleaned I was happy with it and when it was spray painted with the white gloss it looked amazing.

The distressed finish with the silver leaf was just what I had in mind too so I was happy that it turned out fine .

So I hope you like what I have done to show you a different way to use your die cuts, and there are many more shapes you can use to make a vase to suit your home.

And Ruby likes it too 

More tomorrow ...

Hugs xx 
May 16, 2021

Spikey Flowers & Stencils

 Hi Everybody,

Todays card is created suing the new Spikey Flowers stamp and die set and I have teamed this with texture paste and a stencilled background.

I though I would try something a little different by combining the texture paste with some Gilding wax and I am happy to say that the technique turned out ok. 

The flowers can be done in two sizes if you wished but I have simply made one large one for the front of my card.

The effect is lovely and once it is completed you cannot see the mistake I caused by smudging the texture paste. So I hope you will give this a try and experiment with mixing other things into your texture paste for a different kind of look to your designs.

More tomorrow …

Hugs xx

April 21, 2021

Thanks ...

Hi Everybody,

This week I have had to visit the doctor again because it I have an infection in my surgery wound. 

Don't ask me how this has happened coz I have no idea all I know is that it is very hot, red and painful

I have started on antibiotics to see if that helps and fingers crossed everything will be ok in a week or so.

So this card is to say thank you for all your kind wishes and lovely messages and the many cards that you have sent to me.

The card shown has been created with the 5x7 Card and Box die set and I have used a really old stamp from Indigo Blu stamped onto a white panel. 

I have then embossed it in CMM flourish folder and added it to the card front. The "Thanks" die is another older one from Spellbinders.

The roses are from the Layered Roses Die Set and the leaves are a mixture from several sets to add variation. I have added some sequins dotted around the card for sparkle.

More tomorrow ...

Hugs xx

April 07, 2021

Water Coloured Cards

Hi Everybody,

I have recently found joy in water colouring again and over the weekend I have created these two cards using my Gansai Tambi paint set.

I used the Spring Summer die and stamp set from Card Making Magic and I embossed the stamped flowers in gold powder, and cut and coloured more than enough for these two cards.

On this top card I used the Trellis A5 embossing folder after sketching a black line around the edges.

I arranged the flowers and leaves with foam pads under some of them and then dotted the card with pale aqua ink and sequins.

The sentiment is from the Sentiments stamp & die set from CMM


For the second card I used the new Whimsical Herringbone stamp from Altenew and stamped it with clear ink and embossed it in gold.
I decided to paint in some of the stamped pattern in the aqua paint and offset it on my card base with foam under it for dimension

The sentiment stamp on this card is from an old set that I have and I used black ink to add it under the panel to follow the shape.

I am more than happy with both cards and I think they have a fresh clean look to them .

I love the new stamp from Altenew and will be using it often.

More tomorrow ...

Hugs xx

March 22, 2021

With Love & Best Wishes

 Hi Everybody,

For today's card I have created a Twofer and this one of them shown on the right.

I have again used one of the Deco word dies and as you can see it is the complete focal point of the shaped card,

I have done a video to accompany this set and I hope you will enjoy watching it. I try not to make them too long so you wont fall asleep.


This is the other part of the Twofer and is a little more elaborate with flowers, ribbons and pearls, so nothing new there then !!

I really enjoy making this type of card it's what you call "right up my street"

More tomorrow ...

Hugs xx


March 18, 2021

Decorative Words Happy Birthday

Hi Everybody.

This pretty Easel Card is created with the Happy Birthday Decorative Word die and all my collections are available at Craft Stash

The video shows you this easel card and I am sure that this is a style that many of you have tried and enjoyed.

If you are new to cardmaking then maybe this video can help you to see how they are made so that you can go on and try many more in your own developing style

It is never my intention to belittle anybody and yet someone on YouTube accused me of making her feel like a five year old back at school.

If I have ever made anybody feel that way I apologise profusely, that is not what my videos are about.
I deleted the negative comment from my channel as I didn't think it was justified.


As always I hope that the majority of my readers enjoy my videos and I shall continue to make them for as long as I am able to.
 And I am forever grateful to the lovely comments that I get here on my blog, on YouTube, on Facebook and also on my website 

More tomorrow ...

Hugs xx
March 16, 2021

Floral Decorative Corners

Hi Everybody,

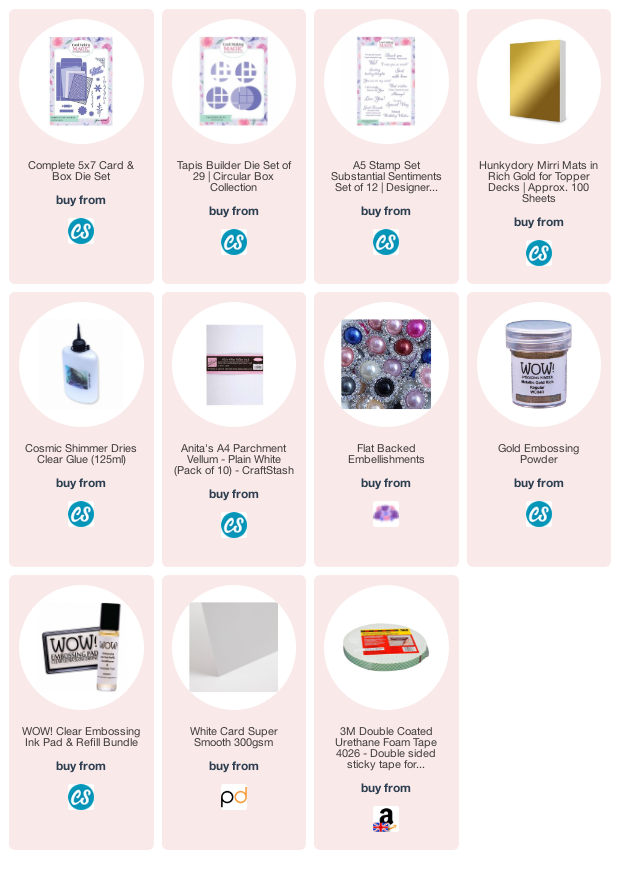
This is another of the new corner dies from my collections and this one is the Floral Decorative Corner Dies.

There are so many dies in these sets and the way you use them is just as varied.
 
In the video I have shown you some of the ways that I have used the elements and put together different looking cards to suit the occasion

They can also be made to fit various sizes of card too so you will never be short of dies to decorate your personal designs.


The cards shown look completely different and yet they are created with the same die set.
The words on this one are from the Ultimate Relations and if it is out of stock at Craft Stash then
leave your name and email address and they will notify you as soon as it is back.

It is another useful set to have and covers all the relatives you may have including extended families

More tomorrow ...

Hugs xx

March 11, 2021

Hearts Decorative Corners

 Hi everybody,

This dramatic card would be ideal for any male members in your family and you an take off or leave on the flowers to suit your recipient.

It doesn't show up in the video but there is a bright silver behind the panel that really adds some sparkle to the design.

The video will show you how I made it and it is just over 5inches in size. It could very easily be turned into an easel card  if you wanted.


And if you wanted a softer look then you can always swap out the colours.
My pages are simply to give you ideas and hopefully inspire you to try something a little different if you are new to card making  

More tomorrow ...

Hugs xx

March 09, 2021

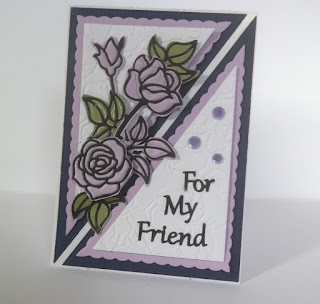
Rose Decorative Corner

Hi Everybody,

Todays card is again using the Rose Decorative Corner and I think it will become obvious that this is my favourite one in the new corners die sets.

I have used blue and white for this colour scheme with navy blue as my accent shade.

The sentiment is the Ultimate relations Die Set and there are so many in this set to cover ALL family members even into extended families.

I love die cutting because all the work is done with the dies and all I need to think about are best colours ... which and what type of flowers ... the layout for the card, then go ahead and make it for my recipient.

I know that there are people who don't like my style of card making. Some thinks its too fussy. But I love this way and the flowers make it extra special for me and the people that I make my cards for. They love them and that makes me happy.

If you are a clean and simple card maker then that is OK too and I do like that style also, as well as mixed media. But this is always my go to style and the one that I am most often asked for when asked to make a card for someone as a commision.

More tomorrow ...

Hugs xx
March 08, 2021

Hochanda Card

Hi Everybody,

This is one of the cards that I made for Hochanda last week and I must admit that I really do like this card.

I did the quilted look with the flowers and it looks much better in the hand than on a photograph.

I used the beautiful Rose Decorative Corner and I chose lilac and white for my colour scheme which is always a lovely combination.

The triangles have been embossed to add more interest to the background.

It was good to see it shown on the shows that Pauline demonstrated on and I will try and show you more as the week goes on.

More tomorrow...

Hugs xx