Beautiful Card Designs Made Easy

June 30, 2017

Friday Freebie 25 - Shabby Chic

Hi Everybody,

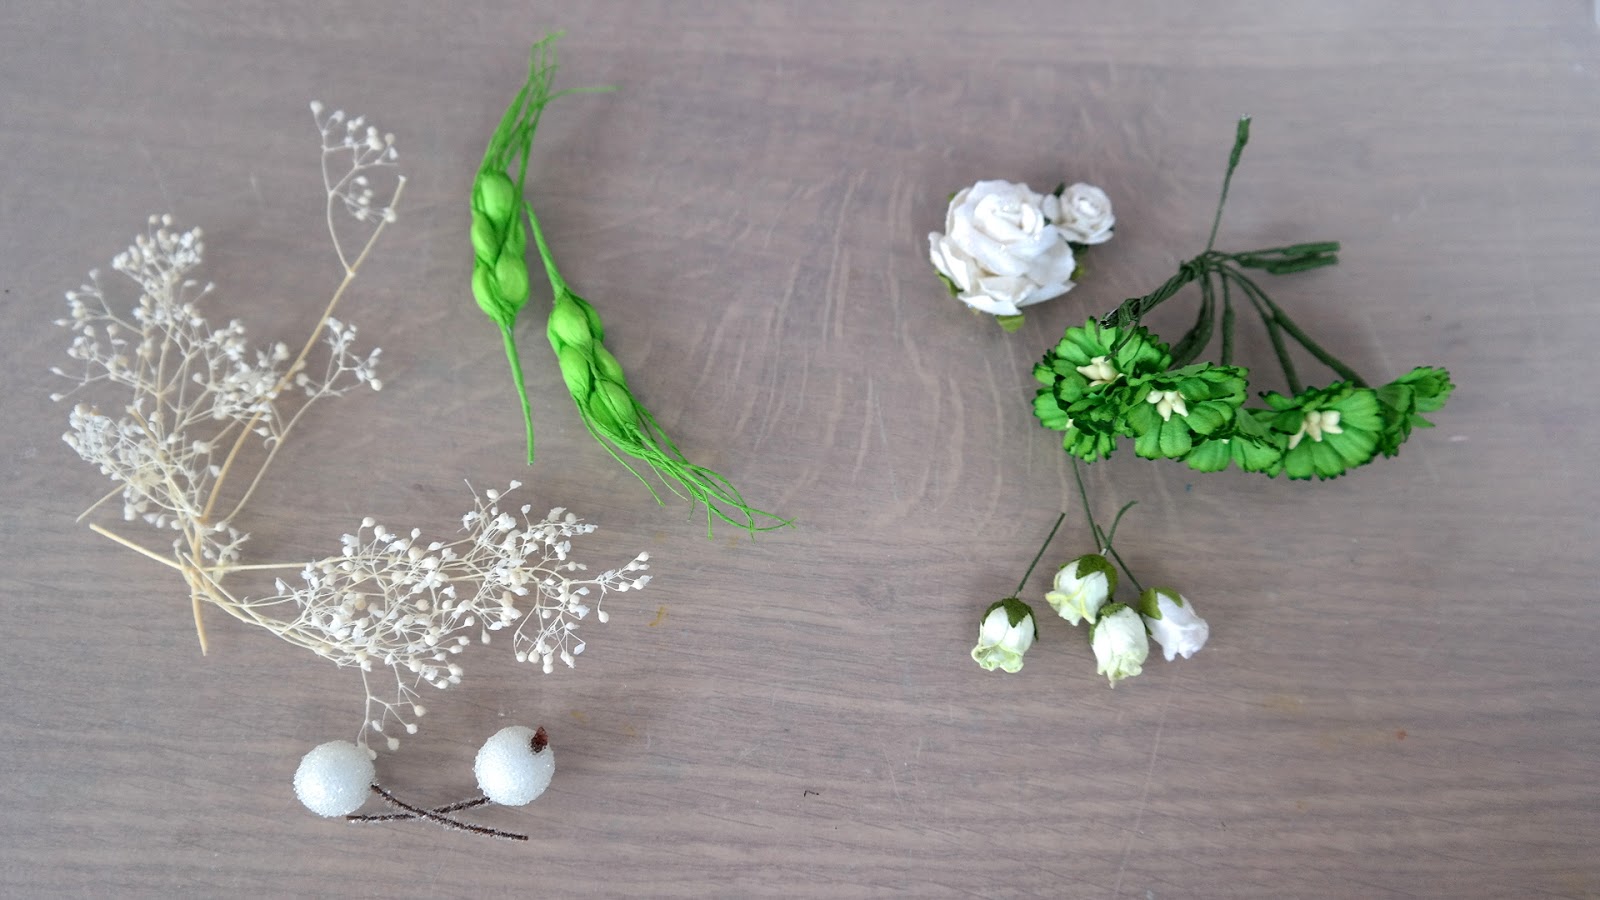
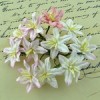
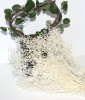
Pretty in Blue for this card teamed with coffee flowers. I have also added metal to this one in the shape of leave and the owl

There is lace along the bottom and sparkle to the flowers and I will leave it to you to discover what else is on there if you are the winner

It is a 5x7  card and the inside is lined on this one and I don't think you will be disappointed with it if you should be the winner

If you would like to have this card then just leave me a comment at the end of the post ... but don't forget to come back and check for your name tomorrow

And if you wanted to become a follower than add your name to the  "Lovely Followers"  box on the right sidebar or follow me on  Bloglovin in the right hand sidebar

Please come back and check regularly as there is always something going on

More tomorrow  ...

Hugs xx

June 28, 2017

Papercraft Essentials 148 - Sunflower Dreams

Hi Everybody,

Papercraft Essentials 148 will be in the shops tomorrow and with it there is this lovely gift named Sunflower Dreams

I decided not to make my flowers yellow but to try something different to show you how versatile this stamp is

For this card I have gone for a Distress ink background and turquoise flowers and I quite like the effect. The video is here for you to view ... PE148 Sunflower Dreams

As well as the stamps and the embossing folder you can also download some papers  to save you time

I printed them off onto a 160 gsm paper as this is not flimsy and will give you a good look.

For this card I used only the papers and the labels from the paper stack.

On the revers of the packaging there is a seed packet template so that you can cut out any that you need to add a gift card or money too ... or even a packet of seeds.

Have fun as you play with this useful gift from

More tomorrow ...

Hugs xx

June 27, 2017

Tuesday Tutorial - Combining Spellbinders

Hi Everybody,

For todays card I am going back to some of the older dies that you may have in your collection and I am combining several sets to produce my design.  I have used a pretty lilac and white colour scheme and added in the flowers.
Spellbinders Supplies:
  • S6-001 5x7 Matting Basics A
  • S6-002 5x7 Matting Basics B
  • S6-012 5x7 Mystical Embrace
  • S4-647 Labels 56 Deco Elements
  • S4-646 Labels 56
  • S4-328 Foliage
  • SEL-009 Chicken Wire EF
  • S1-026 Flying Bugs
  • PL-001 Platinum Die Cutting Machine
Other Supplies:
  • Flowers from Wild Orchid Crafts
  • Glitter from Glitter Magic
  • Card from Papermill Direct
Instructions:
With die #7 from Matting Basics A cut two pieces in white card to create the base
With die #7 from Matting Basic B cut a layer in lilac and emboss this layer with a 5x7 folder
With the largest die in Mystical Embrace cut a layer in white
With die #3 from the Deco Elements cut one in white
And with die #4 from the [plain label;s cut one more in white and emboss the top layer
Stamp and emboss a sentiment
Cut tow butterflies from Flying Bugs
Cut several large leaves from Foliage
Select the flowers to match your colour scheme. 
I have used from the left ...
Roses in two sizes, Rosebuds, Cherry Blossom and Lily
Add the layers to the card with foam pads between the layers
Arrange the flowers and sprinkle with glitter
Add pearls as preferred

More tomorrow ...

Hugs xx  

June 26, 2017

Floral Display ...

Hi Everybody,

I get very many lovely comments about my flowers and the arrangement that I do and where I get them from.

As always I use Wild Orchid Crafts  as they have such a wonderful selection and at very good prices.
Then every so often I add some to my Etsy shop and these are some of the last lot I added.

I made six in assorted colours rent pearls or diamante added and of course they all had a Hat Pin in the mix.


All six went in one day to the same person

The panel with the flowers attached is embossed and the other piece is if the buyer wanted to add a sentiment of their own to add to a card and so this one is plain to allow for stamping or writing.

 More tomorrow ...

Hugs xx


June 25, 2017

Ruby Update ...

Hello Everyone,

I thought I would tell you the rest of my holiday adventures in Wales with my family and
my best friend Dougal.

This is me on the left sat on my mums knee with my dad sat on the right. And Dougal is sat on his mums knee.

We had been to visit a slate quarry  and museum and they all enjoyed it very much but Dougal and I just wanted to run around

The next day we had our first taste of ice cream and it was lovely especially as the day was warm.

I really enjoyed getting all the ice cream out and then my mum let me have the cornet too.

Once I had eaten mine I thought I would see if Dougal had any left and help him to finish his

But he had eaten all of his up too and we both had ice cream around our faces
This is one of the places that we visited and it is called Swallow Falls

I had to be kept on my lead as you know I love swimming but it would have too dangerous for a little dog like me.

So instead we where taken to a river side and there we could paddle and swim for ages
Later after we had been dried off we snuggled down in our jackets and fell asleep all curled up together 

Dreaming of another day on our holidays and the fun we can have playing ... and barking !!

Bye for now

Love Ruby xx

June 24, 2017

Card Winner ...

Hi Everybody,

Hope you are all looking forward to your weekend.  I have some filming to do today ... got to keep those videos up to date ...  and then tomorrow I am F.R.E.E.
 Griff and I will be going out for Sunday Lunch somewhere and I always look forward to that...especially if Roast Beef is on the menu

Watch it rain tomorrow, but I don't suppose Ruby will mind, as Vickie and I usually do a Sunday morning walk with Ruby and Dougal, either on the beach or in the woods.
  She has a story for you tomorrow telling you more about her holiday.

So the winner of the Shabby Chic card from yesterday has been chosen at random and the name this week is you ...

Gloria Lamb

would you email me please
christina@card-making-magic.com
with your postal address and the card will be on its way to you.

You have 72 hours in which to claim the card 

More tomorrow ...

Hugs xx


June 23, 2017

Friday Freebie 24 - Shabby Chic

Hi Everybody,

Todays card is pink and green with lots of lace and sparkle added and the finished size is 5x7.

I have  used lots of Spellbinders to create this card and the background is Letterpressed with Distress Inks

There is a little verse that has been stamped and embossed and then coloured and surrounded with beautiful flowers

I still have many more shabby chic cards to give away over the next few weeks but if you would like this one then you need to leave me a comment at the end of the post

You will need to come back tomorrow to check if you have won and then you will have 72 hours in which to claim the card

More tomorrow ...

Hugs xx

June 22, 2017

Die Cutting Essentials Special Edition 5

Hi Everybody,

Another video for you this week and this one is to show you some of the things I made with 

This is on sale now in selected supermarkets and craft stores and WHSmiths, and the theme for this kit is an English Country Garden

There are also dies, stamps and an embossing folder, as well as free papers that can create a complete scene for you if you wish

This pretty card is created using some of the free papers that are in the kit and I fell in love with this floral one

There are more ideas for you to see in the video and I am sure that you can come up with many many more once you start to play with your Special Edition Kit 

More tomorrow ...

Hugs xx

June 21, 2017

Creative Stamping 45 - Sprinkled with Love

Hi Everybody,

This months Creative Stamping 45 has a fantastic A4 stamp set called Sprinkled with Love and this is perfect for all you Bake Off fans and the new series 

The featured designer this month is Apple Blossom Designs and one of their stamps would be ideal if you like to bake gifts to give or to sell.

It says "From the Kitchen Of ... " so what could be better than to advertise your own culinary skills on the products that you have made ... Perfect !!

This A4 size is such good value and the stamps are quality material that will last you a long time if you take care of them 

There is so much on this set and I had a lot of fun stamping and colouring and making the cards.

I did a lot of ink blending on my creations and I was happy with the results of all of them.

The video will show you how I created a really easy background that any body can do and it is so imperfect that there is nothing to worry about trying the technique for your self.

Here is the video ...

As always I hope you enjoy it and thank you for your lovely comments both here and on YouTube


More tomorrow ...

Hugs xx

June 20, 2017

Tuesday Tutorial - Fluer de Circle

Hi Everybody,

For todays card I have used one of the newer dies from Spellbinders. 
To create this look I have used a quality white card and then simply inked through the die with the card still in place to bring out the detail. This way I am sure that everything matches my desired colour scheme
Links to all the suppliers are now listed at the end of the blog post
Spellbinders Supplies:

  • S5-276 Fluer de Circle 
  • PL-001 Platinum Die Cutting Machine
Other Supplies:
  • Card from Papermill Direct
  • Distress Ink from Craft Stash (Lucky Clover)
  • Glitter from Glitter Magic
  • Dried flowers from Anna Marie Designs
  • Paper Flowers from Wold Orchid Crafts
  • Adhesives from Craft Stash
Instructions:

With die #3 from the Fluer de Circle cut one piece in white and ink through the die whilst the card is in place
Ink the solid centre with the same colour ink
Cut the filigree die in white and add the sentiment to the smaller centre part in the same colour ink
Create a card base to fit the Fluer de Circle
(All I did was fold in half an A4 white card and then cut to the size of the die cut panel)
Create a smaller layer in white and ink around the edges with the same colour as before
Create another smaller white panel and emboss this in any folder you have.
(Not a lot of this panel will be seen so you can skip this step if you prefer)
Flat glue the embossed panel on to the one with the inked edges 
Add pieces of foam pad under the filigree layer and add this to the card front making sure that when you add the sentiment panel the words will lie level
Use a double layer of foam under the sentiment 
I have used a mixture of dried flowers on the left and paper flowers on the right
Add the layers to the base card and dress with the flowers. I use a hot glue gun to keep everything in place. Dot with wet glue and sprinkle with glitter

More tomorrow ...

Hugs xx


June 19, 2017

Practical Publishing Club Create Box Kit 2

Hi Everybody,

It's time for the second Club Create Box Kit and with this kit I have made some very pretty cards. 

The video is available for you to view

There are some really lovely products in this kit and here  I made a feminine card for a mum.

Could be a Birthday or Mothers Day card and for the frame I used silver gilding flakes


The club brings you quality products every three months and each time they will be different.

It is an inexpensive way for you to build up your crafting goodies and if you wanted to join the club then the link is here ... Club Create

The video will show you what is in the kit and I hope you enjoy the cards that I made 

More tomorrow ...

Hugs xx

June 18, 2017

Ruby Update ...

Hello Everyone,

I am back from my holiday in Wales and what a lovely time I have had with my very best friend Dougal there to share it all with me.

Here we are settled down on our beds in the back of the car ready to set off.

It took us almost three hours but we had a couple of stops for us to spend a Penny and once we got there we had a lovely safe garden to play in.
Through the cottage window I could see some fluffy white things in the field next to us and I have never seen any of them before and of course I had to bark ... just to say hello.

But they ignored me and walked off making a really funny noise ... but they didn't bark back.

They didn't run around like Dougal and me either so I don't really want to play with them ... Dougal is much more fun and noisy like me

The next day we went to the beach and I just love swimming. Here we are in the sea but Dougal is not as brave as me.

I went in up to my shoulders and came out soaked ... and then I went back for more.

He is taller than me and doesn't seem to get as wet.

On the way back to the car I found a lovely clean pool and of course I went straight in there too before anybody could catch me

Once we got back to the car our mums put our Ruff & Tumble jackets on us to keep us warm and we slept on the way back to the cottage

It was lovely and warm in the sun and we have a big cushion to lie on and the doggy gate keeps us safe


There is a lot of room for both of us to spread out and we have had a lovely day out


I'll tell you more next time 

Bye for now from a tired and happy puppy

Hugs Ruby ....

June 17, 2017

Card Winner

Hi Everybody,

It's nice to be home again on this beautiful Saturday and the journey from Wales was pleasant. We have had a lovely time but I have lots of work to be getting down to next week. The first thing I need to do is announce the winner of this weeks Shabby Chic  card and the name that has been drawn for this one is you ....

CCM (Carmen)
Please email me your postal address to 
christina@card-making-magic.com
and the card will be on its way to you. 

Now that I am home I will be posting the card that you won last week also Patty B so if you could both let me know that you have them safely when they arrive

More tomorrow ...

Hugs xx

June 16, 2017

Friday Freebie 23 - Shabby Chic

Hi Everybody,

Pale shades of  browns and lemon are the colour scheme for this Shabby Chic Card and this was one of my favorites when I made this type of card.

I added lots of items to the front of this one including lace, flowers and sparkle as well as the little birdcage at the top of the card

Now if this is a card that you would like to have then all you need to do is leave me a comment at the end of the post.

I am happy to send the card to you wherever you are in the world and it doesn't matter if you have won one before

But you will need to come back and check if it is you who has won it and then email me your postal address so that I can get the card in the post for you

More tomorrow ...

Hugs xx

June 14, 2017

Simply Cards &Papercraft - Family Ties

Hi Everybody,

I have another free gift to tell you about today with my favorite magazine Simply Cards and Papercraft Issue 164. It will be on sale in selected supermarkets, craft stores and WHSmiths on the 
15 th June

Family Ties is a set Nesting Dolls dies and stamps.that will give you the chance to colour these beautiful dolls for your self 

There is also a paper download of sentiments and pre coloured dolls ... especially useful for those who don't enjoy colouring and they will help you to make cards quickly when you are in a hurry.

Simply cut out the sentiment that you want,  and then use the dies in the gift to cut out the dolls,  and add them to your card

The card to the right has been created in that way and all I have done is make the background with a stencil, add the dolls with foam pads and place the sentiment at the top ... done ... quick and easy !!

You can get the magazine or a subscription from More Mags

But for this card I took a lot more time and stamped the dolls and coloured them with Spectrum Noir pencils.

I created the background with stamps and Distress Inks.

The video will show you how I made the dolls open to reveal another one inside just as the real Nesting Dolls would be

It is not difficult to do but the card it produces is a fun one to give.

Here is the video for you 

Enjoy it and the magazine with it's wonderful free gift

More tomorrow ...

Hugs xx

June 13, 2017

Tuesday Tutorial - Framed Floral Card Front

Hi Everybody,

This pretty card is made with a complete card front die and that has to make life more simple when you need a card in a hurry.  I have used bright silver mirror card to create the front and that adds the sparkle that I was looking for
Spellbinders Supplies:
  • S6-117 Framed Floral Card Front
  • Platinum Die Cutting Machine
Other Supplies:
  • Distress Inks
  • Dries Clear clue
  • Foam pads
  • Flowers from Wild Orchid Crafts
  • Glitter from Glitter Magic
Instructions:
With the outer die of the Framed Floral die cut  three pieces of white stamping card and use two to create the base card
With the third piece and the Distress Inks blend all three colours on to the panel.
I have started at the top and used Salty Ocean, Cracked Pistachio and Shabby Shutters
It looks smoother one it is dry
With the Silver mirror card I have cut the two dies together to create two panels ... one for the card front and the other to give me extra leaves to tuck behind my flower
Add small piece of foam to the filigree panel so that they cannot be seen from the front and add to the blended panel
Stamp a sentiment of your choice on to some white card.
 ( I used two of the inks I had blended earlier to create a two tone effect for my words) 
Cut this out with the long solid solid strip.
Then cut another solid strip in the silver and divide this in two.
Arrange around the sentiment strip to leave a small border at the top and bottom
Add this sentiment strip to the filigree panel and trim as needed on each side.
Trimming from the back give a neater finish
Add all this to the base card
Trim some f the leaves from the other piece of mirror card and choose a flower to blend with your colour scheme
Arrange the leaves around your flower and dot the flower with glue and sprinkle with glitter
Dot each of the flower centres with a pearl

More tomorrow ...

Hugs xx