Beautiful Card Designs Made Easy

June 17, 2017

Card Winner

Hi Everybody,

It's nice to be home again on this beautiful Saturday and the journey from Wales was pleasant. We have had a lovely time but I have lots of work to be getting down to next week. The first thing I need to do is announce the winner of this weeks Shabby Chic  card and the name that has been drawn for this one is you ....

CCM (Carmen)
Please email me your postal address to 
christina@card-making-magic.com
and the card will be on its way to you. 

Now that I am home I will be posting the card that you won last week also Patty B so if you could both let me know that you have them safely when they arrive

More tomorrow ...

Hugs xx

June 16, 2017

Friday Freebie 23 - Shabby Chic

Hi Everybody,

Pale shades of  browns and lemon are the colour scheme for this Shabby Chic Card and this was one of my favorites when I made this type of card.

I added lots of items to the front of this one including lace, flowers and sparkle as well as the little birdcage at the top of the card

Now if this is a card that you would like to have then all you need to do is leave me a comment at the end of the post.

I am happy to send the card to you wherever you are in the world and it doesn't matter if you have won one before

But you will need to come back and check if it is you who has won it and then email me your postal address so that I can get the card in the post for you

More tomorrow ...

Hugs xx

June 14, 2017

Simply Cards &Papercraft - Family Ties

Hi Everybody,

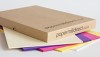
I have another free gift to tell you about today with my favorite magazine Simply Cards and Papercraft Issue 164. It will be on sale in selected supermarkets, craft stores and WHSmiths on the 
15 th June

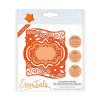
Family Ties is a set Nesting Dolls dies and stamps.that will give you the chance to colour these beautiful dolls for your self 

There is also a paper download of sentiments and pre coloured dolls ... especially useful for those who don't enjoy colouring and they will help you to make cards quickly when you are in a hurry.

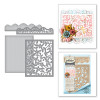
Simply cut out the sentiment that you want,  and then use the dies in the gift to cut out the dolls,  and add them to your card

The card to the right has been created in that way and all I have done is make the background with a stencil, add the dolls with foam pads and place the sentiment at the top ... done ... quick and easy !!

You can get the magazine or a subscription from More Mags

But for this card I took a lot more time and stamped the dolls and coloured them with Spectrum Noir pencils.

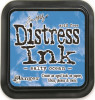
I created the background with stamps and Distress Inks.

The video will show you how I made the dolls open to reveal another one inside just as the real Nesting Dolls would be

It is not difficult to do but the card it produces is a fun one to give.

Here is the video for you 

Enjoy it and the magazine with it's wonderful free gift

More tomorrow ...

Hugs xx

June 13, 2017

Tuesday Tutorial - Framed Floral Card Front

Hi Everybody,

This pretty card is made with a complete card front die and that has to make life more simple when you need a card in a hurry.  I have used bright silver mirror card to create the front and that adds the sparkle that I was looking for
Spellbinders Supplies:
  • S6-117 Framed Floral Card Front
  • Platinum Die Cutting Machine
Other Supplies:
  • Distress Inks
  • Dries Clear clue
  • Foam pads
  • Flowers from Wild Orchid Crafts
  • Glitter from Glitter Magic
Instructions:
With the outer die of the Framed Floral die cut  three pieces of white stamping card and use two to create the base card
With the third piece and the Distress Inks blend all three colours on to the panel.
I have started at the top and used Salty Ocean, Cracked Pistachio and Shabby Shutters
It looks smoother one it is dry
With the Silver mirror card I have cut the two dies together to create two panels ... one for the card front and the other to give me extra leaves to tuck behind my flower
Add small piece of foam to the filigree panel so that they cannot be seen from the front and add to the blended panel
Stamp a sentiment of your choice on to some white card.
 ( I used two of the inks I had blended earlier to create a two tone effect for my words) 
Cut this out with the long solid solid strip.
Then cut another solid strip in the silver and divide this in two.
Arrange around the sentiment strip to leave a small border at the top and bottom
Add this sentiment strip to the filigree panel and trim as needed on each side.
Trimming from the back give a neater finish
Add all this to the base card
Trim some f the leaves from the other piece of mirror card and choose a flower to blend with your colour scheme
Arrange the leaves around your flower and dot the flower with glue and sprinkle with glitter
Dot each of the flower centres with a pearl

More tomorrow ...

Hugs xx 


June 12, 2017

Cassandras Garden from Tonic ...

Hi Everybody,

This pretty in pink card is using a beautiful Tonic die called Cassandras Garden and it is a very detailed and filigree die

It is a six piece die set and it can make three different designs for you just by placing the dies in different positions

I have simply cut and layered the dies up in pink and white card and added the lace at the bottom of the card

The Best Wishes is another Tonic die and altogether this was an easy card to make and the result is easy on the eye.

The addition of the lace at the bottom is just a little touch of luxury and as so little is used at any one time then a metre goes a long way.

More tomorrow ...

Hugs xx