Beautiful Card Designs Made Easy

April 19, 2017

Water Colour Wednesday - Bird Crazy

Hi Everybody,

I sat and water coloured this fun card in a moment of peace and I really enjoyed the process.

I used a number of techniques to get the background and I like the end result

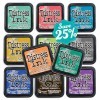
First I ink smooshed three shades of Distress Inks onto some water colour card and spritzed it with water to lift some of the colour.

I then inked through a stencil with a darker shade to get the circles pattern onto the card on the left side


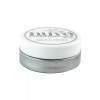
I added Tonic Studios Embellishment Mousse in silver through a different patterned stencil on the right side and allowed that to dry.

I cut this out with a stitched edge die and added it to a top folded white base card

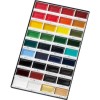
The bird, which is from the Tim Holtz Bird Crazy Collection,  was water coloured with Gansai Tambi and I hand drew the pattern onto the bird.  I added Glossy Accents to the eyes and then mounted him onto some foam pads.

The sentiment was heat embossed onto some parchment and then added to another circle in white. And finally I dotted some sequins around the card ... Cute or what ????

More tomorrow ...

Hugs xx


April 18, 2017

Tuesday Tutorial - Ornamental Doily

Hi Everybody,

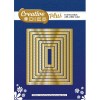
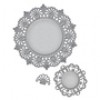
Doilies are always lovely when added to your cards and this beautiful die from Spellbinders will create the perfect one for you every time.  I have simply used white card and added it to some dramatic background paper and I am really pleased with the effect
 Spellbinders Supplies:

Other Supplies:
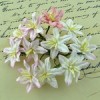
  • Flowers from Wild Orchid Crafts
  • Ribbon from Mei Flower
  • Glitter from Glitter Magic
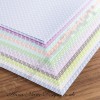
  • Card from Papermill Direct
  • Pink Dotty card from AnnaMarie Designs
Instructions:
With white card create a 15 cms base card and keep the fold at the top
With Pink Dotty card create a amt that is slightly smaller 
With plain pink card create a mat that is slightly smaller
With some dramatic card create another mat that is slightly smaller 
With both parts to the Ornamental Doily cut them in white card.
Stamp a sentiment onto the smaller piece and heat emboss in clear powder
Flat glue the Dotty card to the base and the dramatic card to the pink layer then wrap with ribbon.
Add foam pads to the back before adding these layers to the base layers
With foam pads under the Doily add this over the top of the ribbon
With foam pads under the sentiment layer add this to the Doily
The flowers I have used are from left to right:
Top row ... Roses in 10mm 15mm 20mm and two different colours
Chrysanthemum, Cosmos Daisy
Bottom row ... Rosebuds, Gypsophilia, Tulips 
Add to the right hand side of the card and dot with glue.
Sprinkle with Glitter for a sparkly effect 
Add the bow to the left of the Doily and add one small rose to the centre

More tomorrow ...

Hugs xx


April 16, 2017

Ruby Update ...

Hello Everyone,

I have lots to tell you about my adventures this week. I have been up to mischief again !!

Last weekend our mums took Dougal and I to Stanah which is a lovely walk by the side of the river Wyre

We had great fun  running around and we made friends with lots of other dogs too.  I was being very good ... until I spotted the chance to try swimming again 

I dived into the river and had a good paddle around and then I got out all by my self. I was a very soggy doggy and my mum said I didn't smell very nice but I really enjoyed myself.  And this time my mum didn't panic

 Once we got home I had to have a bath to make me clean and smell nice to be near and then I was brushed 

Here you can see all my long hair but I was hot in the sun and so this week I have had my hair cut at the groomers.

It was lovely and I was bathed again and then blow dried. I fidgeted a bit while I was having my hair trimmed

But once I was done and my coat was short and shiny my mum brought me home I sat on the bench outside my house and soaked up the sunshine

I have had a lovely time and I will tell you more of my adventures next week

More from my mum tomorrow 

Hugs xx

April 15, 2017

Todays Card Winner ...

Hi Everybody,

I am up bright and early today and off to see a show at the Winter Gardens this afternoon with the lovely Isabella and her Nana Vickie.  Isabella is now five and she is my Great Grand daughter and we are going to have some fun today.

But before I go and do the shopping I have done the draw for the Pink card from yesterday. The name drawn from the hat today is you ...

Marilyn Mathis

could you email me your postal address please to 
christina@card-making-magic.com
and the card will be on its way to you.

There may be a little delay as it is Easter Weekend here in the UK and the post will be slow so please let me know when it arrives with you.

More tomorrow ...

Hugs xx
April 14, 2017

Friday Freebie 014 - Beautiful Discovery

Hi Everybody,

This lovely pink card had all the things I love attached to it and the verse is just the correct one to send to a friend.

There is even a hat pin pushed into the organza bow

I have used it many times and this card was actually shown on Create and Craft when I demonstrated the dies on the TV

It can be yours if you would like it and all you have to do is leave me a comment at the end of the post.

I don't mind sending the card to wherever you live and it doesn't matter if you have won one before.

Just leave your comment and from those added a name will be drawn and the winner announced tomorrow.

When you get the card you will see that I have edged each side with pearls and the inside is lined too

Good luck everybody

More tomorrow ...

Hugs xx


April 13, 2017

New Collection - Videos ....

Hi Everybody,

There is a new collection of dies coming to Craft Stash and they are all based around the family theme.  They will help you to create beautiful cards for all family members and include extended families too.

There are five die and two stamp sets in the new  Silhouette Collection  and each die is in two parts. The link will take you direct to them  If you buy more than one set then the dies will mix and match with each other to create different outer patterns.

These are the videos ...

Silhouette Collection - Mother and Baby
This pretty die set could work equally as well for Aunts, Sisters, Friends, Nursery workers as well as other family members

Silhouette Father and Son  could also be two brothers or simply friends fishing together and the sentiments will help you to create the right one for the occasion

Silhouette Grandmother and Child  could also be Great Grandmother and I made the card in gold because all great grandmothers are golden

How do I know this ???? because I am one myself.

I created this next card with a Sun-ray Effect behind the Grandfather and Child as they walk away hand in hand

This is a lovely technique to re create and so I hope you will try it too.

I was really quite pleased with this card once it was finished.

The next one was the Family Silhouette  and this card has all my favorite features to it.

Flowers, Ribbons and Pearls and it's ...  Pink !!!

But in the video I have tried to show you how you can alter the look of this and indeed any of the die cuts with pens or pencils for another look

And it is really easy to do if you imagine the couple walking away from you.

That way there is no need to worry about adding features to them, and the results are quite pleasing on this too.

So there you have the links to all five videos and they will show you the dies and stamps that are available in this new Silhouette Collection

More tomorrow ...

Hugs xx

April 12, 2017

Beautiful Girl !!

Hi Everybody,

I am sharing this card today but it is not a water colour.

It was done quite some time ago with Spectrum Noir pens

The image is from Saturated Canary and I have had this for a long time too.

It is a digital image and stored on my PC for use whenever I need it but I don't know if it is still available.

This was one I really enjoyed colouring but I have improved since I did this one as I have had a lot more practise since then.

I will be back to water colouring though as that has become my favorite way to while away a couple of hours and relax at the same time

More tomorrow ...

Hugs xx

April 11, 2017

Tuesday Tutorial - Acanthus Leaf Card Front

Hi Everybody,

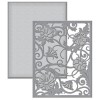
This pretty card is created with a relatively new die from Spellbinders and this is an A2 size. To make this one I have started with the card front itself and worked my way back to make the base at the end.  The overall effect is very pretty in shades of lilac and purple
Spellbinders Supplies:
Other Supplies:
With both dies from the Acanthus Leaf cut one panel in white and ink through the die before removing the card (I used Dusty Concord)
Add foam tape to the back of the die cut in areas that cannot be seen from the front
Add this to some text paper
Layer this panel onto some darker purple paper and leave a border around the edge the size you want it to be
The paper that I have used is  called Vintage Notes and is available in the Poundland Shops in the UK
There are 32 sheets of 200 gsm paper with some lovely designs 
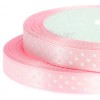
Wrap these with some white ribbon and secure on the back
Tie a small bow for the front
Stamp and heat emboss the sentiment of your choice
Now you can create the base card to add these layers too and make it the size that you want it to be
The flowers I have used are from left to right:
Heather, Anemone, Chrysanthemum, Tulips, Roses and Rosebuds
Add to the left of the card and tuck the sentiment in place with the flowers
Add the Dazzler to the bow
Dot the flowers with some glue and sprinkle with glitter
Line the inside of the card with the same papers for a really pretty look.

More tomorrow ...

Hugs xx