Beautiful Card Designs Made Easy

June 13, 2017

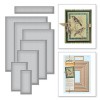
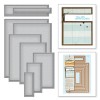
Tuesday Tutorial - Framed Floral Card Front

Hi Everybody,

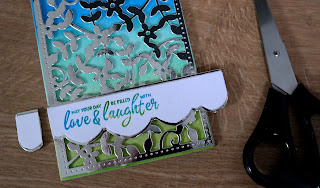
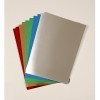
This pretty card is made with a complete card front die and that has to make life more simple when you need a card in a hurry.  I have used bright silver mirror card to create the front and that adds the sparkle that I was looking for
Spellbinders Supplies:
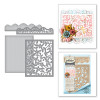
  • S6-117 Framed Floral Card Front
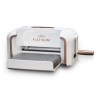
  • Platinum Die Cutting Machine
Other Supplies:
  • Distress Inks
  • Dries Clear clue
  • Foam pads
  • Flowers from Wild Orchid Crafts
  • Glitter from Glitter Magic
Instructions:
With the outer die of the Framed Floral die cut  three pieces of white stamping card and use two to create the base card
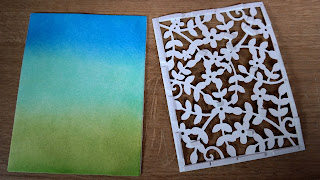
With the third piece and the Distress Inks blend all three colours on to the panel.
I have started at the top and used Salty Ocean, Cracked Pistachio and Shabby Shutters
It looks smoother one it is dry
With the Silver mirror card I have cut the two dies together to create two panels ... one for the card front and the other to give me extra leaves to tuck behind my flower
Add small piece of foam to the filigree panel so that they cannot be seen from the front and add to the blended panel
Stamp a sentiment of your choice on to some white card.
 ( I used two of the inks I had blended earlier to create a two tone effect for my words) 
Cut this out with the long solid solid strip.
Then cut another solid strip in the silver and divide this in two.
Arrange around the sentiment strip to leave a small border at the top and bottom
Add this sentiment strip to the filigree panel and trim as needed on each side.
Trimming from the back give a neater finish
Add all this to the base card
Trim some f the leaves from the other piece of mirror card and choose a flower to blend with your colour scheme
Arrange the leaves around your flower and dot the flower with glue and sprinkle with glitter
Dot each of the flower centres with a pearl

More tomorrow ...

Hugs xx 


June 12, 2017

Cassandras Garden from Tonic ...

Hi Everybody,

This pretty in pink card is using a beautiful Tonic die called Cassandras Garden and it is a very detailed and filigree die

It is a six piece die set and it can make three different designs for you just by placing the dies in different positions

I have simply cut and layered the dies up in pink and white card and added the lace at the bottom of the card

The Best Wishes is another Tonic die and altogether this was an easy card to make and the result is easy on the eye.

The addition of the lace at the bottom is just a little touch of luxury and as so little is used at any one time then a metre goes a long way.

More tomorrow ...

Hugs xx


June 11, 2017

Ruby Update

Hi Everyone,

S'mee  Ruby to tell you some of my latest adventures.

I have had fun with my best friend Dougal again and here he is with my favorite chewed up milk carton.

Do you think that if  I stare at him hard enough he will give it back to me??  Well maybe not !!

I also like socks and I steal them whenever I can even if they are in the laundry basket waiting to be pegged on to the line.
I run off with them so fast that no one can catch me and it's great fun.

And I don't care if they are on my mums feet.

She tries to stop me getting them but I tug so hard that they come straight off

I like to make her laugh and she calls me a little thief, but I give them back to her eventually ... and then steal them again

Dougal had an operation the other week so now neither of us can have puppies.

Here he is in his babygro so that he cant get to the wound and he was feeling really sorry for himself.

We couldn't play together for a week until he felt better but now he is back to his old self and just as naughty as me

He is a Cockapoo and he is really kind to me even though I bark and growl at him.

 But he knows that I love him and we have such fun together.

Here he is with a ball that his mum bought for him to play with.

It lasted about ten minutes as he pulled all the soft stuffing out of it and scattered it around the house.

He is trying to look innocent here but the stuffing is hanging from  his mouth so he didn't fool anybody.

We are going on our holidays soon and so my mum is trying to get all her work done before we go, and busy writing up blog posts so that they will go out regularly.


We will have lots more to tell you  from Wales and we hope the weather will be kind. See you again soon

Bye for now .... Ruby 


June 10, 2017

Card Winner

Hi Everybody,

Just a quick short post today to announce the winner of yesterday's Shabby Chic card as I am trying to do this on my IPad and in a bumpy car at the same time and I keep hitting the wrong key. It's taking me ages to type what I want to say .....

I have Ruby and Dougal settled in the back of the car and we are all off to Wales on our jolly holidays

It's been raining earlier but at the moment it is cloudy and fine. Griff is driving and has picked a number from the amount of comments and the name today is yours ....

PattyB
Please send me your postal address to
christina@card-making-magic
and the card will be on its way to you.

I won't be able to post it to you till next week so please be patient

More tomorrow ...

Hugs xx
June 09, 2017

Friday Freebie 22 - Shabby Chic

Hi Everybody,

Todays FF is a 6" square card that is decorated with a cameo and flowers.

There is lots of interest on this card that does not show up in the photograph

The sentiment says to To My Friend but if you wanted to use the card then you can always change this if you wished

It is in shades of pale pink and delicate green with lots of sparkle.

Would you like to have this card ??? Then all you need to do is leave me a comment at the end of the post and come back tomorrow to check

A name will be chosen at random so you will need to come back and check if it is YOU.

I may be a little late posting this one to you as I will be on holiday in Wales for a week ... but you will get it as soon as I get back home

More tomorrow ...

Hugs xx 


June 07, 2017

Enjoy the Journey ...

Hi Everybody,

The title of todays blog post is the stamp and die set that is free with this months Die Cutting Essentials 25

It consists of dies to create the car, foliage and flowers and stamps to compliment the items and help you to create your own scene

It was a lot of fun to play with and there are many more ideas within the magazine itself.  Plenty for you to get your teeth into.

It will be on sale on the 8th June so keep a look out for it on the shelves.

For this card I have teamed it with the Happy Hooves die set that was the free gift with Papercraft Essentials mag on the 1st June

All the free gifts with these magazines are quality items and they will help you to build up your "stash" quite quickly and give you a good read at the same time.

So grab a brew and settle down to watch the video featuring this kit and 


More tomorrow ...

Hugs xx

June 06, 2017

Tuesday Tutorial - Celebration Banners


Hi Everybody,

Todays card is a fun celebrations one that would suit childrens parties or events. 
Make it in bright and bold colours and get the kids to help create invitations for their own parties to give to their friends. 
 Really easy to do and with supervision from you they will be something that children can be proud to make and happy to give.
Spellbinders Supplies
  • SCD-004 Day Dreams 
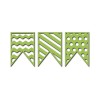
  • SCD-019 Banner Trio 
  • SCD-029 Celebrations Fun Sentiments
  • S5-131 A2 Matting Basics A
  • S5-132 A2 Matting Basics B
  • PL-001 Platinum Die Cutting Machine
Other Supplies.
  • Coloured Card
  • Fun Foam Sheets
Instructions:
With the largest rectangle die from the A set cut two panels in deep turquoise for the base card
With the largest die from the B set cut one panel in a paler turquoise for the layer
Wrap thie layer with turquoise twine for the banners to attach to and then add to the base card
Cut the banners in the colours of your choice and layer them onto another colour. 
Carefully cut around the outside edge to give you a two colour banner
Cut the sun and clouds and ink lightly to give some shading to the shapes
Cut Celebrate from white card and again from fun foam and stack together for dimension
Arrange the banners along the twine and add foam pads underneath to raise them up.
Arrange the clouds and sun as you like on the card
Add the sentiment to the top of the banners
Quick and easy 

More tomorrow ...

Hugs xx


June 05, 2017

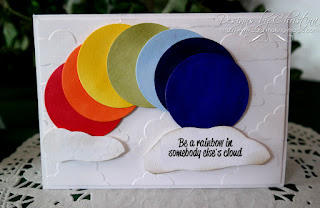
Circles Rainbow Card

Hi Everybody,

For todays card I have used just one circle die and cut seven of them.

Then I coloured them in with Spectrum Noir Pens in rainbow shades.

I added them to a cloud embossed panel with varying thicknesses of foam underneath some of them.

If you don't have a cloud die then roughly cut some by hand and add a little shading with some pale grey ink.

I added them in an arc to the embossed panel and placed a cloud at each end. The sentiment is from Crafters Companion and it was stamped and heat embossed on to the lower cloud

Quick and easy to do with just a few circles and could be for any occasion ... male or female, young or old.

More tomorrow ...

Hugs xx


June 03, 2017

Card Winner

Hi Everybody,

It's a lovely day here this morning so I am hoping it will stick around for some time. Can you believe that half the year has gone already. I have lots of new and exciting things coming up for the rest of the year and I am really looking forward to it.

Busy day today and I have lots of filming to do in readiness for my summer break that is coming up soon.  I will be scheduling posts to go out while I am away and my "Give Aways" will be there as usual.

But today Winner has been chosen at random and the name this week is you ...
Terrie ...
Would you email me with your postal address please to 
christina@card-making-magic.com
and the card will be on its way to you

More tomorrow ...

Hugs xx
June 02, 2017

Friday Freebie 21 - Shabby Chic

Hi Everybody,

Todays FF is another of the Shabby Chic ones that seem to be going so well.

And this one is really pretty in the hand as the picture does not show the full extent of the sparkle in this card

There is a lot going on and I am sure that you will like it once you have it with you.

So if this is a card that you would like to have then all you need to do is leave me a comment at the end of the post.

One name will be chosen at random and added to tomorrows blog post.

And as I always say .... PLEASE come back and check if it is you.

The name will also be added to the Winners Page in the sidebar to your left.

I cannot chase you up because until you send me your details as the winner I don't know where you are.

I am happy to send the card to you wherever you live ... YOU just need to claim it if yours is the name shown

More tomorrow ...

Hugs xx