Beautiful Card Designs Made Easy

Showing posts with label Spellbinders CHA Sneak Peak. Show all posts

February 24, 2015

Tuesday Tutorial - Gold Majesty Circles

Hi Everybody,

When Spellbinders introduced the concept of the Imperial Gold dies it was a completely new idea to the world of die cutting.

With these dies you had not only the ability to cut and emboss but now you could also deboss the design into the card for a really special look.

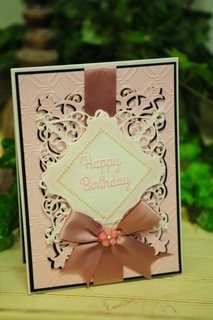
For this card I have used mirror card and placed a matching hatpin into the bow.

For the base  cut two #7  5x7 Matting Basics A   in white (#1 being the smallest)

In the color f your choice cut 1  #7 5x7 Matting Basics B  and between this layer and the base card I hand cut another really thin edged layer in mirror card

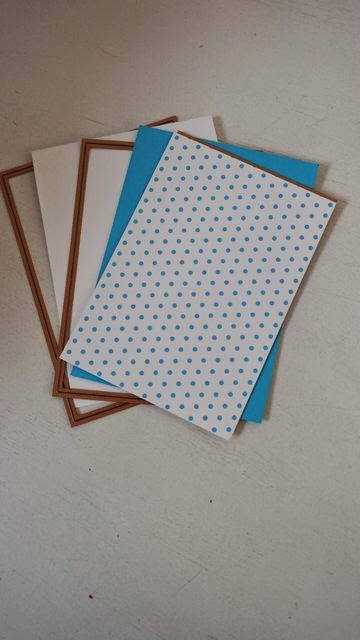
In a patterned card cut one #6 5x7 Matting Basics A ... I used the spotty card

This video  tutorial explains why I like to make my cards in  this particular way ...  Create a Hinged Card


With  Gold Majesty Circles  #6  cut  and emboss the base layer from Mirror  card

Then  place the dies #4  #5  #6  together on your card and cut and emboss.

You can use  a magnetic sheet to hold these dies in place as you need to make sure that they  will not slip and cross each other or you will ruin the cutting edge

These three will create the frame shown and will give you a lovely deep impression in your card

Place foam pads on the wrong side of this frame and use the wider areas so that they wont be seen.

Add this frame to the mirror card base you cut previously
Layer up the mirror card, colored card and patterned card and use foam pads between the bottom layer and the base card.

Now before I add mine I wrapped ribbon around them so that it will be hidden inside the layers.

I added foam tape to the shaped layers and then added them to my base.

I inked the edges of a sentiment that has been cut into a plain circle and then added it to a Scalloped circle.

I used foam pads behind this and placed into the centre aperture onto the mirror card.

Then with a neatly tied bow with a Hatpin and some gemstones around the edge of the frame I think this is a really pretty card.

The large dazzler has been added to the knot and some flowers are my finishing touch,

More tomorrow ...

Hugs xx


December 04, 2014

Card Class

Hi Everybody,

In the last card class my ladies tried their hand at creating a more masculine card with the unusual technique shown

If this is a new idea to you then maybe you would like to watch a tutorial on Faux Leather Effect

The two different color schemes make the card look totally different and you can make it suit your recipient whether male or female

It is very easy to do and I hope you will enjoy the short video  ... and I am sure that you will agree that both Mary and Brenda have made lovely cards on this their first attempt.

The Spellbinders Sneak Peak and Give Away is now in its fourth day

Click this link  HERE   for the form that you need to fill in and submit to be in with a chance

Visit the other Designer Team blogs too for even more chances to win and there are other sets on offer... and at the end of the week there will be a grand prize fro someone to win.

But remember that these dies are  being newly launched at the CHA shows in California and  they will be available for you to buy  next spring 2015

The link is open for 48 hours and is the only way to enter.  Good Luck

Thank you for all the comments on my practise run with the camera. I had some really good tips and advice from many of you and I will take each and every one on board and work with it.  Many of you preferred the third photo of the cards and that was my favorite one as well.

It was only a practise run and my first attempt with my new camera and I do intend to use other staging props and not just the ones shown.  So hopefully my pictures will get better

 All the advice given was well received by me and in the manner it was intended

More tomorrow ...

Hugs xx


December 01, 2014

Spellbinders Winter CHA 2015 Sneak Peak and Give Away -Day 1


Welcome to the first day of the Spellbinders Winter CHA 2015 Sneak Peak and my first attempt at showcasing for this wonderful team

The beautiful template that I am featuring is the  Imperial Square  and it is one of many being released at the Craft and Hobby Association for 2015  You will have the chance to win this at the bottom of the page. The  sentiment has been cut in silver from Sentiments One

My first project was created as a beautiful silver and white Congratulations Card that would be ideal for wedding day and the die is a pleasure to work with


 Supply List

Cross Promotional Partners
Other Products 
  • White Hammered card
  • Silver Mirror Card
  • White Organza Ribbon
  • Heart hatpins
  • Foam tape
Instructions

Cut two Grand Square #7 (the smallest is #1) to create the base and join together with a hinge

Cut two Grand Square #6 from white cardstock and emboss both peices keeping one for later

Hand cut a silver layer to fit in between these two layers to form the base.

Mat and layer the embossed white and silver card together


Cut and Emboss the entire Imperial Square die set with white card stock

Using foam tape layer this with a slightly larger piece of silver card

From the four smallest dies cut each one four times in silver

Then onto the silver and white embossed layers add the four largest  ones into each of the corners

Next take your silver and filigree layer and add it to this panels making sure it is centred and level

With the four smaller corners add them to a white centre shape securing with glue on the back.

Add this panel to the card front with foam tape for dimension.

Wrap all these layers with white ribbon and they can now be added to the base layer and the ribbon workings will be hidden in between these layer.

Cut Congratulations from Sentiments One and add it to white card


Using the centre part of the Imperial Square die set cut the word panel and then trim to fit the centre of your card.

Take the second piece of white embossed card and add it to the inside of the card to line it

I have also cut another Imperial Square and trimmed it down to fit as a pocket inside the card

Glue three sides leaving the top part open and into this slip a label shape that can be used as a greeting or for your signature.


A Designers Note...

When you are adding words to your label a good tip is to use a ruler and the grid lines on your cutting mat to help you get them straight and line them up equally on either side of your  card

And here is a second card using the same die in another way and this will be featured in a later post complete with instructions on how to make it

For you chance to win click  HERE   fill out the entry form and submit ... Good Luck   (The link is only open for 48 hours) 
(This link is now closed)

For the Official Contest Rules click HERE

Questions ?   Contest Questions    (No entries will be accepted at this email address)

To see other projects and for  more chances to win please visit  Debbie Olson at Thinking Inking  to start this brand new "Give Away"


More tomorrow ...

Hugs xx