Beautiful Card Designs Made Easy

November 21, 2015

Todays Card Winner ...

Hi Everybody,

Do you have any snow in your area today? We don't here .. not a flake though it is cold.  But I have to say the sun is shining and it looks very fresh.  I am going to play with Isabella later today for a few hours and really looking forward to it.

The draw for the peach and white card has been done and this weeks name is ...

Sue MacFall
so if you could email me please at
christina@card-making-magic.com
I will post the card off to you straight away.
I hope you will like it when it arrives and please let me know that you have the card.

Have a lovely weekend everybody 

More tomorrow ...

Hugs xx

November 20, 2015

Friday Freebie 094

Hi Everybody,

Todays card is created in Peach and White with some pretty matching organza ribbon from Mei Flower

The peach background is the large die Heirloom Rectangle that I have cut down to create the square

All the layers have been added with foam in between to give height and dimension to the card

The sentiment is from Crafters Companion and I have stamped it in brown and heat embossed it with clear powder, then added it to a peach mat

The embossing folder is sadly no longer available to buy,  but you can use any that you have in your own collection to give added texture to the background layer

If this is a card that you would like to win then all you need to do is leave me a comment at the bottom of the post and then come back tomorrow to see if your name has been chosen as the winner.

More tomorrow ...

Hugs xx

November 19, 2015

Thank You Cards ...

Hi Everybody,

Here is an idea for a really inexpensive boxed gift set to give to some one and all it will cost you is a bit of ink, some card and a little time.

But think of the joy that some one will get when you give them this  as a gift for any occasion.

I made them in one batch session and they are all alike apart from the colours.

I used Distress Inks and the flower stamp from Spellbinders is called  My Friend

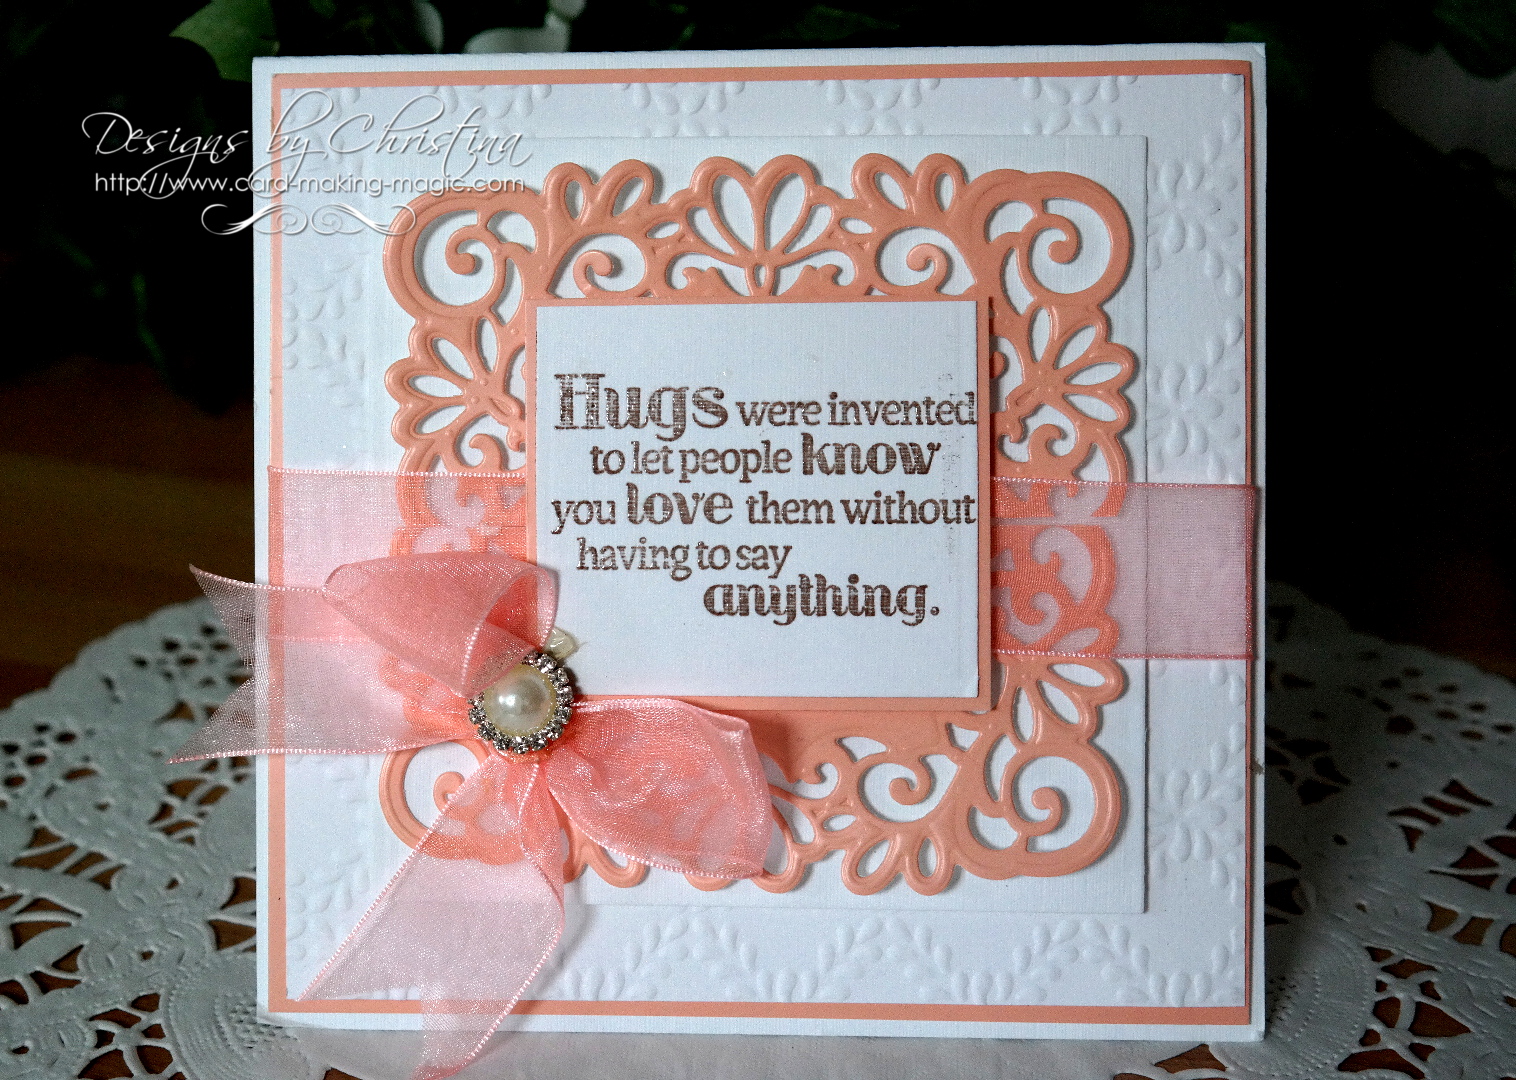
The sentiment is from My Favorite Things  and  there are four stamps on the sheet called Grand Greetings 

I have stamped them in Black and then  heat embossed it with clear powder for a shiny effect  ... and this is less messy than embossing with black powder.

I used a new tool called the MISTI   ... Most Incredible Stamping Tool Invented  ... and it is a fabulous new toy.

I am in the process of putting together some video tutorials on the new Misti to show you some of the things you can do with this tool.

It is not cheap and it flies out of suppliers the minute it is back in stock so you need to be quick if you want one.

At the moment Oyster Stamps are taking pre orders for deliveries of the  MISTI   later this month so click the link to go to their website and take a look for yourself

I have made a box to hold the cards and included the envelopes to go with them and you could even include the stamps too for your recipient to send the cards to others

 I think this is a very useful as well as pretty gift to give

More tomorrow ...

Hugs xx

November 18, 2015

2-4-1 Christmas Card (Video Tutorial)

Hi Everybody,

Todays card is a little special and will take some measuring from you to get it centred

It is well worth the effort if you do and you will get two cards for one by using the positive and  negative of the die cut

Let the video show you how I did this and then maybe you would like to try it for yourself.


This is the second card and it is really pretty with the diamanté studded around it and I am really pleased with the way both have turned out.

Make them in different colours and send them to your special friends this year.  I used Faded Jeans Distress Inks as it blends so well

The letters I have used are from Donnas' Alphas from Spellbinders and I have had this set for a long time.

I am trying to re use the older dies as I know that many of you may have them and if you do then we may as well make use of them.

The background to the second card is Grate Effect  and it makes the loveliest back drop to the words.

You can use any alphabets  that you have as they will work using the same method.

These two are created using Spellbinders Font One Uppercase and it is a finer font than the other.

The colour is Salty Ocean and I have used a Splodge Mat  to help me blend my inks ... and this company now do many stencils that you can blend with
This the same die set and the card on the left has been made into a shaker card.

The stamp set was free with Simply Cards and Papercrafts  and it has proved to be really useful 

So there you have some pretty ideas to make some of your cards and with an alphabet you can add any name or occasion that you wish.

More tomorrow ...

Hugs xx


November 17, 2015

Tuesday Tutorial - One Word Wonder

Hi Everybody,

Todays card is just a little bit of fun and shows you that you don't need a lot of dies to be creative. This one uses just one word but the effect is quite good and the sentiment says it all.

Spellbinders Supplies:
Other Supplies:
  • Distress Inks - Salty Ocean, Victorian Velvet, Milled Lavender
  • Black/ White Card from Papermill Direct
  • Baked Ikea Dots
Instructions:
Cut a panel of smooth white card to about 4 1/4 x 5 1/2" and create your blended effect with Blenders to get a pretty finish.   Other colors will give you another look so use any Distress Inks that are in your "Stash"
With the die "Hello" from the phrases set cut it as many times as you need in white to fill the front of your inked panel. 
I added mine at an angle and cut  up the words as I needed to fill the gaps along the sides. When you are happy with the position glue them in place and trim off the overhang to neaten the edges
With the same die cut the word again in black card and I have also cut it in craft foam and glued the two together for a thicker look
Stamp any appropriate sentiment onto black card and heat emboss in white.
Trim the end into a little banner shape
Add your word panel to some black card and leave the tiniest of borders around the edge. Add it to a white  Hinged Style  base card
Add in the banner,  with foam pads underneath to raise it up, where you want it to sit on your card and  glue in place the black Hello over one of the white ones
Highlight with some black dots for a really simple card.

More tomorrow ...

Hugs xx