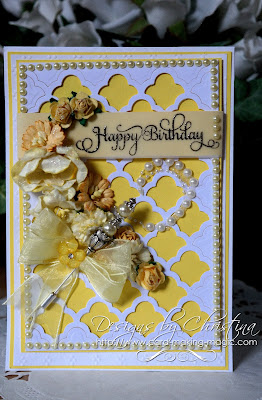
Todays pretty card is once again using an older die that some of you may already have in your crafting "Stash" I know that many of you have said that you really appreciate tutorials with older Spellbinders dies as we sometimes forget that we have them stuffed away in a cupboard.
Well it's time to get them out again and put them back to work making you some lovely cards. After all dies from any company are a considered purchase and we want to get as much out of them as we can ... Right ?? Right !!
- S6-001 5x7 Matting Basics A
- S6-002 5x7 Matting Basics B
- Bracket Borders One (Retired)
Other Supplies:
- Flowers from Wild Orchid Crafts
- Ribbon from Mei Flower
- Glitter from Glitter Magic
- Pearls from Want2Scrap
- Hand made Hat Pin (by me)
- Tied Together Embossing folder
- Card from Papermill Direct
Instructions:
With die #7 Matting Basics A cut two panels in white to Create a hinged card
With die #7 Matting Basics B Cut one layer in pink
With die #6 Matting Basics A cut another panel in white
(Please remember that #1 is always the smallest die)
With the smaller white panel choose one of the cutting edges and one patterns from the Border dies.
Add them to your card with the cutting edge facing down and tape in place to prevent them crossing over each other.
I placed mine about two thirds of the way down the card. This will give you two pieces once the die is removed
There is no need to emboss with the die as you are going to place these into a lattice folder and dry emboss them
Once embossed lay them onto your pink layer and decide on the sentiment. Stamp and heat emboss this in white leaving enough of a gap in between the two fancy edge to be able to read it
Trim down these two panels so that a small border of the pink card shows around the edge
Add foam tape to the back of both pieces and wrap the top and bottom panels with some ribbon.
Secure the ribbon at the back and then add both panels to the pink layer and then add all to the base card
From the ribbon make some small bows to be added to the top and bottom.
Arrange the flowers as you would like them to cross the channel you have created and then finally add a small pearl or gemstone to each of the cross sections in the lattice pattern
Add larger pearls to the knot in the bow
The particular die that I have used is now retired from Spellbinders website but if you don't have one and like the look then you could always go for the Scalloped Borders Three which has a very similar shape
More tomorrow...
Hugs xx


