Beautiful Card Designs Made Easy

March 12, 2016

Card Winner is ...

Hi Everybody,

Bit of a change with the weather today and although not too cold it is dull.   We really need some sunshine now to brighten up the days and some warmth here in the UK.  Still I hope you all have a good weekend wherever you are in the world.

The draw for the card was done this morning and a name has been chosen to win both of the yellow cards from yesterday.  The winner is ...

Sue MacFall 
please would you email me
christina@card-making-magic.com
and the cards will be on their way to to you straight away.
Could you let me know when they arrive with you and I hope you will like them  both

More tomorrow ...

Hugs xx


March 11, 2016

Friday Freebie 109

Hi Everybody,

Two more cards on offer today still with the Brusho Theme from the last few weeks.

These two are using the yellow crystals and I have used both negative and positive pieces for the cards.

The effect is quite vibrant but the cards can be used for any occasion.


If you would like to win BOTH of these then all you need to do is leave me a comment at the bottom of the page.

The winner will be given in tomorrows blog post so please come back and check if it is you if you add your name.

I have used the Classic Heart and Scalloped Classic Heart from Spellbinders for these cards as they are designed to play nicely together

More tomorrow...

Hugs xx


March 10, 2016

Creating A Stencil from die cuts ...

Hi Every body,

Over on my  YouTube  channel today you will find the latest video from me and this one shows you how to use your die cuts as stencils with some embossing paste

The card to the right is the one I go on and complete in the video and add in the lovely Wild Orchid Crafts flowers around the oval shape

I love to make cards like these and I enjoy adding in all the finery to make it truly feminine with ribbons and pearls

I bought the embossing paste from the Craft show a few weeks ago but you can buy it in most craft shops or even on line if you don't have shops close by

It was not expensive and a little goes a long way.

I also made a second background but did not complete the full card so I thought I would show it to you here so that you can see how it looks.

I used Distress Inks to colour the paste and it is really bright and shiny

I have wrapped white ribbon around the layers and then added my water colored topper onto a  Scalloped Oval  from Spellbinders

I like both of these cards but they are for completely different generations.

I had fun making them and I hope you like the results.

Please join my YouTube channel to be sure you never miss a video from me and if you enjoyed the tutorial then please give it the thumbs up to let YT know that you like this type of video


Just a Reminder of  new links to click  ...

  • New Cards to Inspire  (Part 6)  video added ... top left of the page. 
  • A new tutorial added to the Tuesday Tutorial page each week  
  • A tutorial is added to Spellbinders Blog  - latest one yesterday - Emojis Hello Card 
  • New Resource Page for you to access all the pretty things I use on my cards
  • New video tutorial added every Thursday  to YouTube

More tomorrow ...

Hugs xx


March 09, 2016

Water Color Wednesday - Splodge background

Hi Everybody,

Nothing could be more simple than this card which is just water splodges with paint added in and allowed to run

I used craft foam at the back which helped to flatten the card out again and then backed it onto some deep red card.

The stars are cut from the same card and added to the front with foam pads beneath.

I used two of the Pierced Stars  together to create the frame

The sentiment is from the   Many Words    stamp set from Spellbinders  and I finished it off with  the shiny chrome dots from Want2Scrap

Simple, easy and would suit the birthday of a young man ... just leave out the pink !!

More tomorrow ...

Hugs xx 

March 08, 2016

Tuesday Tutorial - Fleur de Elegance with Diamond Essence

Hi Everybody,

Todays card uses several sets of dies that will all play well together and all are still available to purchase. To make this card a little different I have offset the main focal point and add in my floral display along the other side.

The sunny yellow color is there to remind us that spring is on the way and we can look forward to warmer days and being outside more.
 Spellbinders Supplies:

Other Supplies:
Using die #7 from Matting Baiscs A cut two panels and  create a hinged card  and lay to one side
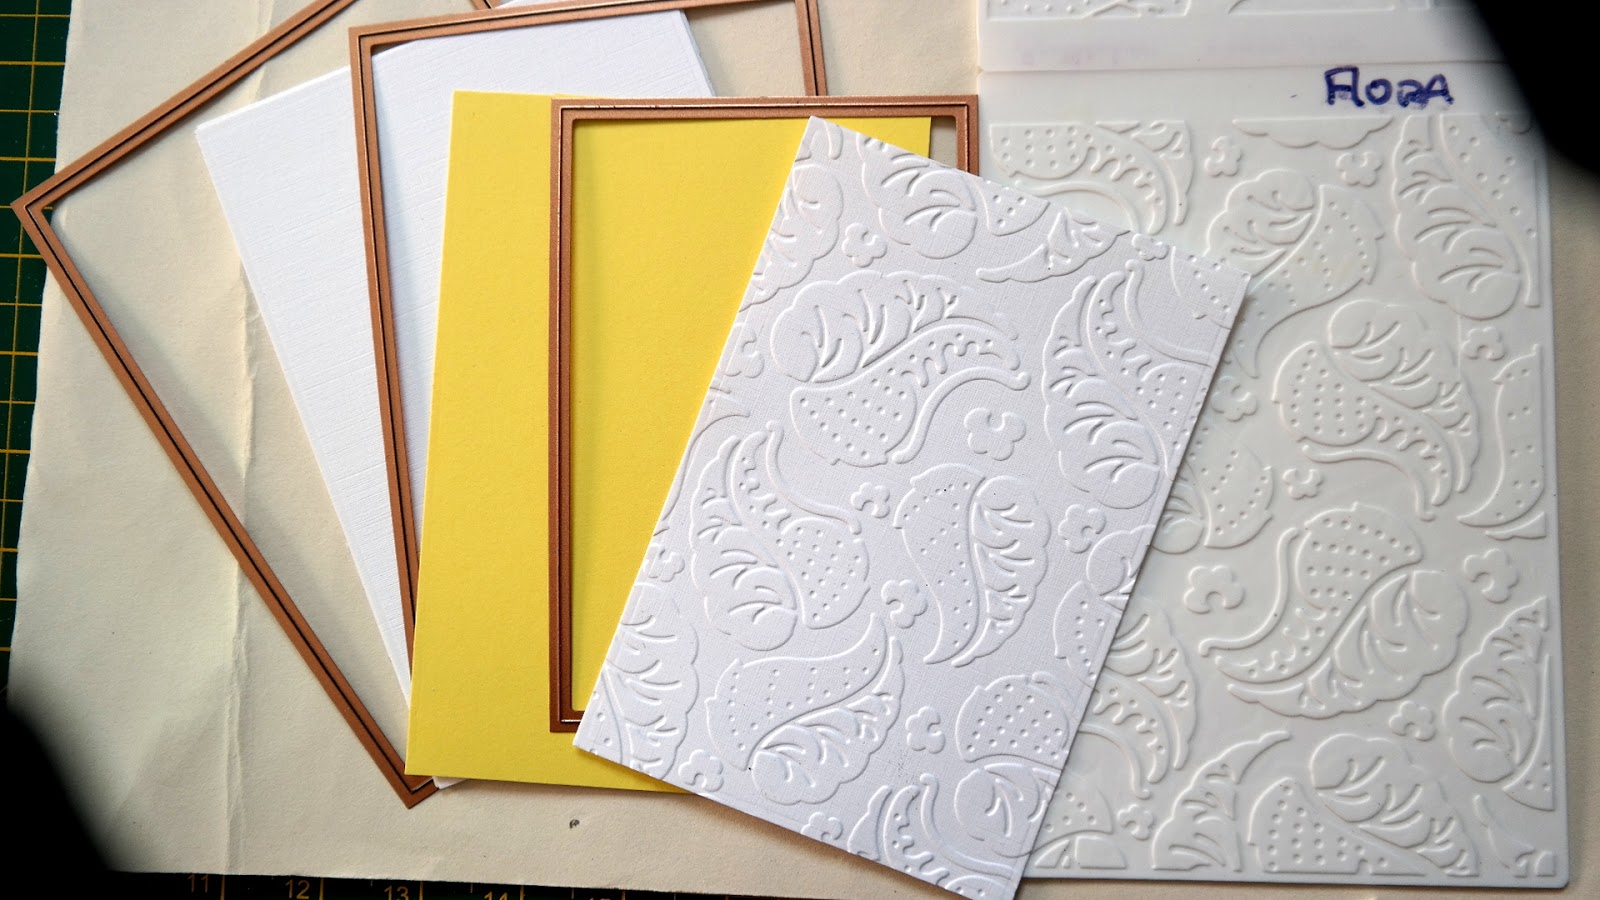
Using die 7 from Matting Basics B cut another panel in yellow
With die #6 from Matting Basics A cut another white panel and emboss using one side of the folder.
(Please member that die #1 is always the smallest)
Glue the white embossed panel flat onto the yellow one
With die  #3 from Fleur de Elegance cut one panel in yellow
With die #2 cut one panel in white 
Add foam tape to the back of each of these shapes
Place the yellow panel onto the embossed layer from the previous step
Offset them over to the left and then trim the left edge flush with the side of the card
Wrap the ribbon and lace around these layers
With die #4 from Diamond Essence cut one panel in white and emboss it with the other pattern in the folder and add foam tape to the back
Layer this onto the shapes and lace from the previous step
Cut the chosen words from yellow craft foam
Leave the top white shape in tact and add the words to the top of it
Dress the card with beautiful flowers and sprinkle them with glitter
Add little yellow pearls along the top and bottom right hand edges.
The foam tape raises the layers to add interest to the card

Pretty Card for any occasion

More tomorrow ...

Hugs xx