Beautiful Card Designs Made Easy

November 04, 2016

Friday Freebie 143

Hi Everybody,

My apologies for the poor quality of the photo but don't let that out you off because the card is really pretty.

It is in shades of pale pink and lemon teamed with white and I have added a hatpin into the floral display.

The finished size is A2 and I have used the Labels Eight for the layers.

Do you think you would like this card? Well if you do all you need to do is leave me a comment at the end of the post

From those comments a name will be chosen and announced in the blog post tomorrow.  So you will need to come back and see if you are the winner

You will have till Wednesday to claim the card and then it will be gone to someone else.

Good luck to all and I am happy to send the card wherever you are in the world.  And boy have my cards gone to some far away places over the years.

More tomorrow ...

Hugs xx


November 03, 2016

Magazine Freebies ...

Hi Everybody,

This week I have been really busy getting the vidoes to show you the new "Freebies" that are with this months magazines. There are some excellent choices for you and if you subscribe then you will never miss your favorite one as it will be delivered to your door .

So here they are ...

Simply Cards and Papercrafts 156     is a stamp set,/stencil and a snow flake die that you will be able make some really pretty cards with for your Christmas cards this year. The video will give you some more ideas


Creative Stamping 36 - Winter Wonderland   This is a large A4 stamp set with some lovely images and sentiments on so you can be really creative with this one

Mix and match them to your hearts content and remember that it is not just for Christmas

Use it for winter birthdays or anniversaries and some of the images are really good for male cards.

I am sure that you will think of lots of ways to put this fabulous free gift to good use

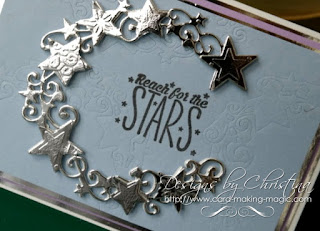
Die Cutting Essentials 17 - Stardust

This is a die set that I really enjoyed working with and there are some really useful sentiments to go with this design

This is prefect for using with any mirror card that you may have in your crafting goodies

There are a lot things that you can do with this ... turn it round to different directions. Cut it up and decoupage the stars.

Stack it up to make it really strong and this is something that I show you in the video.

I hope you will enjoy them all and also any of the magazines that you may already be buying

More tomorrow ...

Hugs xx 

November 02, 2016

Water Colour Wednesday - Botanical Flutters

Hi Everybody,

Todays card is created with Distress Inks and water and the result is quite a pretty card.

I created a stamp with craft foam from the Hummingbird die that is in the  Botanical Flutters   from Spellbinders

I stamped it several times over the card with Versamark and used white embossing powder on them

Then with a blending tool I used Twisted Citron and Stormy Sky over the top and blended it well. The white birds show through once this is done.

Spritz with clean water and blot off again for a more mottled look

The Hummingbird I have cut twice in white card and then a top layer in silver and glued them all together for dimension

The base card is white and on top of that I have added in a sun-ray panel and I will cover that in another video

So lyricist speaking not water colours but done with water based inks so I am cheating a little here ... but still a good card to send to some one on their birthday.

More tomorrow ...

Hugs xx


November 01, 2016

Tuesday Tutorial - Labels Forty

Hi Everybody,

This is a colour that I don't use very much but each time I do I like the card and say to my self ... "Use this more often...." So here we have a 5x7 sized card in pale lemon and white and it is really easy to create.
Spellbinders Supplies:
Other Supplies:
Instructions:
With die #7 from Matting Basics A cut two pieces in white and create a base card. Leave to one side
With #7 from Matting Basics B cut another layer in yellow
With #6 from Matting Basics A cut one more layer in white and emboss this piece and add these two layers together
(Please remember that die #1 is always the smallest)
With dies #4 and =5 from Labels Forty cut the layers in yellow
With dies #3 and #4 cut these layers in white and emboss with a different pattern 
Layer each size onto the corresponding plain layer with foam pads between 
 and add them all together on top of the larger layers from the previous step
Wrap all layers with ribbon and add a double bow
Add them all to the base card 
Glue the pretty centre piece onto the knot in the bow

More tomorrow ...

Hugs xx

October 31, 2016

With Love in Pink ...

Hi Everybody,

These pretty papers are from the Blissful Paper Pads from AnnaMarie Designs 

This is obviously the pink but there are other colours for you to choose from and sentiment tags to match also

I have used Circular dies to create an aperture and then filled the gap with Floral Trellis

Each of the petal shapes has been dotted with tiny pink pearl from Want2Scrap

The flowers are a mixture of stamped images, die cut flowers and leaves from the  Quite Contrary stamp and die set  by Spellbinders with paper flowers from Wild Orchid Crafts

More tomorrow ...

Hugs xx