Beautiful Card Designs Made Easy

May 15, 2017

Shaving Foam Background

Hi Everybody,

I have been playing with the shaving foam again and this is the card I came up with

I used two shades of blue in some really cheap shaving foam and I created several panels from the mix.

This one was my favorite and so on top of it I stamped the butterfly in black and heat embossed it with clear powder

The butterfly was a magazine freebie and I have used it several times

I coloured the wings with my pencils and then out came the glue pen and I added glitter to them

A few sequins dotted here and there and this makes a really pretty card in to time at all.

More tomorrow ...

Hugs xx

May 13, 2017

Shabby Chic Winner ...

Hi Everybody,

Bit of a change in the weather and it's been raining overnight. So it will be wellies time to dog walk later today. But the draw for the first shabby chic card on offer has been done and the winner is ...

Toni Selden
Please can you email me
christina@card-making-magic.com
with your postal address
and the card will be on its way to you

I hope you will like it and please let me know that you have it safe

More tomorrow...

Hugs xx

May 12, 2017

Friday Freebie 18 - Shabby Chic

Hi Everybody,

As promised this is the start of the Shabby Chic cards and this is no:1 that is on offer. This is one of my favorites and I love the soft lilac and lemon colour scheme to it and I really enjoyed making this one.
The flowers are all from Wild Orchid Crafts and there are lots of them. 
The cameo and the lace are also from WOC and the card is a truly feminine creation

So if you would like to win this card then all you need to do is leave me a comment at the end of the blog post and from those comments a name will be drawn at random.  I will announce the winner in tomorrows blog post  and then you will have 72 hours to claim it

More tomorrow ...

Hugs xx


May 10, 2017

Creative Stamping 43 - Sea View Collection.

Hi Everybody,

Tomorrow sees the sale of the new  Creative Stamping 43   magazine and with it is a fabulous collection of stamps. The link will take you to the order page

Each month a different designer will be featured and this month it is Sheena Douglass with the Mermaid and the Message in a Bottle 
I have kept all my cards to sea and sand water colours with Gansai Tambi and had a lot of fun creating them. 

In the video ... 
 I give you some ideas of how I used this set and show another way using one stamp as a background

They will make cards for any age group ... male or female and there are some lovely sentiments in the collection also

So get out your colours and have a little play time for yourself as you create some really lovely cards.

And look out for Creative Stamping next month when another designer will be featured 

More tomorrow ...

Hugs xx

May 09, 2017

Tuesday Tutorial - Floral Swirls Strip

Hi Everybody,

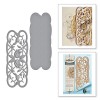
Todays card is using one of the strip dies from Spellbinders and this die comes in two parts to make it a very versatile addition to your collection.
 I have used it in two different ways to create the beautiful backdrop for my flowers.
 I have added in all the links at the bottom of the page
Spellbinders Supplies:
  • S4-659 Floral Swirls Strip
  • S6-001 5x7 Matting Basics A
  • S6-002 5x7 Matting Basics B
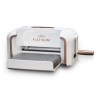
  • PL-001 Platinum Die cutting machine
Other Supplies:
  • Card from Papermill Direct
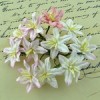
  • Flowers from Wild Orchid Crafts
  • Glitter from Glitter Magic
  • Patterned Card from the £££Shop
  • Cosmic Shimmer Glue from Craft Stash
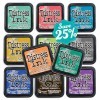
  • Distress Inks from Craft Stash
Instructions:
With die #7 from Matting Basics A cut two panels in white to create the base card
With die #7 from Matting Basics B cut another layer in patterned card
(Please remember that die #1 is always the smallest)
With die #6 from Matting Baiscs A cut another panel in white
Place the centre part of the Floral Swirls Strip onto one side of the card and tape in place ... die cut
Then move it over to the other side of the card and repeat the process
With the outer part of the die cut a panel in patterned paper.
Then with the two dies together cut another panel in white
Ink through this piece before removing it from the die. (I used Dusty Concord & Bundled Sage)
Flat glue the patterned paper to the base card
Add foam pads in strategic places to the filigree panels so that they cannot be seen from the front
Add this to the base layers
With foam pads between these two layer add the filigree to the solid layer and add these two to the centre of the card front.

And this is what it will look like once you have done those steps, and if you wanted to leave it at this stage it is a lovely card and not too fussy for the men in your life.
But I wanted to dress mine up a little more and add in the flowers that I like to use...
From left to right:
Tulips in two different shades of purple ... Rosebuds in two shades 
Roses in 10mm and 20mm ... Lily and one Anemone
Stamp the sentiment onto white card and layered it onto left over piece of patterned paper
Arrange the flowers as you like them and tuck the sentiment into the display
Dot with glue and sprinkle with glitter for a sparkly effect.

More tomorrow ...

Hugs xx