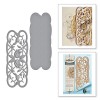
Todays card is using one of the strip dies from Spellbinders and this die comes in two parts to make it a very versatile addition to your collection.
I have used it in two different ways to create the beautiful backdrop for my flowers.
I have added in all the links at the bottom of the page

Spellbinders Supplies:
- S4-659 Floral Swirls Strip
- S6-001 5x7 Matting Basics A
- S6-002 5x7 Matting Basics B
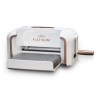
- PL-001 Platinum Die cutting machine
Other Supplies:
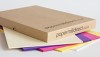
- Card from Papermill Direct
- Flowers from Wild Orchid Crafts
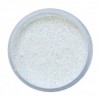
- Glitter from Glitter Magic
- Patterned Card from the £££Shop
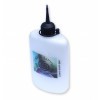
- Cosmic Shimmer Glue from Craft Stash
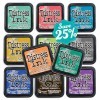
- Distress Inks from Craft Stash
Instructions:

With die #7 from Matting Basics A cut two panels in white to create the base card
With die #7 from Matting Basics B cut another layer in patterned card
(Please remember that die #1 is always the smallest)

With die #6 from Matting Baiscs A cut another panel in white
Place the centre part of the Floral Swirls Strip onto one side of the card and tape in place ... die cut
Then move it over to the other side of the card and repeat the process

With the outer part of the die cut a panel in patterned paper.
Then with the two dies together cut another panel in white
Ink through this piece before removing it from the die. (I used Dusty Concord & Bundled Sage)

Flat glue the patterned paper to the base card
Add foam pads in strategic places to the filigree panels so that they cannot be seen from the front
Add this to the base layers

With foam pads between these two layer add the filigree to the solid layer and add these two to the centre of the card front.

And this is what it will look like once you have done those steps, and if you wanted to leave it at this stage it is a lovely card and not too fussy for the men in your life.
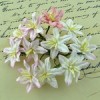
But I wanted to dress mine up a little more and add in the flowers that I like to use...

From left to right:
Tulips in two different shades of purple ... Rosebuds in two shades
Roses in 10mm and 20mm ... Lily and one Anemone
Stamp the sentiment onto white card and layered it onto left over piece of patterned paper

Arrange the flowers as you like them and tuck the sentiment into the display
Dot with glue and sprinkle with glitter for a sparkly effect.
More tomorrow ...
Hugs xx


Morning Christina, what a really beautiful card and a very instructive tutorial I think this die is a must have.
ReplyDeleteNancyd xx
OH! Nice card, love the colours and the flowers. Amazing what you can do with this die.
ReplyDeleteWow a lovely card colours and idea .Thank you for the Tutorial Christina.
ReplyDeleteElaine H X
Lovely card , very pretty.
ReplyDeleteMichele
How lovely!
ReplyDeleteStunning card today Christina. Just love that strip die.
ReplyDeleteLove Val in Spain xxx
Love this die Christina what you have created is beautiful so pretty
ReplyDeleteThank you love June horrocks xxxxx
lovely card and clear tutorial. Thank you xx
ReplyDeleteVery pretty card Christina...thank you for the tutorial...luv Ursula xxx
ReplyDeleteGood Morning Christina :) Ooooooooooo Prrrrrettyyyyyyyy. A Beautiful Signature Christina Card this morning and a wonderful tutorial as well! Thank you so much for sharing. Love it! Enjoy your day Dear Lady. Big Hugs.
ReplyDeleteHi Christina,
ReplyDeleteThe Floral Swirl Strip is beautiful and versatile. It makes the card stunning. Thank you for the great tutorial.
Have a lovely day everyone
Carmen
Gorgeous card :))
ReplyDeleteThanks for sharing!
Good Morning Christina- this is a very lovely card. Thank you for sharing. Have a great day!
ReplyDeletewhat a beautiful card. The dies make a lovely effect on it. XX
ReplyDeleteLovely card these dies are amazing as are your cards Christina .
ReplyDeleteEvening Christina. Very pretty card. Thanks for your tutorial xx
ReplyDelete