Beautiful Card Designs Made Easy

June 23, 2017

Friday Freebie 24 - Shabby Chic

Hi Everybody,

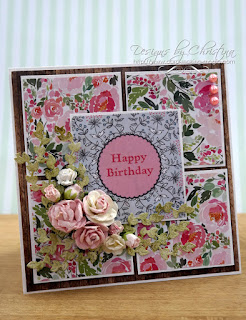
Todays card is pink and green with lots of lace and sparkle added and the finished size is 5x7.

I have  used lots of Spellbinders to create this card and the background is Letterpressed with Distress Inks

There is a little verse that has been stamped and embossed and then coloured and surrounded with beautiful flowers

I still have many more shabby chic cards to give away over the next few weeks but if you would like this one then you need to leave me a comment at the end of the post

You will need to come back tomorrow to check if you have won and then you will have 72 hours in which to claim the card

More tomorrow ...

Hugs xx

June 22, 2017

Die Cutting Essentials Special Edition 5

Hi Everybody,

Another video for you this week and this one is to show you some of the things I made with 

This is on sale now in selected supermarkets and craft stores and WHSmiths, and the theme for this kit is an English Country Garden

There are also dies, stamps and an embossing folder, as well as free papers that can create a complete scene for you if you wish

This pretty card is created using some of the free papers that are in the kit and I fell in love with this floral one

There are more ideas for you to see in the video and I am sure that you can come up with many many more once you start to play with your Special Edition Kit 

More tomorrow ...

Hugs xx

June 21, 2017

Creative Stamping 45 - Sprinkled with Love

Hi Everybody,

This months Creative Stamping 45 has a fantastic A4 stamp set called Sprinkled with Love and this is perfect for all you Bake Off fans and the new series 

The featured designer this month is Apple Blossom Designs and one of their stamps would be ideal if you like to bake gifts to give or to sell.

It says "From the Kitchen Of ... " so what could be better than to advertise your own culinary skills on the products that you have made ... Perfect !!

This A4 size is such good value and the stamps are quality material that will last you a long time if you take care of them 

There is so much on this set and I had a lot of fun stamping and colouring and making the cards.

I did a lot of ink blending on my creations and I was happy with the results of all of them.

The video will show you how I created a really easy background that any body can do and it is so imperfect that there is nothing to worry about trying the technique for your self.

Here is the video ...

As always I hope you enjoy it and thank you for your lovely comments both here and on YouTube


More tomorrow ...

Hugs xx

June 20, 2017

Tuesday Tutorial - Fluer de Circle

Hi Everybody,

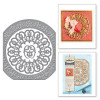
For todays card I have used one of the newer dies from Spellbinders. 
To create this look I have used a quality white card and then simply inked through the die with the card still in place to bring out the detail. This way I am sure that everything matches my desired colour scheme
Links to all the suppliers are now listed at the end of the blog post
Spellbinders Supplies:

  • S5-276 Fluer de Circle 
  • PL-001 Platinum Die Cutting Machine
Other Supplies:
  • Card from Papermill Direct
  • Distress Ink from Craft Stash (Lucky Clover)
  • Glitter from Glitter Magic
  • Dried flowers from Anna Marie Designs
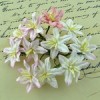
  • Paper Flowers from Wold Orchid Crafts
  • Adhesives from Craft Stash
Instructions:

With die #3 from the Fluer de Circle cut one piece in white and ink through the die whilst the card is in place
Ink the solid centre with the same colour ink
Cut the filigree die in white and add the sentiment to the smaller centre part in the same colour ink
Create a card base to fit the Fluer de Circle
(All I did was fold in half an A4 white card and then cut to the size of the die cut panel)
Create a smaller layer in white and ink around the edges with the same colour as before
Create another smaller white panel and emboss this in any folder you have.
(Not a lot of this panel will be seen so you can skip this step if you prefer)
Flat glue the embossed panel on to the one with the inked edges 
Add pieces of foam pad under the filigree layer and add this to the card front making sure that when you add the sentiment panel the words will lie level
Use a double layer of foam under the sentiment 
I have used a mixture of dried flowers on the left and paper flowers on the right
Add the layers to the base card and dress with the flowers. I use a hot glue gun to keep everything in place. Dot with wet glue and sprinkle with glitter

More tomorrow ...

Hugs xx


June 19, 2017

Practical Publishing Club Create Box Kit 2

Hi Everybody,

It's time for the second Club Create Box Kit and with this kit I have made some very pretty cards. 

The video is available for you to view

There are some really lovely products in this kit and here  I made a feminine card for a mum.

Could be a Birthday or Mothers Day card and for the frame I used silver gilding flakes


The club brings you quality products every three months and each time they will be different.

It is an inexpensive way for you to build up your crafting goodies and if you wanted to join the club then the link is here ... Club Create

The video will show you what is in the kit and I hope you enjoy the cards that I made 

More tomorrow ...

Hugs xx