Beautiful Card Designs Made Easy

March 31, 2015

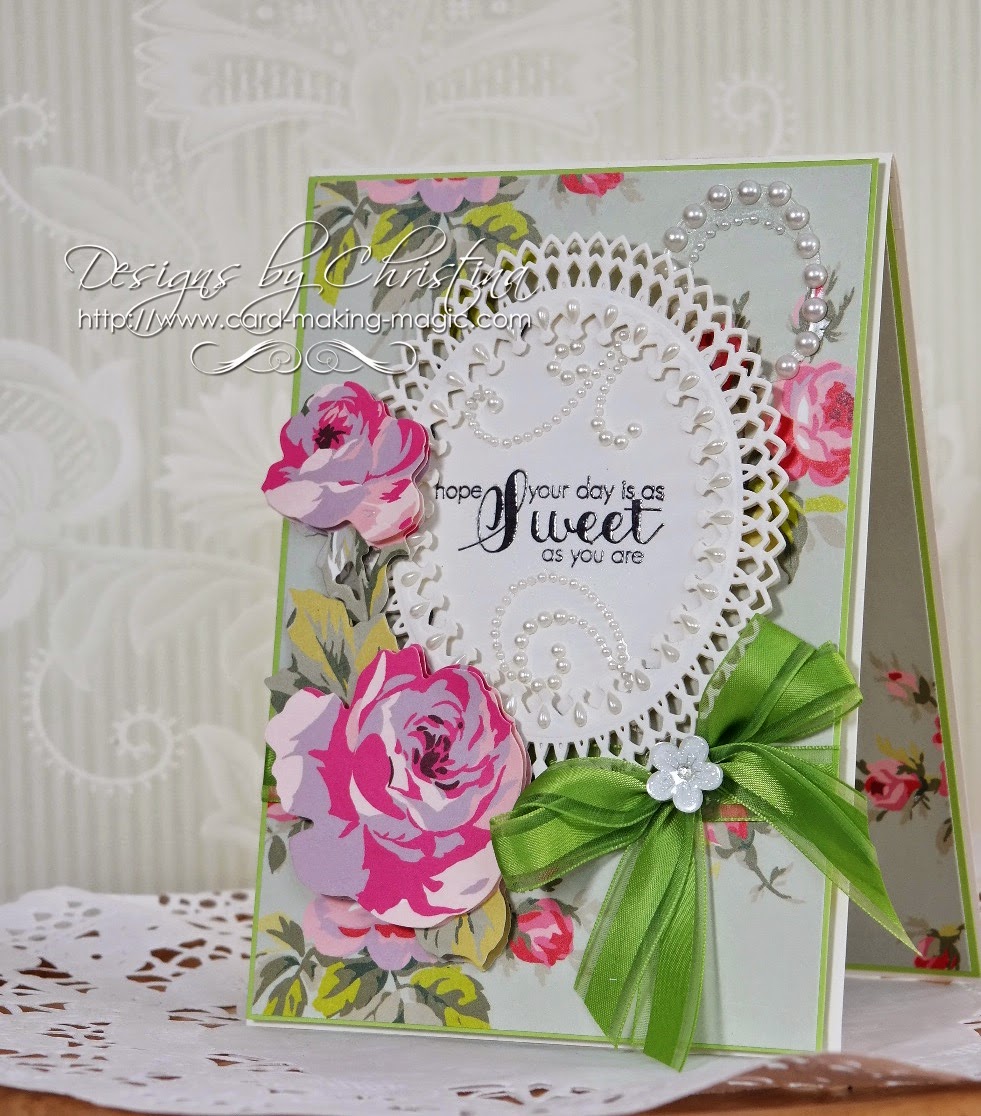
Tuesday Tutorial - Embossing with Dies

Hi Everybody,

I like to add texture to my cards and the background piece is the one that makes the card pop if embossed

This technique can be done with dies ... large or small ... that you have in your collection and give you a really pretty look

For this card I am using just the inner part of   Grate Effect  

I have also used Classic Hearts   and the matching Scalloped Classic Hearts

My flowers are from Bitty Blossoms  and I have another tutorial on my website showing how to get the best from Spellbinders Blossoms

Create your base card in your chosen color and I like to make mine to the Hinged Card Style

My base card is white and I have chosen a patterned card for the next layer which is slightly smaller

I have cut another piece of white card that is the same size as the Grate Effect die and layered it up to pass through the Grand Calibur

You will need to check your machine for the correct sandwich to EMBOSS


The correct sandwich for embossing  with the GC is ...

Grey Base plate ... die template facing up

Cover it with the lightly spritzed  card 

Cover with the TAN embossing mat 

Cover with the Pink Embossing Plate

And once you have run it through this is the effect you will have in your card

It will be embossed and not cut and once trimmed to fit the front of your card will create a beautiful layer for you


From both sets of Hearts I have used the #6 (#1 is always the smallest) and cut one in white and the other from some patterned card

The white heart I have then embossed with a folder

From the Bitty Blossoms cut the flowers that you need to add to your design and glue a small pearl to the centre of each flower

And I have used some leaves from Spellbinders  Foliage  and tucked them under the blooms
This close up shows you the quilted effect that the embossing will give to your cards

I have used small pearls from Want2Scrap to accentuate each cross section


More tomorrow ...

Hugs xx


March 30, 2015

Distress Inked Card

Hi Everybody,

Todays card has all my usual embellishments applied and I am really pleased with the way this card has turned out.

But it is the background that I really like,  as that was done with water colors,  and it is a bit of a stray off my usual path for this

I used water color card from Crafters Companion  as it is good quality and quite thick

I used Distress Inks and a craft mat to get the result and lots of water and then simply played with it all until I was happy

The card is a 5x7 with the hinge at the top and the inside is lined too.

My flowers, dove and metal corner are all from Wild Orchid Crafts

The ribbon is from Mei Flower  and the pink pearls on the ribbon and surrounding the flowers are from Want2Scrap

The metal corner was originally gold but I changed the color with embossing powders.

The stamp is part of a set that I bought at a craft show a few years ago and can't remember who makes it

Quite a pretty card and one I am happy to add my name too

More tomorrow ...

Hugs xx


March 29, 2015

Card Class ...

Hi Everybody,

In our card class the other week I had my ladies decorating some of those snack tubs we all love

I let them lose with flowers, ribbons and pearls ... as well as pretty papers, tulle and lace

These delightful tubs look a whole lot more beautiful when they are covered and both ladies are pleased with their efforts.

I have titled them so that you can see the color choices of Mary and Brenda and I think they look so pretty that they could be given as small gifts.

I made some from the larger tubs a while ago and when Isabella saw them she loved them.  Isabella is three and my Great Grand-daughter and when asked which color tub she wanted she said  ...." Er! Both"

On these we have used flowers and pearls strings from Wild Orchid Crafts  and satin ribbons from Mei Flower

More tomorrow ...

Hugs 

March 28, 2015

Another winner ...

Hi Everybody,

What a difference in the weather today.  Yesterday was lovely and sunny and we managed to get some tidying up done in the garden ... but today it's wet and windy and not pleasant at all.

Time to stay indoors and just chill, maybe do a spot of crafting ... for a change

The winner for yesterdays blue card has been done and the name drawn from the hat is ...

Gingernuts ...

can you send me your postal address please to
christina@card-making-magic.com
and I will get the card in the post to you straight away

Please let me know when it arrives with you and I really hope you will like it

More tomorrow ...

Hugs xx

March 27, 2015

Friday Freebie 052

Hi Everybody,

One whole year of Friday Freebies and another one soon to start.

This card has used a mixture of dies and they are  all layered up with foam tape.

The white layer is embossed with a basket weave pattern and the layered onto the blue

I have wrapped the layers with ribbon before adding to the base card

The next layer is in blue and I have used 5x7 Reflective Moments

The smaller white layer is Decorative Labels Eight
which has also been embossed

Then over the top I have used Lattice Motifs but this is a die you will have to search for as it is no longer on the Spellbinders website.

I do not deliberately choose dies that are no longer available it's just that I have these dies in my crafting "Stash" and I still like them and use them.  I am so sorry if you cannot find them ... but that is progress I suppose

If you would like to have this card on its way to your house then join the group of followers and leave me a comment.  A name will be chosen at random and the winner announced in tomorrows  blog post.  Please come back to check if you are the winner.

More tomorrow ...

Hugs xx


March 26, 2015

Tone on Tone

Hi Everybody,

Todays card has used nothing other than white and shades of it and this card looks lovely in real life.

I have just added an everyday verse but it would make a beautiful wedding card

The verse I have used is one of a set from Crafters Companions Sentimentals Range   and if you click the link it will you the stamp sheet.

(I have used the one in the bottom left corner and stamped and embossed it in silver)

The  white satin ribbon I have used is from Mei Flower with a large sparkly dazzler over the knot.

The diamante is from Want2Scrap  and I have just used portions of it for my design

The beautiful flowers are from Wild Orchid Crafts and I have arranged the display around the sentiment.

This is such a pretty card and the background panel has been embossed and backed onto silver card and then onto a white base card that is 7" square

On the next panel I have used some modelling paste through a stencil and then sprinkled glitter into it while it was still wet.  The result is a raised finished that shines with glitter but the camera has not really picked it up. I used a corner rounder to shape the edges and that too has been layered onto silver

I have stamped my sentiment on to Labels Eleven but this is a die that has now been discontinued

 I have another card done with the same modelling paste and glitter technique that I will show you next week as tomorrow is Friday Freebie again

More tomorrow ...

Hugs xx

March 25, 2015

Centura Pearl ...

Hi Everybody,

It is amazing what you find once you start to clear out your craft room. It's like Christmas all over again.

I am finding things that I had forgotten about and this lovely  Centura Pearl   from Crafters Companion  was in  the back of the cupboard.

So I decided to make a card using the Victorian Collection - Medallion Three 

This is the die I have used to show you some variations with in the Tuesday Tutorials and here is another one using the #2 part of the die that leaves the pattern in the card.

This has been backed with the Centura Pearl and then decorated with ribbon from my "Stash"

The Flowers are from Wild Orchid Crafts

I have added in some green leaves cut from   Foliage    which is a really useful die to have in your collection ... especially if you like to add flowers

The pearl flourish is from Want2Scrap  and don't be afraid to cut it up.  You can probably get three cards from one flourish

The  Sentiment One  is also from Spellbinders and again is a useful addition if your writing is not the neatest .... like mine ... I keep all my sentiment dies on my work area so that I can just grab one as needed.

Just a little note ... 

I have added a permanent link in the side bar to your right for all the Tuesday Tutorials that have been done and I will add them as I do them in the future.  Each one will have a direct link to the named tutorial so they should be easier to find

More tomorrow ...

Hugs xx


March 24, 2015

Tuesday Tutorial - Captivating Squares

Hi Everybody,

Todays beautiful card is created with the Captivating Squares from Spellbinders

This could be a die that you already have in your crafting "Stash" as it has been around for quite some time.

There are many ways to use this die and this is just one of them.
I have cut two 6" squares and created the base card with a hinge

Then from some plain pink I have cut a smaller layer and repeated the process with some pink spotty card
From #3 and #4 Captivating Squares I have cut four frames   (and remember that #1 is always the smallest die in any set)

Keep the centre parts as you will need one of them later.


Layer these together in sets of two off setting them with each other as shown in the photo

Just a spot of glue in strategic places will hold these together for you

Then with some foam tape between the layers lay the top two on the bottom two and off set them again

Now you should have a very pretty lacey centre for your card.

Place more foam pads under these layers so that it cannot be seen from the front

Add these to the base card and decorate as you wish.  I have used flowers from   Wild Orchid Crafts and some pearls from Want2Scrap  around the edge of the frame


With the pieces that are left over stamp  and emboss your sentiment on one of them

The rest can be used on another project so keep them safe

Add a double layer  of foam tape underneath to raise it up over the level of the frame

And there you will have another very pretty card to add to your collection.

More tomorrow ...

Hugs xx

March 23, 2015

Negative Effect ...

Click to enlarge
Hi Everybody,

When we make cards there is such a lot of card that we discard.

But with just a little thought and some planning ahead we can put it to good use and make some pretty cards.

I needed some butterflies for another card that I was making and I used the Spellbinders Les Papillions Two 

I used the solid base to the die and rather than just cut it out randomly I carefully positioned one on some card that I would use for my top layer

Once cut and embossed this negative piece was the piece I used for this card.  I also cut another piece in pink and used it underneath as a shadow but the butterflies have been kept safely for the next card

The pink card in the negative space says "Happy Birthday"  and is from  AnnaMarie Designs

The embossing folder is from Crafters Companion

I used a large flourish from Want2Scrap for the butterfly trail

And there is my free sentiment again  from  Simply Cards and Papercrafts   Magazine stamped and embossed at the bottom of the card.

It really was that simple to make this card and yet the result is very pretty

More tomorrow ...

Hugs xx


March 22, 2015

Pretty in Green

Click to Enlarge
Hi Everybody,

Now this is a color I don't use very often but I was asked the other day to give some ideas for cards  using green

The card I have used here is from the Celebrations Range with Spellbinders and this shade is called Pixie Play

There are lots of items in this range from the card to embossing folders,  stamps and dies that match them

The floral paper underneath was very bright and so I have subdued it with Parchment and added it with eyelets in each corner.

I used an embossing folder on the parchment before adding it to the card

The diamante around the edge  and the flourish are from Want2Scrap

The white and green flowers are from Wild Orchid Crafts  and they have been sparkled with Glitter Magic  Chameleon glitter.  The little white dove is also from WOC

The ribbon was in my "Stash" and the dazzler over the knot is part of a Primark bracelet that I took apart.  I am happy with the result and as the card I used is 12 x 12 I have managed to get two cards from the one sheet

This sentiment was free with   Simply Cards and Papercrafts   and it is one of the most useful phrases in my collection and it is one I have used often since I got it.  I love the script it's in too

More tomorrow ...

Hugs xx

March 21, 2015

Winner is ...

Hi Everybody,

Isn't this a beautiful day .... I know it's on the cold side but the sun is shining and it feels really pleasant.

After a lovely relaxing morning I now have a winner for the yellow card that was offered yesterday and the name drawn from the hat is ...


Bill Ali 
would you email me your postal address please to 
christina@card-making-magic.com
and I will get the card in the post to you straight away.
I hope that you will like it and please let me know when it arrives with you.

So now I have a lovely casserole cooking in the slow cooker and I am off to have coffee with my youngest daughter 

More tomorrow...

Hugs xx

March 20, 2015

Friday Freebie 051

Hi Everybody,

This pretty yellow card is the one up for grabs today and this uses the Quatrefoil Background

It is one of those dies that I don't know where you will get it from now. I have tried to find it for you but no luck.

But obviously as new items come onto the market the old ones are replaced and then it becomes difficult to find the dies you want

If this is a card that you would like to win then all you need to do is join the group of followers.

Just leave your name in the "Join This Site" box to your left and then leave me a comment

A name will be chosen in the morning and the winner announced during the day.

Then you have 48 hours to claim the card by sending me your postal address to 
 christina@card-making-magic.com

The flowers on this card are from Wild Orchid Crafts  and the satin ribbon is from Mei Flower  making a really pretty card

More tomorrow ...

Hugs xx

March 19, 2015

Card Class Ladies

Hi Everybody,

In last weeks card class my two ladies made these very pretty cards and as  usual they went for completely different color schemes

Mary chose the pink and Brenda went for the more demure coffee and cream

Both cards are made in the Hinged Card Style   and both have flowers, ribbons and pearls to dress them up.

Both have used dies from Spellbinders  Laced with Love Collection

Mary has chosen  Lonely Hearts  for her card with the Sentiments One  added to the bottom. She has done it in pink and white and added flowers of the same color.

Brenda has chosen   Interlocking Love for her card with Sentiments Three   added to the panels and she has chosen cream with Kraft card for hers.

The flowers and the bows dazzlers  are from Wild Orchid Crafts  and the  ribbons are from Mei Flower

I think ladies have made really lovely cards and they went home happy after another successful class

More tomorrow ...

Hugs xx


March 18, 2015

Friendship Card in Turquoise ...

Hi Everybody,

Here is the last of the group of Friendship Cards I made for Vickie to give to her friends

This was a special request from my daughter so that she can show her friends that she appreciates them.

Over the last few weeks I have shown you each one.

Although they are all the same  Hinged style with flowers, ribbons and pearls on them I have used different dies so that they are not the same.

For this one I have used Gold Labels Four  and I like the effect of the layering on this card

It just goes to show that not many dies are needed to create a lovely card.

This is just one die but the result is one that you can be really pleased with.

And just to remind you of the boxes each card was in here they are.

They all make a good gift and not just a card and the boxes make them extra special.

More tomorrow ...

Hugs xx


March 17, 2015

Tuesday Tutorial - Medallions Three - More Ideas

Hi Everybody,

Since the tutorial last week I have had many emails telling me how much you love the  Victorian Collection from Spellbinders

And many of you have also said that you have the Medallions Three and enjoy working with it.

So for todays tutorial I am staying with this lovely die and showing you a couple of ideas that you can do with it to ring the changes

I created my base card from Matting Basics A #7 (#1 is always the smallest)  in white

From some petty blue card I cut another mat from Matting Basics B  #7

The other white layer is cut from #4 Matting Basics A

Select  #2 and #3 from Medallions Three  and cut one layer in blue and then cut this piece in half neatly down the middle of the card.

Take the smaller white piece that you cut  and the two blue filigree halves  and place the outside patterned edges into the centre of the card and trim to fit.

I added my panels to the white with foam pads to give depth to the design

The next thing we are going to do is create a double frame to sit around this panel
From Matting Basics A take three dies ... #3 #5 and #6 and lay them all together on your white card

Tape them in place so that they don't move and with the EMBOSSING sandwich run them through the machine

This will push the impression of the dies into the card but won't cut it ... you are just embossing


Once you have embossed the card very carefully remove the centre die #5 without disturbing the other two dies

And this time you are going to use the  CUTTING sandwich for your machine

Once you have done this,  again carefully remove the tape and the dies from the card ...

... and this is what the card should look like with a double frame impression around the edge

To the back of this frame we can now attach the foam pads we need to raise it up

It can now fitted over the filigree panel that you created earlier and then mount all these layers to your base card.

Dress it up any way you wish and you will have a really pretty card to give to someone special.

I have added satin ribbon from Mei Flower to mine and tied it in a single bow

The blue and white flowers are from Wild Orchid Crafts

Behind the flowers I have added some pieces of pearl flourish from Want2Scrap

And here is the exact same die used in another way to give you variation in your designs.

The base card and frame are created in the same way but I have added in the Medallions Three to the top and bottom of the frame and trimmed it to fit.

The sentiment is stamped and embossed and then cut with Labels One  and then mounted onto Luscious Labels One

There you have one die and two ways to use it as well as the variation I showed you in last weeks tutorial

Such a versatile die and such beautiful cards created from it.

More tomorrow ...

Hugs xx

March 16, 2015

Friendship Card in Rose...

Hi Everybody,

As promised here is another of the "Friendship" cards that I made for my daughter to give on her friends' Birthday.

If you remember I made four of them all complete with matching boxes and so far I have shown you two of them

This is the third one and it is a lovely deep shade of rose pink.

All the cards were made the same style, they all have flowers from Wild Orchid Crafts  in lovely displays on them

The wide Satin ribbon on them all is from Mei Flower  and I have tied it in a double bow.

I made  each one  a Hatpin  and I buy mine from the Sparkles Group complete with end protectors

But I used different dies on each one to ring the change

This one has 5x7 Reflective Moment  for the white layer and this is a really pretty die.

On top of that I hand cut another pink rectangle layer and then I added the verse to Labels Forty Four

My daughter was very pleased with the cards and so far the friends who have received them have been delighted too.

More tomorrow ...

Hugs xx

March 15, 2015

International Ambassadors Blog Hop

Hi Everybody,

Welcome to the third  International Ambassadors Informal In'spire Blog Hop - we have been having so much fun with these Blog Hops and we are all so pleased that you come and play along and leave us such lovely comments

I hope you are getting to know us and and seeing our different styles, each one of us is very unique in our creative styles - so there is something for everyone! 

For this hop we have decided to use the  In'spire  Dies 

They are such fun to create with - and can be used singularly or combined with others as you will see along the way!

My choice was the  KOI  and I tried to re-create an under water scene for my golden fish.

I have used  Alcohol markers in blue and green to color the background and cut two of the Koi and added them to the card.

I used Glossy Accents to produce some realistic bubbles around the fish and then added some of the  Ivy   stems ... minus the leaves for the sea grass.

Then over the top I have added in an Acetate dome and colored that with the same blue and green  and onto the acetate I added some more bubbles

I used orange card for my Koi and to make the fish swim opposite I simply used the die on the correct side of the card for one and the wrong side of the card for the other

The words I have cut in black and added to the acetate and I have used  Sentiments Three

Just a fun idea and makes a change from my usual style, but I hope you will like the idea and you will get more along the way.

The next stop is  Linda   and the list of International Ambassadors is below, in case you get lost along the way.

Ursula Langhammer  *on a break
Christina Griffiths  (You are here)

Thanks so much for stopping by - we hope you enjoy your time with us - we will be back with more!

More tomorrow ...

Hugs xx

March 14, 2015

Card Winner

Hi Everybody,

Just a short post today as I will be on my way to the GNPE at Harogate and I hope to meet some of you there. Please come and say Hello if you see us ... It will be so nice to meet you

Well another card will be winging its way to the new owner and I cant believe it is card no 50 already

That's almost a full year of giving away cards and I really hope you have enjoyed them whatever it is you have used the card for. I know some of you have framed them and keep them in your craft rooms

So today's card winner is ...

Paula
Would you email me please
christina@card-making-magic.com
with your postal address and I will get the card in the post to you

I have been asked if this Friday Freebie is open to everyone around the world and the answer is YES!

I am happy to send you the card wherever you live and my cards have been sent to many places in the world in the last 50 weeks. So please add your name next time if you like the card and would be happy to win it. 

But don't forget to come back and look for your name and claim the card if it is your name that is shown

More tomorrow ...

Hugs xx

March 13, 2015

Friday Freebie 050

Hi Everybody,

Todays card to be given away is in Teal just for a change !! And can you believe that this is week 50 of the Friday Freebies

This card has all the usual accoutrements on it that I like to add and it is another that looks better in the hand than the photograph shows.

For this card I have used  Spellbinders  Tapestry   and this a very intricate die. I have layered it up with black for a more dramatic look

It has flowers from Wild Orchid Crafts and a neat little Hatpin pushed into the bow.

So if you would like to own this card then all you need to do is  become a follower and then leave me a comment  at the end of the post.

From those comments one will be selected by my "Film Crew" and this week I will have to do the draw this evening as tomorrow I am off to the GNPE craft fair in Harogate. Please come over and say "Hello" if you are there

The blog post for tomorrow will be scheduled to go out bright and early and the winner will be announced then.

Please can I ask that if you take the time to add your name that you also take the time to come back and check if it is you who has won.  I allow 48 hours for the card to be claimed and then it will go to some one else if you don't come forward.

If you are the winner then you will need to email me ....
christina@card-making-magic.com 
with your postal address 

More tomorrow ...

Hugs xx


March 12, 2015

Anna Griffin Papers

Click to Enlarge
Hi Everybody,

This little 5x7 card is created using papers from Anna Griffin along with the decoupage pieces needed for the flowers.

It is made in the Hinged card style that I love to use and the inside has also been lined with the same papers.

I have cut my base card from  Luscious Lime   from the Celebrations Collection

From Spellbinders Oval Bliss   I have used  #4 for the base layer and then used it again with  #3 to create a frame

I have placed the frame over a stamped and embossed sentiment  and added each layer with foam tape in between

I have used some pearl flourish from Want2Scrap around the inner edge of the frame so that it surrounds the words and added a small tear-drop pearl onto each of the scallops for a really pretty effect

The ribbon is simply wrapped around the layers with a double bow added to the top and the central flower over the knot is from Wild Orchid Crafts

The flowers are precut and all I needed to do was add them to the card and I decided to place mine so that they are partly onto the oval.

It may not be quite my style but it is pretty all the same.

More tomorrow ...

Hugs xx

March 11, 2015

Yellow again ...

HI Everybody,

This card is another that is predominantly yellow but it also has a splash of pink.

As long as the shades of the colors that you use are subtle then this is a color combination that works really well.

The background paper to this card is from Anna Griffin and it is so pretty.

The yellow card is from the Craft shows I went to the other week.

 I have used  the Heirloom Oval  and layered it with   Elegant Ovals  then topped it with Sentiment One

There is lace and ribbon around the bottom with a triple bow added.

The centre of the bow is Gray pearl and diamanté and into the centre I have added a yellow pearl Hatpin

The flowers and the silver corner piece are from Wild Orchid Crafts  and this is another card that I am happy with in these colors

More tomorrow ...

Hugs xx


March 10, 2015

Tuesday Tutorial - Medallions Three

Hi Everybody,

Todays tutorial is using  the Victorian Collection   which is one of my favorite sets

This particular one is Medallions Three  and it has a separate outer die that you can use to create the base

It gives such a lacey feel to a card and is sure to please all your female recipients.

Just wrap some ribbon around it and add those flowers and there you have a beautiful card to grace any bodies mantleshelf

For this card I have created my base card in a pale blue and it is a 6" square.
Then for the next layer I have chosen a toning spotty paper and cut it slightly smaller

It is this layer that we will work on first.
From  Medallions Three take #2 and #3 together and cut two layers of the filigree pattern in white.

Cut one of them into quarters and fix foam pads to the back of each piece.

Leave the other piece to one side for now
Add one quarter to each corner of the blue layer

Wrap  ribbon that is wide enough to cover each of the gaps in the centre.

I supported my ribbon with foam pads in the gaps and you can just see them in the photograph

Secure the ribbon on the back and then add foam tape to give dimension.

On top of that layer add the second piece of filigree card that you cut so that it is centralised on your card.

The layers that you have created with the foam pads or tape will give interest to your card as it creates depth and shadow

Stamp and emboss your chosen sentiment.

I have used  #3  Labels One   to cut out the words and then mounted it onto #3  Luscious Labels One  and I have used foam pads between each layer

Then once you have added in your bow, with a dazzler over the knot and some really pretty flowers you will have a card that you can be proud of.

My final touch was to add a pearl flourish from  Want2Scrap  coming from behind the floral display

The flowers are from Wild Orchid Crafts  apart from the large Gray one which was one of six on a bracelet that I bought form Primark for £1

More tomorrow ...

Hugs xx


March 09, 2015

Another Birthday Card ...

Hi Everybody,

Todays card is maybe for a younger birthday ... though lots of people are young at heart and would love this cute little elephant.

It is from a new Spellbinders  Celebration Collection   which has dies as well as   Embossing Folders and Stamps 

This stamp set is called Your Day

The Spellbinders I have used are Classic Hearts and Classic Scalloped Hearts

A simple card with matted and layered panels cut into banner shapes and in different patterns, then wrapped with some Gingham ribbon

I have cut the elephant so that is sits outside the die cut and I have decoupaged up a second layer of the elephant alone

He has a Googly Eye added for fun and I colored the image with Spectrum Noir IG1 IG2 and PP1 in the ear ... and TB1 LV1 PP1 BT for the parcels.

Then I used all the colors and made a dotted background in the heart shape and lined the inside of my base card

How easy can that be and add it to your collection of ready to use cards if it is not needed right away

Don't forget to add your name to the Birthday Give Away   if you would like to win the goodies on offer ... but you will need to become a follower and leave me a comment too

More tomorrow ...

Hugs xx 

March 08, 2015

Birthday Give Away ...

Hi Everybody,

I am sorry to be so late in the day announcing the winner of the "Birthday Give Away"  but I have been into town today spending all the Gift Cards I got from family members for my Birthday and I have bought lots of Goodies for ...  ME !!

But the draw has been done by random selection from InLinkz and the winner will have had her email by now asking her to claim the prize.

The winner is ...
 Jenny Hurley
I need you to email me please 
christina@card-making-magic.com
with your postal address  please  so that I can get the parcel sent out.  

The two ladies who have won the Friday Freebie  cards have also claimed them but I need  you to contact me by email please  ... Dorothy Cattanach  for your card

The reason  I ask you to email me is for your own safety.  Facebook is not private and I don't want your personal information adding on there.  I am not being awkward about it ...  and I am not responsible for any outcome if you do.

More tomorrow ...

Hugs xx

March 07, 2015

Card Winners

Hi Everybody,

You may have noticed that the title of todays post is Card Winners ... in the plural and that is because last weeks card was not claimed by the winner and so another name  has been drawn.

The first thing to deal with today is the Card winner of the  Friday Freebie 049  and the draw has been done to select a name.  I am so happy that so many of you wanted this particular card this week and it is much prettier in real life.

So the winner of the Friday Freebie 049  is  ....

049 Dorothy Cattanach

The draw was done again from last weeks list and the name pulled out  to win the card offered as Friday Freebie 048 is ...

048 Ros Hodgkins

both of you ladies need to email me 
christina@card-making-magic.com
your postal addresses and I will get the cards in the post to you straight away.

If the cards are not claimed within 48 hours then they will be re drawn another time

Yesterday ...

A really big THANK YOU to the ladies out there who took the time to make and send me a Birthday card.  

I really appreciate all the effort that you went too and I feel truly blessed that you  take the time to visit my pages, leave me comments, write me lovely emails and then also send me beuatiful cards.

They have taken pride of place on top of my TV cabinet and will stay there for a week.  The yellow card and the flowers were sent to me from Kim and they are gorgeous so thank you to Kim and Mick for your kindness.

I had a lovely day with my family and Isabella wanted to play "Shop" in my craft room. She wanted to sell me some of the cards I made for  ... (in her words) Two million thousand pounds !! Sort of expensive don't you think ??

Last night Griff took me out for dinner and we tried a new restaurant and it was very tasty and very posh.  So all in all I had a really good day and being 21 again had it's advantages 

Today is the last chance you have to enter for the  Birthday Give Away  so head on over and add your name and the draw for that prize will be done by InLinkz tomorrow

More tomorrow ...

Hugs xx


March 06, 2015

Friday Freebie 049

Hi Everybody,

Todays card is back to pink so all you pink lovers out there can have the chance to win this on

I have used the Butterfly Background for this one in a lovely shade of pink  ... but sadly this is a die that has now been retired from Spellbinders and will be hard to get hold of

The card itself is simply A4 cut in half and then hinged at the top and the just layers added all with foam pads to give it depth

It has pearls surrounding the frame and a dazzler in the centre of the bow and I have added pearls hearts to each of the butterflies.

It has been lined inside and it is about 6x8"

So would you like to win this one ?? If you do all you have to do is leave me a comment at the bottom of the page.

A name will be drawn in the morning and the  winner announced in the days blog post.

I will post the card to your wherever you are but please pop back to check if you have won.  

So today is my Birthday and I am giving away some lovely goodies. The chance for you to win the  Birthday "Give Away"  is open until the 8th March

If you would like these items then join the group of followers, leave me a comment and add your name and email to the list.

More tomorrow ...

Hugs xx


March 05, 2015

Friendship Card in Teal

Hi Everybody,

Have you added your name to the  Birthday Give Away  yet ?? If not ... why not??  You need to be quick as this will close in a few days and you will have missed the chance to win some really pretty Goodies. Just become a follower, leave me a comment and add your name and email to the list

Here is another of the Friendship cards that Vickie asked me to make.

She is delighted with them and I hope her friends will also be pleased when they get these cards from her for their birthdays.

This one is created in Teal and white and  comes complete with a matching box

I have used the  Grateful Lattice  and created a frame to sit on top of the patterned card.

I used foam tape to raise it up added pearl flourishes  from  Want2Scrap to sit behind the sentiment

The sentiment has been added to  Labels Eighteen  with a  Faux Nestie  cut to sit behind it

The flowers, the dove  and the buckle are from Wild Orchid Crafts   and they have been sparkled up with  Glitter Magic

The ribbon is from  Mei Flower  and to this I have added a beautiful Hatpin.

I buy my hatpins complete with end protectors from the  Sparkles Goup  and I use 3" silver ones and decorate them myself ... and I have a video that was done a few years ago now but  will show you what I do ... Decorating Hatpins

More tomorrow ...

Hugs xx