Beautiful Card Designs Made Easy

September 30, 2016

Friday Freebie 138

Hi Everybody,

Here are the last two cards with the Distress Ink Backgrounds that I am giving away to two winners

All of them have been very vibrant colours with a floral display to compliment the scheme

Each has a decorative hatpin that I have made in the petals and each one is an A2 size with the fold at the top.
The flowers are from Wild Orchid Crafts  with sparkly petals with Glitter Magic

So this is the last chance to win one of these and all you need to do is leave me a comment at the end of the post.


You will need to come back tomorrow to see if it is your name that is shown and then email me with your postal address so that I can post the card to you.

It doesn't matter if you have won one before or where you live, and you don't need to have a blog to enter

So what are you waiting for ... get wring that comment . It wont show up until it has been moderated so please don't add it two or three times

More tomorrow ...

Hugs xx

September 29, 2016

Using Banners ...

Hi Everybody,

At first glance this looks nothing like a banner ... but that is exactly what I have used to create this background.

The die set is part of  the Apple Blossom Collection named Banners and it is available to purchase from Craft Stash

There is also a matching stamp set Banner Sentiments that can be used with the die that will give you lots of ways to customise this for your self.

But once you have used it as banners you may like to try something more and the video will show how I have made this work for me.

Apple Blossom - Banner and Sentiments   is now waiting for you on YouTube  and I hope you enjoy the video.

The papers that I have used are all from the same stack and so are sure to match and they are from  AnnaMarie Designs

The one that I have used is from the Teal pack and I have used all the straight edged  Banners to cut my shapes

The  Gilding Flakes  can be bought from Craft Stash  along with the  Double Sided Adhesive Sheets  that I used to stick them on to

If you are new to my blog ...  all the coloured words are links and are there for you to see the products that I have used

More tomorrow ...

Hugs xx


September 28, 2016

Water Colour Wednesday . Ribbon Bows

Hi Everybody,

Today I am killing two birds with one stone and showing you a new video that features a new product from  Craft Stash

This is their new Ribbon Bows Collection and it consists of several stamps and matching dies that you can purchase separately

Here I have added the bows to some water colour card and used the Gansai Tambi to paint them in bright and cheerful colours.

The video will show you how I created this card  and give you some other ideas that you may like to try and it is not hard to do ...even if you can't draw or colour.

Apple Blossom - Ribbon Bows Stamps & Die Set  is now waiting for you on YouTube and I hope you will enjoy the ideas that it shows you.

Grab a cuppa and a biscuit or two ... or three and relax for a little while as you watch

The dies and stamps are now ready for you to buy at Craft Stash 

More tomorrow ...

Hugs xx

September 27, 2016

Tuesday Tutorial - Swirling Grace

Hi Everybody,

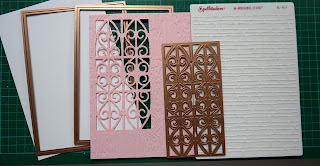
This beautiful die is from the designs by Becca Feeken and is available with Spellbinders.
 It is part of a collection that Becca created to cover the wedding themes and they are all beautiful graceful swirling  dies. 

Spellbinders Supplies:
Other Supplies:
Instructions:

With die #7 from Matting Basics A cut two pieces in cream and create a hinged card
Please remember that with Spellbinders die #1 is always the smallest
Hand cut another layer in turquoise slightly smaller than the base
Hand cut another layer in parchment that is the same size as the turquoise one and emboss this layer
Cut one panel in turquoise using the outer frame of Swirling Grace
Then with the two dies together cut another panel in cream and glue these two together.
Add foam pads to the back of the turquoise card
With the other two parts to the die set cut one of each and I decided to use the cream card for both of these.
With the border sentiment cut your chosen word four times and glue them together for extra strength

Assemble the card and add in some flowers along the bottom.
I used a decorative hatpin in the display and sparkled my flowers with glitter.

More tomorrow ...

Hugs xx


September 26, 2016

Apple Blossom - Embroidery Collection

Hi Everybody,

Craft Stash have another new collection going in to their online shop tomorrow and here is a sneaky peek of what is on offer.

This is going to be an exciting week as I will be adding not one but 
six new videos 
and they will showcase even more new products for you to view

There are some really cute stamps in this Embroidery Collection  as well as sentiments and little fillers for you to use on your own designs

The die that matches this set is an embroidery hoop and you can use that as you like ...just let your imagination do the work

So here is the first video on YouTube showcasing the  
and you will find some cool ideas that you may like to try.

I have had fun playing with these stamps and I am sure that you will too.

They are available to purchase from tomorrow at Craft Stash

And while you are there have a look around for some of the other goodies that they have in their shop.


More tomorrow ...

Hugs xx


September 25, 2016

Colouring with Spectrum Noir

Hi Everybody,

I had a whole load of fun colouring these umbrellas and adding the extra decoration to them with a white pen.

The stamp is part of an A4 collection called Summer In The Garden.

Some of you may have this already as it was a free gift with a magazine some time ago.

So to make this card I used Spectrum Noir for the colours and masked off the umbrella in stages

Masking makes them overlap so that each one looks to be sitting behind another.

With hindsight though the sentiment would have been better stamped in Black to make it show up more but I think the finished effect is good fun

From the same stamp  I coloured in the brollies in Gray keeping just one of them brightly coloured and added the raindrops from the same set over the top

The Die and sentiment are from a set by Avery Elle and I just  thought that they fitted this scene perfectly.

So two interpretations of the same stamp and a whole lot of enjoyment in the process

More tomorrow ...

Hugs xx


September 24, 2016

Two More Winners ...

Hi Everybody,

It's a bit cloudy here today and I am going to go shopping later. 
Do you remember me telling you that my Grandson has bought his own restaurant? 
Well at the moment it is being torn apart from top to bottom and Griff is doing a lot in there with the building work. It looks like a disaster area at present.
Last weekend they put a new false ceiling in from back to front and it looks a whole lot better for it

Once things start to go back in it will move pretty quickly and I cannot wait to have a delicious meal in there with the rest of my family. I will keep you posted as to the progress. 
Me ... well I go there in my capacity as chief nosey parker !! Just to see what has been done

Anyway on to todays winners and of course the draw has been done. 
The two names chosen this week are 

Joyce MacPherson  and   Karen Dakyns

and if you could both email me please to
christina@card-making-magic.com
then I will get the cards in the post straight away.

Please let me know when they arrive with you and I hope that you will like them 

More tomorrow ...

Hugs xx

September 23, 2016

Friday Freebie 137

Hi Everybody,

Two more bright and cheerful cards on offer today to two lucky winners.

I don't know which one you will receive but they are both really pretty so I don't think you will be disappointed which ever one it is.


The flowers are from Wild Orchid Crafts and compliment the colour scheme on each card

They are both in Landscape and the finished size is US A2

I have added a Decorative Hatpin in the floral display and that was made by my own fair hand

So here is your chance to win one of  these cards by simply leaving me a comment at the end of the post.

A name will be drawn from the hat and announced in tomorrows blog post  so be sure to come back and check if it is you. 

 I am happy to send the card anywhere that you live at my expense

Last week I incorrectly said that they were Brusho Crystals but they are not ... they are in fact Distress Inks Backgrounds  and if you click the link the video will show you how it was done.
 I am now in the corner with the dunces hat on !!!

More tomorrow ...

Hugs xx


September 22, 2016

Two Videos Today ...

Hi Everybody,

So here are two more videos for you and this completes the week of videos that I have added
From some of the comments I can see that you have enjoyed them and again my apologies for the quality but they are older videos and we now film in HD for better viewing

These pretty backgrounds are techniques that I have shared with you before on my pages and they are easy to do using alcohol marker refills and some acetate.or some cheap shaving foam
You can create some beautiful looks by simply varying the colours that you use and looking at these two it's not hard to guess my favourite colours !!


Have fun dressing your cards any way you like and it makes a fabulous backdrop for any male cards you may need to make if you alter the colours to darker more sombre shades.

More tomorrow ...

Hugs xx


September 21, 2016

Water Colour Wednesday - 1 image 2 ways

Hi Everybody,

For todays offering I am using not water colours but Alcohol Marker pens.  And I thought I would share with you the video that was done with Spectrum Noir quite some time ago.  
It was added to The Art Studio before they went off line and it uses the older pen sets but it seems such a shame to waste this as I know that many of you have the older style pens and use them regularly


The image is from Just Inklined and is on the CD The Next Big Thing 
I know that many of you have this CD even though this is now difficult to get hold of. 
But there will be other images that you have that may need to be coloured with thiese shades and so I hope you will put this to good use

More tomorrow ...

Hugs xx

September 20, 2016

Tuesday Tutorial - Partial Die Cutting

Hi Everybody,

Today I thought I would share this video that will show you what is meant by Partial Die Cutting.
It is a fun techniques that you can use in so many ways and it may be something that you have heard of but never tried for your self.
Time to relax and let this video show you how I made my card


The Bo Bunny image is from Crafters Companion and has been coloured with Spectrum Noir

The Diamante flourish is from Wnat2Scrap and I cut it into sections and added it to sit behind the image.  

The die is Grand Large Labels which is sadly now retired from the Spellbinders website.  Try Amazon or Ebay or one of your local sources and you may be lucky enough to find it.

More tomorrow ...

Hugs xx

September 19, 2016

Making Stripes ...

Hi Everybody,

Do you sometimes struggle to find papers that will match your images?
 Here is an easy way to create that background that will always blend with your design because you can use the same colours that you used to colour the image in the first place.
Let the video show you how I coloured my card for a really pretty finish.


This is a video that was made a long time ago so my apologies for the quality of it.
Both my "Film Crew" and I have made lots of improvements through the years, as we have learned new things.
Hopefully you will enjoy the videos even more.

Even though this is an old video the idea remains the same and can be useful to help you make the cards that you like to create. 

You may be a seasoned card maker and have done this type of thing regularly please  remember that new people visit my blog every day and to them it is something that they may have never seen and would like to try for them selves.

More tomorrow ...

Hugs xx

September 18, 2016

Cute Christmas Character ...

Hi Everybody,

I have really enjoyed playing with the die that comes free with this months Papercraft Essentials 138

This magazine will be on sale on the 22 Sept so keep a look out for it in the shops and supermarkets

It is described as a Cute Christmas Character die and I made several cards just sticking with that theme.

The little Polar Bear is stood on the ice waving his Greeting to you and I have inked and embossed the background for more effect.


But then I decided to play a little more and once the imagination kicks in there are endless possibilities for the characters that you can make

In the video I show you how I made a really cute monster card that is sure to delight the children in your family... and you can make variations of this too

So it's not just a Christmas die but one that can be used all year round and I am sure that you will have lots of fun playing with it.

You can get the magazine direct from Moremags or you can subscribe to your favorite one from the same link


More tomorrow ...

Hugs xx

September 17, 2016

Card Winners ...

Hi Everybody,

On Thursday I topped 40,000 followers on YouTube who have viewed my videos nearly 7 1/2 MILLION times and I am so happy about that.
 Here on the blog I have reached 1,400 with almost 2 million page views here and you really have no idea how happy this all makes me.

I enjoy writing my pages and making the videos that many of you seem to enjoy and I love it when you let me know that you do.

This is one of the reason why I decided to do the Friday Freebie as this is my way of showing you how much I appreciate ALL of you and each week there are new people joining my blog.

So this week I am adding  a video to my pages every day starting with tomorrow and going through until next weeks FF which will be another double card  "Give Away"

The two winners this week of the cards offered yesterday are ...

Marion & Lori 
so if you ladies could let me have your postal addresses please to
christina@card-making-magic.com
then the cards will be on their way to each of you.

Please let me know that you have them with you and I really hope you will like the one you receive 

More tomorrow ...

Hugs xx

September 16, 2016

Friday Freebie 136

Hi Everybody,

Do you remember these cards done with the colourful backgrounds ??

Well I made six of these all as "Thank You" cards and over the next three weeks I am going to be giving them all away
That's two each week as a Friday Freebie to two lucky winners but I cannot guarantee which one you will get ... and these are the first two..

They all have flowers from  Wild Orchid Crafts  that have been sparkled with  Glitter Magic 

Each one has a Decorative Hatpin pushed into the petals 


They are in different colours but they are all US A2 size

Would you like to win one of these cards ??

Then all you need to do is leave me a comment at the end of this post. and a name will be drawn tomorrow and announced in the blog post for the day.

More tomorrow ...

Hugs xx


September 15, 2016

International Ambassadors Informal Blog Hop

Hi Everybody,

Today is another chance for you to go blog hopping with the International Ambassadors and for our theme this month we have chosen Fall.

 I have created a card that is a million miles away from my style and this card was inspired by Christine Smith from CraftiPotential

I have used the  Fall Foliage  set from Spellbinders to make stamps with craft foam from the dies and this is a set that has been around for quite some time

I have used all the autumn colours of Distress inks to stamp the leaves onto some smooth white stamping card.

I used the border stamp from Clearly Besotted along the left side and I rounded the corner off at the bottom right

This panel has been raised on foam pads to give some dimension to the card.

So why not pop along and see what the other Ambassadors have come up with  and please leave us a comment to let us know that you visited....

Linda Lucas                Australia
Yvonne van de Grijp  Netherlands
Christine Emberson    UK
Christina Griffiths       You are here ..

Have fun 

More tomorrow ...

Hugs xx

September 14, 2016

Water Colour Wednesday - Bear Hugs

Hi Everybody,

Just a quick and short post today as I have more videos coming with "Goodies" from Craft Stash that are sure to please you.

This cute Teddy Bear is the Bear Hugs stamp set from Clearly Besotted.

 It comes complete with several sentiments that will ring the changes for your designs.

There are matching dies to cut both the Teddy and the banner for you and several sentiments  to go inside it

I have used the Diagonal Stripes to create the side panels to my card and I used Blueprint Sketch Distress Ink

The card is a small A2 and I dotted it with some blue sequins as a little extra.

The bear has been water coloured with Gansai Tambi and it didn't take me long to make this simple little card

More tomorrow ...

Hugs xx

September 13, 2016

Tuesday Tutorial - Elegant Ovals

Hi Everybody,

Today I have used several older dies and worked them all together. 
I have  used  a 5x7 background along with some ovals and vines to create a really pretty card that I hope you will like.
Spellbinders Supplies:

Other Supplies:
With die #7 from Matting Basics A create a hinged card
With #3 from Exquisite Labels 11 cut one panel in white
(Die #1 is always the smallest)
Using the largest die we are going to create frames from Elegant Ovals
 so with =4 cut once in white for the base layer
With #4 and 3 cut the frame in white and
With dies  #4  and #2 cut another in white and keep the extra centre piece

Add foam pads to the back of these trimming them to fit if needed so that they don't show at the front of the frame
Cut and emboss with pale green card as many vines as you would like to add to your floral display
Place all the layers on top of each other with the wider frame in the middle.
Flat glue into the centre the piece that was extra centre piece
Stamp and emboss a sentiment onto  the smallest die # 1 and add this to the top of the centre oval 
Fill this bottom part  with flowers and vines

More tomorrow ...

Hugs xx


September 12, 2016

Not A Card !!!

Hi Everybody,

The other day I was cleaning and tidying my craft room and I found several canvases tucked away in a cupboard.

It seemed such a shame to have them sitting there doing nothing.

And so I got out the paints and sprays, embossing pastes and stencils and set to work.

The intention was to video the making of this but I got a bit carried away with myself and before I knew it hours and gone by and the canvas was finished .... Ooooops!

It now hangs on the wall in my craft room and the size of it is 9" x 13 " so quite a good size and I have to say that I am very happy with it

Aaaand I still have several canvases still to use


I used a lot of  Wild Orchid Flowers  flowers  and leaves on this.

The string of pearls, metal embellishments and the organza butterfly in the top left corner are also from WOC.

The chalk paints I have used on the base coat, the natural fibres and the cheesecloth are all are from AnnaMarie Designs

There is also an abundance of glitter sprinkled around from Glitter Magic

More tomorrow ...

Hugs xx


September 10, 2016

Card Winner ...

Hi Everybody,

Beautiful day here and it is Griffs birthday. Tomorrow I am taking him to see Amaluna Cirque de Soleil in Manchester and we are both really looking forward to it. Every time it has been advertised on TV I have said that I would really like to see that show ... and tomorrow is the day.


The winner for yesterdays card has been chosen and the name this week is you 

VAL JONES

Would you email me your postal address please to
christina@card-making-magic.com 
and the card will be in the post to you straight away.

I hope you will like it and please let me know when it arrives with you

Day off tomorrow ...

Hugs xx

September 09, 2016

Friday Freebie 135

Hi Everybody,

I have another card with the glue technique on it for todays give away and this idea was featured in a YouTube video quite sometime ago.

But it is an idea that you may like to try and so I make no apologies for adding the link again ... Using Glues

It Is ideal to use for the men in your life and the finished size is about 6x8"

So if you would like to have this card then all you need to do is leave me a comment at the end of the post.

Please come back tomorrow to see if your name is listed as the winner and then if it is you will need to email me your postal address.

I am happy to send the card anywhere and you don't need to have your own blog.  Nor does it matter if you have won one of my cards in the past you can still enter again if this is one that you would like to have

More tomorrow ...

Hugs xx

September 08, 2016

Woodland Scene

Hi Everybody,

Today I am featuring the new die set that comes free with Septembers 
Die Cutting Essentials 15

This will help you to create the prettiest of Woodland Scenes  and is a complete card front for any of your Christmas cards

But don't put it away again after the season is over because with a little change here and there this is something that you can use all year round

It would make excellent male cards.

For this one I have dressed it up with a summer theme.


I have added green grass and hills rolling away in the background and the sun setting in the distance.

There are more ideas on the video and I show you how to make this into a shaker card. 

Pop over to YouTube now and watch the   Die Cutting Essentials - Woodland Scene  
The magazine will be in the shops soon or you can buy it direct from Moremags
You can also subscribe to have the magazine delivered to your door monthly at the same link and save money at the same time 

More tomorrow ...

Hugs xx

September 07, 2016

Water Colour Wednesday - Best Birthday

Hi Everybody,

Todays clean and simple card is using  the  Best Birthday  matching stamp and die set from Clearly Besotted

You don't need to buy the dies to create this card because you can simply fussy cut around the image ... but I have to buy both if they are available ... don't ask me why !!

So to make this card I stamped the two outside characters directly onto my base card and stamped the central one onto another piece 

I water coloured them all in and then die cut the piglet out and added it on foam pads to the centre position on my card

The sentiment and balloon strings are from the same stamp set and the only extras on the card are some silver sequins that I have dotted around

They just don't look silver in the photograph .
 I inked around the edges of the card and matted it onto some grey before layering it onto the white base

More tomorrow ...

Hugs xx


September 06, 2016

Tuesday Tutorial - Swirl Stripe

Hi Everybody,

Today I am going to be using this really pretty panel die from Spellbinders that was designed by Becca Feeken.  It is in two parts and creates a panel that is about 3 x 6" and I have only used the centre part of the set for my card.
Spellbinders Supplies:
Other Supplies:
Instructions:
Using  die #7 from Matting Basics A cut two pieces and Create a Hinged card
With  die #7 from Matting Basics B cut another panel in pink
( Die #1 is always the samllest)
Use the centre part of Swirl Stripe and place it in the upper left corner of the pink card and cut.
No need to emboss this piece as you are now going to add it to your embossing folder and run it through the machine
I added some Parchment/Vellum to the back of my patterned area and then added foam tape to the back to support it all
Wrap this panel with lace along the bottom section before adding it to the base card
Cut as many leaves as you would like to add to your creation.
I used Foliage Two for my flourishes but that die is now retired so in the supplies above I have given you an alternative die  for the same effect
Cut the Celebrate word four times in white and once in gold.
Layer them all together with the gold one on the top.
Add the leaves, flourishes and flowers to the right hand side of the card
Add the sentiment along the bottom on top of the lace.
I use a hot glue gun to hold all my additions in place
Sparkle the flowers with some glitter on the petals
Place the pearls around the flowers and onto the patterned piece
Push the Hatpin into the petals as the finishing touch

More tomorrow ... 

Hugs xx