Beautiful Card Designs Made Easy

Showing posts with label Clearly Besotted Stamps. Show all posts

February 09, 2021

Snowdrops and Text

Hi Everybody,

Here is another card used with the little text border. I have had this such a long time and it was actually free with a magazine.

For this card I have cut three panels and embossed them then run over them with Blueprint Sketch. I added them to the base card with foam tape underneath.

The Snowdrop is stamped from the set and the sentiments and I cut the flower with a little oval die.

I added that to another panel and wrapped the edges with blue ribbon then added that to the card base also

It is a Clearly Besotted set and it came with a text stamp and several Snowdrops as well as some sentiments, but I can't remember which magazine it came with and as it was a special offer it won't be on the Clearly Besotted website.

So my apologies to Ann Topp who asked me about it, that I can't help you further.

More tomorrow ...

Hugs xx


January 31, 2020

Friday Freebie Clearly Besotted Snowdrop

Hi Everybody,

Another double whammy this week in the shape of the beautiful Snowdrop Die, Stamp and mini Embossing Folder from Clearly Besotted.

Each of the two gifts includes the magazine and a beautiful card that I created with them

There is also a video to you show you what I did and it is
So if would like one of these sets to grace your own collection than all you need to do is leave me a comment at the end of this post with your FULL NAME

You don't need your own blog and I am happy to send the gift to you wherever you live, and it doesn't matter if you have won before you can still enter each week but don't forget to come back and check over the weekend if you are the winner

Good Luck everybody

More tomorrow ...

Hugs xx


November 27, 2019

Simply Cards & Papercraft 199 - Clearly Besotted Snowdrop

Hi Everybody,

This months Simply Cards & Papercraft will be in the shops tomorrow and Clearly Besotted are featured in the pack. 

Their stamp and die set also has a little embossing folder with it and it is really pretty.

This is one of the cards I have made and you will find more in the video that I have made to show you.

Clearly Besotted Snowdrop  is not too long but there are some pleasing designs in the video that you may like to copy.

You will find many more in the pages of the magazine too and some of them are even from me !!

Make a cuppa and click the link to watch the video and I hope you enjoy it

More tomorrow ...

Hugs xx

August 26, 2019

Play Day with Arteza

Hi Everybody,

Over the weekend I have had a little bit of time to play with some water colours and I have thoroughly enjoyed myself 

I have used stamp images that I have had for a long time and I thought it would be good to get them out again

I used the new Water Colours paints that have been gifted to me by Arteza and they are lovely to work with
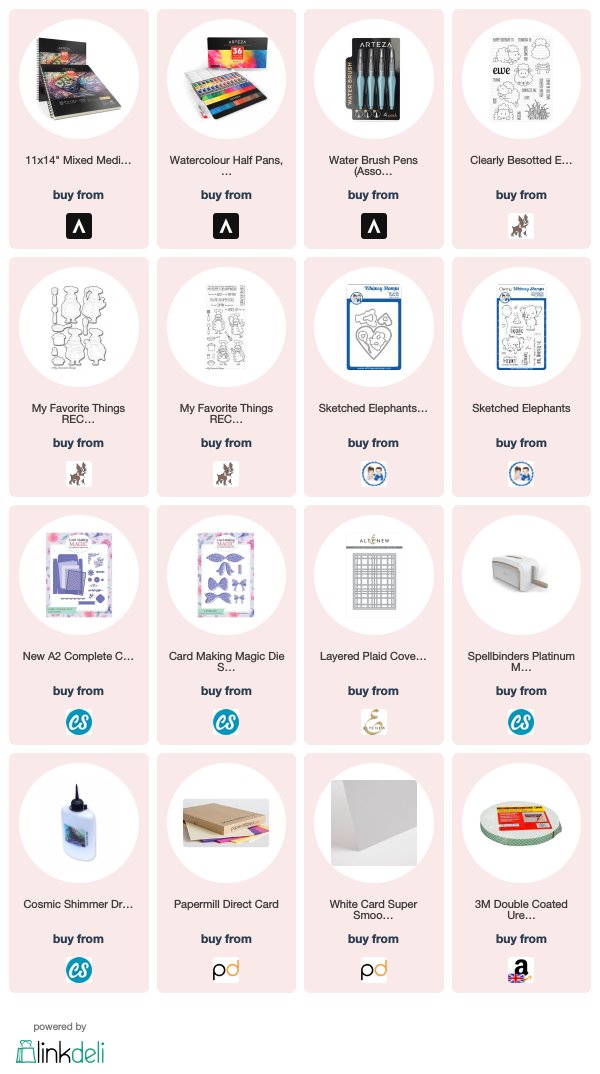
I have added links to the bottom of the page for you to see what I have used and some of them are affiliate links.

This just means that I get a small payment if you buy through the links, at no extra cost to you ...
but means a lot to me.

Arteza are offering you a 10% discount if you add the code
ChristinaGriffiths1.
and it is valid until the 25th September

The water colour pads from Arteza are really large with 60 sheets in each and it is good quality paper with a smooth side and rougher side.

I got all my images and more from one sheet just leave enough space around each image to be able to cut it out with the matching dies

Then all you need to do is have fun and enjoy working with your favourite medium.

More tomorrow ...

 Hugs xx

May 25, 2017

Easy Water Coloured Card

Hi Everybody,

Today I am adding a short video on how I made this card and if you are new to water colouring it is a very easy one to start off with.

 The stamp set is from Clearly Besotted and there are matching dies that you can buy.

The links to the products are at the bottom of the page

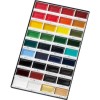
I have simply used a masking technique to get my sheep in a row and I have used Gansai Tambi Water Colours

The green mat was just to accentuate the grass and the sky was added with a homemade edge to some white card .... and you can see how much it has been used in the past. A great card for the men in your life

So I hope you enjoy the video ...  Feeling Sheepish Water Coloured Card 

More tomorrow ...

Hugs xx

January 11, 2017

Water Colour Wednesday - Bear Hugs

Hi Everybody,

This pretty little Bear Hugs card would be ideal for a childs birthday.

 The bear stamp and dies are from Clearly Besotted and their store is due to re open again in April

There are lots of sentiments that you can buy to match with it and dies to cut out both the bear and the banner

I created the background with Distress Inks and a blending tool and then took a block Birthday stamp and in the same colour ink simply stamped over the blending

It leaves a very feint impression that can be seen better when the card is in the hand.

The bear has been coloured with Gansai Tambi  water colours and cut out with the matching die. 

Both sentiments have been stamped and cut out with dies and all the die cuts have foam pads underneath them.

The balloons are from a panel that I had already created with Brusho Crystals and I cut them with a little balloon die that I have in my "stash" and I used a white Sharpie pen to add pattern to some of them

I trimmed down the panel to fit the front of an A2 card and left a small border along one edge

Another quick and easy card to make

More tomorrow ...

Hugs xx

December 07, 2016

Water Colour Wednesday - Train and Carriage

Hi Everybody,

This blue card would be perfect for a small boys birthday and it was quick and easy to do.

I have used some dotty blue card for the background and this one is from the Craft Shows

I wrapped it with blue ribbon before adding it to the base card

The stamp I have used is from Clearly Besotted but at the moment they are taking a break.

So the stamp won't be available to purchase until next year so keep a look out for it.

 I have simply used Distress Inks to add the colours to my train and carriages and then I used the matching die set to cut them out.  The rail is p[art of the stamp set and the wheels and piffs of steam are from the die set.

Altogether a pretty card and of course the train set could be for a girl also 

More tomorrow ...

Hugs xx 

October 12, 2016

Water Colour Wednesday - Robins !!

Hi Everybody,

These three cards are really easy to do and I have used Distress Inks to colour them all.

I have simply sponged the background on to the card making the circle wider as I worked my way out from the centre.

Spritz it with water to get the mottled look and then with a darker shade of ink stamp the snowflakes 

I added in the sentiment in black ink and embossed it with clear powder then with a black pen I added in two lines above it.

The robins have been stamped in Tea Dye and Festive Berries and cut out with the matching die and both were from Clearly Besotted.


The third card is done in the same way for the background but I have added in the Musical Border from Craft Stash to the top.

I cut it three times and I glued them together.

I have sprinkled them with glitter and added them at an angle on my card.

Really easy to do especially if you make lots of cards for charity

More tomorrow ...

Hugs xx


September 14, 2016

Water Colour Wednesday - Bear Hugs

Hi Everybody,

Just a quick and short post today as I have more videos coming with "Goodies" from Craft Stash that are sure to please you.

This cute Teddy Bear is the Bear Hugs stamp set from Clearly Besotted.

 It comes complete with several sentiments that will ring the changes for your designs.

There are matching dies to cut both the Teddy and the banner for you and several sentiments  to go inside it

I have used the Diagonal Stripes to create the side panels to my card and I used Blueprint Sketch Distress Ink

The card is a small A2 and I dotted it with some blue sequins as a little extra.

The bear has been water coloured with Gansai Tambi and it didn't take me long to make this simple little card

More tomorrow ...

Hugs xx

September 07, 2016

Water Colour Wednesday - Best Birthday

Hi Everybody,

Todays clean and simple card is using  the  Best Birthday  matching stamp and die set from Clearly Besotted

You don't need to buy the dies to create this card because you can simply fussy cut around the image ... but I have to buy both if they are available ... don't ask me why !!

So to make this card I stamped the two outside characters directly onto my base card and stamped the central one onto another piece 

I water coloured them all in and then die cut the piglet out and added it on foam pads to the centre position on my card

The sentiment and balloon strings are from the same stamp set and the only extras on the card are some silver sequins that I have dotted around

They just don't look silver in the photograph .
 I inked around the edges of the card and matted it onto some grey before layering it onto the white base

More tomorrow ...

Hugs xx


August 09, 2016

Tuesday Tutorial - Hello Baby Girl ...

Hi Everybody,

Todays card is clean and simple and ready to welcome the new baby to the world. 
I have used Spellbinders dies to create my card and the lovely baby feet card is so special from LimeTree Crafts
The finished size is US A2 and it fits into a standard sized envelope for cheaper postage costs. 
Alter the wording and it would a really lovely baby shower card too
Spellbinders Supplies:

Other Supplies:

With die #7 from Matting Basics A cut two pieces of white card and create a hinged card
With #7 from Matting Basics B cut one layer in pink
With #6 from the A set cut another layer in white and emboss with you favorite embossing folder
(Please remember that #1 is always the smallest)
With #2 from the Scalloped labels 46 cut as many shapes as you would like to ad to your card front but adding too many will spoil the look
Add foam pads to the back of these shapes and place them on the embossed panel randomly
Add some of them so that they lie off the panel
Trim around the shapes from the back and then wrap your ribbon around the layers
Add this to the pink panel and add all to the base card with foam tape underneath to give dimension
Add a small bow and glue small flowers to the centre
Sprinkle them with glitter
Cut the words from a darker shade of pink several times and glue them in layers to add to the card
Dot with pink pearls to finish

More tomorrow ...

Hugs xx

June 08, 2016

Water Colour Wednesday - Good Times

Hi Everybody,

A really simple card today using  Spectrum Noir AquaTints - Pretty Pastels

I have just done a soft wash of the pale blue in the background for the sky

I coloured the bike and butterflies with pink and that basically is all I did with Aqua Tints

I use some well watered down black for the ground and added in my sequins.

The stamp is from Clearly Besotted and is called Good Times 2 

Then I stamped and embossed the sentiment to complete the card.  I used craft foam behind the panel to add it to my card base which is an A2 top folded one.

More tomorrow ...

Hugs xx


May 17, 2016

Tuesday Tutorial - Circular Floral Card

Hi Everybody,

Many of you collected the Grand Dies when they where available and  made really good use of them for larger cards. Sadly they have been retired from Spellbinders website but that doesn't mean that we have to forget about them and if you have them in your collection then it is time to dust them off again.
Spellbinders Supplies:
Other Supplies:
  • Flowers/Leaves
  • Glitter
  • White/Dotty/Striped Card 
Instructions:
These are the dies that I am using and they are numbered the same in any set from Spellbinders with #1 always being the smallest. 
(Please bear in mind that Grand Dies are much larger than the normal sized dies)
With die #3 from the Grand Circles cut two pieces of card in white for the base
With #1 from the Grand Stately Circles cut another white layer
With die #2 from the Grand Circles cut two pieces in different patterns. I have used stripes and dotty card for mine. Choose one of these and stamp and emboss a sentiment onto it
 You will also need one more  in this size in white 
With the two that you have cut for the base you will need to fold one of them back about half an inch down and score. And on this same piece you will need to level the bottom off so that the circle will stand  Only do these actions on the piece that is going to be the back of the card
 Don't fold the scored part all the way back as it needs glue adding to the small area and then marrying up with the other piece. This is now your base card.
With the other patterned panel and the white one add the border die across them and cut and emboss.  Placing the die about two thirds up the card will give you a good depth to these two layers.
Add foam pads to the back of each piece and start to layer together.
My foam pads are about 1mm thick and give really nice dimension to my card.
Add the Grand Stately Circle to the base and then add your patterned circle to the top.
Layer the two cut pieces so that they are offset and add them also.
Add in your flowers so that they make a pleasing display and to curl the stems on the flower buds I have wrapped them around a BBQ stick
Tuck in the leaves as you like and add some sparkle to the petals with the glitter

More tomorrow ... 

Hugs xx


May 15, 2016

International Ambassadors Informal Blog Hop ...

Hi Everybody,

Time for another Informal Blog Hop and this time we have chosen to use Embossing Folders for our theme.  For my card I chose the Medallion Design by Donna Salazar  and it gives a really elegant look to the card.

I did a video awhile ago on how to get the  Letterpress Technique   and that way you can make the most of any of your folders to give you two different designs.
The flowers are from Wild Orchid Crafts and as always they are sparkled with fine glitter. The links are at the bottom of the post for you to view the products.  The sentiment has been stamped and embossed and then fussy cut and added to a parchment circle

So now it's time to hop your way to the next Blog post and see what my very talented friends have created for your delight this month ..

Linda Lucas  ...  Australia
Yvonne van de Grijp  ...  Netherlands
Christine Emberson  ...  UK

Please leave a comment and then we know you have visited and thank you for taking part again this month. We all really appreciate your support and we will see you again on the next Blog Hop

More tomorrow ...

Hugs xx