Beautiful Card Designs Made Easy

October 03, 2015

Card Winner for Today ....

Hi Everybody,

Sorry for the late post but this is the first chance I have had to get it done. I was out and about early and although a little colder it was still very pleasant to be out shopping.  Later today it will be playtime with Isabella and I am really looking forward to that.

So without any more preamble we will get straight to the point about the winner of yesterdays blue card.

The draw has been done and the name drawn from the hat is ...

Kazzie Ice 
and if you would like to send me your postal address to 
christina@card-making-magic.com
then I will get the card in the post to you straight away.

You have 48 hours in which to claim the card and I hope that you will like it once it arrives with you.

Thanks to everybody for adding your names and there will be another card on offer next week

More tomorrow ...

Hugs xx


October 02, 2015

Friday Freebie -087

Hi Everybody,

Todays freebie card is in blue and uses the Interlocking Love die from Spellbinders

It is one that was featured in the past and was a FF card that was won and never claimed ... and so here it is again.

It is an 8x8" card and there is an envelope with it should you wish to use it.

If you would like to own this card then all you need to do is join the followers and leave me a comment.

From those comments a name will be drawn and the winner announced tomorrow.  Please come back and check if it is you as you only have 48 hours in which to claim the card.

More tomorrow ...

Hugs xx

October 01, 2015

Emerald card

Hi Everybody,

For this card I have used the Emerald Green from Brusho Crystal Colours and teamed it with Black and White

The Octagon die that I have used along with the Scalloped Octagons are now retired from the Spellbinders website.

To this I have added the "Hello" which is a matching die and stamp set from  Altenew.

I bought mine from Make The Day Special  and they have all the latest stamps and dies from many many companies.

I thought that this turned out to be quite a striking card and is just another way to use up all these playtime sheets I made with the Brushos and using dies that I already have in my "Stash"

More tomorrow...

Hugs xx


September 30, 2015

One Background - Two Cards (Video Tutorial)

Hi Everybody,

Still playing around with Brusho Crystal Colours and having lots of fun with them.

I thought it would be a good idea to make two cards from one of my pieces and so not waste any of my efforts

For this one I have used Lemon and Emerald Green and the video shows you how I did it.

The die I have used is the Classic Heart  and teamed it with the matching Scalloped Hearts


And the heart that was cut out has gone on to make another pretty card but with a different sentiment.

I bought my set from Make the Day Special and is Grand Greetings  by My Favorite Things

There are four useful phrases on the sheet and they are quite large stamps

I hope you enjoy the video and will pop back again as there is a lot more to come


The offer for the beads went very well and they went like hot cakes. 

I ended up sending out 30 packs altogether  ... with a little extra gift from me inside each one ... and they have been sent to Canada,  USA, Australia, New Zealand, Spain, Portugal, Ireland and all over the UK

Please let me know when they arrive with you and I hope you enjoy the packages 

Some of you said you would like some but didn't give me your address ... so sorry you missed out and you are now too late they have all gone. 


More tomorrow ...

Hugs xx


September 29, 2015

Tuesday Tutorial - Decorated Birthday

Hi Everybody,

Todays card is one of the new additions to the Spellbinders range and this is the Decorated Birthday.

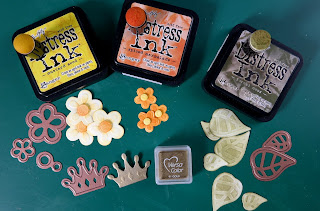
The die cuts the whole shape of the card for you and all you have to do is fold and decorate it. I chose to use the flowers die that is in the set and I am happy with the result.

 Spellbinders Supplies:
Other Supplies:
Instructions:


Lay the main part to the die cutting edge down into the correct side of your card and cut and emboss and remove from the die.
 Carefully fold the card along the scored lines left by the die starting at the front. Mountain fold the first two and valley fold the second two.  Mountain fold the top part to the card and also waht will create the back of it.  Your card should now look like the photo.

Cut the Happy Birthday section from some card of your choice and carefully remove from the die. I sued spray adhesive on the back of mine and pressed it into place on the front panel
Cut the flowers and leaves ... I chose to cut mine in white and then ink with Distress Inks using a sponge dauber. layer the parts to the flowers and add a corresponding leaf to the back of each one.
I added a pearl to the centre of each flower too.  I have inked the crown with Gold but you could simply cut it from gold card

Space the flowers and leaves onto your card and add the crown at a jaunty angel to the top of the sentiment panel

More tomorrow ...

Hugs xx