Beautiful Card Designs Made Easy

May 27, 2017

Shabby Chic Winner ...

Hi Everybody,

Sorry for the late post today but I had lots of things to do this morning.  But now that I am finished I can get the draw done and announce the winner of yesterdays round Shabby Chic Card.

But before I do can I just say that if you enter for the draw then YOU must come back and check to see if your name is listed in Saturdays post.  And if you miss that then the winners names are all listed in the  Winners Page  which is there permanently in the sidebar to the left of this page

I have no way to chase you up to tell you that you have won and if you do not claim it in the 72 hours .... that's three days ... then you will lose it.. So please don't ask me two weeks later about the card that you won as it will not be available.

I am happy to make the cards and offer them as a gift to you.. I don't mind where you live I  will post it at my expense. I don't mind if you have won one before and you don't need to have a blog either.

I am sorry to keep repeating this but if you enter and don't claim the card then you are taking that card from some one else who would really like to have it and that's not fair to them

On to todays winner of the pretty circular card and the name chosen is yours ...

Maureen Killen
please can you send me your postal address to
christina@card-making-magic.com
and the card will be on its way to you straight away.

More tomorrow ...

Hugs xx


May 26, 2017

Friday Freebie 20 - Shabby Chic

Hi Everybody,

Todays Shabby Chic card is a circular one in shades of lilac and cream. This one is dotted in gold glitter and the sentiment says "Thinking of You"


Over the years that I have been giving away my cards many of you have told me that you are adding them to box frames to keep and that is such a compliment to me.
This one is well worth keeping as are all the Shabby Chic ones I am offering over the neext few weeks . I really love every one of them

So if this is one that you would like then all you have to do is leave me a comment at the end of the blog post and then come back in the morning  to see if you have won it.

More tomorrow ...

Hugs xx


May 25, 2017

Easy Water Coloured Card

Hi Everybody,

Today I am adding a short video on how I made this card and if you are new to water colouring it is a very easy one to start off with.

 The stamp set is from Clearly Besotted and there are matching dies that you can buy.

The links to the products are at the bottom of the page

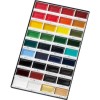
I have simply used a masking technique to get my sheep in a row and I have used Gansai Tambi Water Colours

The green mat was just to accentuate the grass and the sky was added with a homemade edge to some white card .... and you can see how much it has been used in the past. A great card for the men in your life

So I hope you enjoy the video ...  Feeling Sheepish Water Coloured Card 

More tomorrow ...

Hugs xx
May 24, 2017

Beautiful Backgrounds

Hi Everybody,

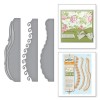
Todays card was shown in the video that I added last week using stencils that are available from Craft Stash

I really loved this little card once it was finished and it was very quick and easy to do.

The longest part was waiting for the embossing paste to dry ... and I left that overnight to make sure it was really dry.

I mixed Dusty Concord Distress Ink with my paste and added it to the card than dressed it up with my usual Flowers,  Ribbons and Pearls

The flowers and lace are from Wild Orchid Crafts  and the ribbon is from Mei Flower

All the layers are raised up with foam pads and that gives depth and interest to the card.

It is much prettier in the hand that the photo shows ... hope you like it

More tomorrow ...

Hugs xx
May 23, 2017

Tuesday Tutorial - A2 Classic Waves Borders

Hi Everybody,

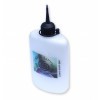
For todays card I have used a simple border die from Spellbinders and this is the Classic Waves which comes in three parts. 
As the border dies divide the card into two separate pieces I thought we would make two cards for the price of one with this set if dies
Spellbinders Supplies:
  • S4-788 Card Creator Classic Waves Border dies
  • S6-001 5x7 Matting Basics A 
  • SEL-002 Grid Iron  Embossing Folder
  • PL-001 Platinum Die Cutting Machine
Other Supplies:
  • Cosmic Shimmer Dries Clear Glue
  • Foam Sheets
  • Bakers twine
  • Enamel Dots
  • Card - two shades of turquoise and white
Instructions:
Create two Base cards with Matting Basic A with the white card
Create three mats with two shade of turquoise and another from the white
Place the three dies at different levels and angles on the card and cut and emboss.
Ink through the die if you like to add more pattern
Use the pieces to create two cards
With foam pads layer up the dies cuts so that they create a waterfall effect on the card and they can be added at the top or bottom of the card base as you prefer
Add an extra layer of white card and emboss this if you prefer a sturdier base, and layer the die cut pieces onto this
Adding in the foam gives more dimension to the card
For the card below I have added the cut pieces to the top of the card and onto another embossed card.
The top has been wrapped with Bakers Twine and two small shells added as decoration
The "Thanks" has been cut three times and stacked together and then enamel dots placed around the rest of the card.
For this card I added the die cuts at the bottom of the card with foam in between the layers
The"You" has been cut three times and stacked together and enamel dots placed around the card
Two ideas that would make good male birthday cards with the appropriate sentiment added

More tomorrow ...

Hugs xx