Beautiful Card Designs Made Easy

August 01, 2024

Tile Effect Cards

 Hi Everybody,

Many years ago ... more than I care to remember ... I did a  video for YouTube and called it the
                        Faux Tile Effect 

It is still there but I have decided it is time to bring old videos up to date and so this is one that has now been
 re-filmed and here it is for you to view.

It is using Distress Inks and stencils, as well as some flowers  on some of the cards, but the overall effect is just as pretty as it was back then.

Here is the more up to date video 
Tile Effect 

The top card shows the tile panel  with just the sentiment added and that way you can see what the effect is on the card.

But the pink one has all the bells and whistles added in with the flowers and the silver die cut frame around the edges.

The tile background is visible along the sided and this is a really elegant card ... much better in the hand than the picture shows.

Please leave  me a comment here and on YouTube to let me know that you have visited, and any of these pictures can be added to Pinterest as well..

More tomorrow ...

Hugs xx

July 31, 2024

Mixture of Techniques

 Hi Everybody,  

These are some of the cards I have made over the past few weeks and they have been filmed and added to the blog pages.

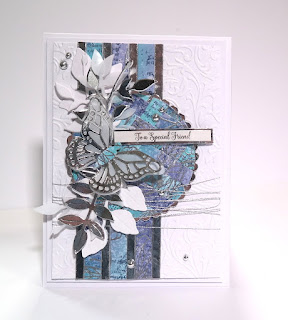
This one is using the Tile Effect for the die cut panel and I have embellished it with silver.

The finished card is a 5x7 and the die cut is one from the original "Christina Collection" brought out many years ago now by Craft Stash.

The alphabet letters are also an old Card Making Magic die set and I don't know if  any of the are still available.

The butterfly was free with a magazine many years ago


The card to the left is using the weaving technique and both videos that were added just days ago.

This is also a 5x7 card as I fine that size suits me the best, not too big and not too small.

It is the circle in the centre of this card that is the
Woven Panel Card 
and it is a very pretty effect what ever size you make the panel or shape.


This card is a mixture of two techniques and has a woven panel  done with the Fractured Card look.

I love the colours in this panel and they are
 Antique Linen and Speckled Egg Distress Oxides. 

 I have splattered the whole lot with gold paint before cutting it into strips to be woven.

I have edged it with gold mirror card leaving a small gap between the panel and the strip for a different kook to the fracture.

All these cards are now in my charity shop box and waiting to be taken to the store.

More tomorrow ...

 Hugs xx


July 30, 2024

Playing with inks ...

Hi Everybody,

These cards are made from the other colour way mentioned in the Three Panel Card video   that I added last week.

Experiment and see which colour combinations you like the most and make your cards with those, it is a process you will enjoy as you play.

You could also try cutting your card at a different angel to vary the look. and use any stamps that you may have in your own collections to personalise the backing.

I really enjoyed making these papers for my cards and it is something I will be doing again soon. 


You could add in some gold or silver card to enrich the design and also add in any little die cuts that you have.

It is an excellent way to use up your scraps and odd pieces that you have lying around.

But it is very addictive and I made loads ... far more than I needed, and so now I have a small box ready to use in the future.

So try really hard to restrict your self to just making what you need for the project in hand ....
 and that is easier said than done !!

More tomorrow ...

Hugs xx


July 29, 2024

Everyday Items - Hole Punch Dots

Hi Everybody,

It is no secret that I love to add embellishments to my cards, whatever it is ... Flowers, Ribbons or Pearls !!

This is something that I have enjoyed doing for a long time and I know that to some people I add too much, but to me more is more.

I like the look of small pearls or enamel dots but they can get a little expensive and so I make my own.

I have in the past made them from coloured glues or the little jars of Nuvo Drops and allowed them to dry before transferring them to my cards.

And I did  a video called Create Your Own Pearls and flourishes about twelve years ago, and boy have I come a long way since that video.

It looks so old now and my cards are much better than they where back then 

I have even made the dots from wax seals in the past and left them to dry, and then added them to my designs.

But this one is so easy and uses up scraps of any kind of card that you have left over. 

You could use a die if you have one that cuts out the holes for you but the hole punch is so cheap to buy and is something that some people already have in their home office. 

Here is the video so please click the link and go to YouTube to view.
Hole Punch Dots

Please leave me a comment both here on the blog so that I know you have visited me, and on YouTube so that they know you enjoy the videos I upload. Thank you xxx

More tomorrow ...

Hugs xx
 

July 28, 2024

Ethne Gloss - Winner

 Hi Everybody,

I hope you are enjoying this lovely weather at long last … we have waited so patiently for it and now the sunshine is here.  It makes such a difference when the sun is out and everything feels much more pleasant. Let’s hope it last a good while now that it is finally shining for us.

I have done the draw for the gift on offer on Friday and the name today is

Ethne Gloss

Would you email your postal address please to

christina@card-making-magic.com

and I will get it in the post to you straight away. I hope you enjoy it and please be sure to let me know that you have it safely 

More tomorrow…

Hugs xx