Beautiful Card Designs Made Easy

Showing posts with label JustRite Stampers. Show all posts

October 02, 2017

White Embossed Cards

Hi Everybody,

These lovely cards have been created with a lace stamp and some white embossing powder on coloured card

They are all blue but the effect is really pretty especially with the addition of the flowers which are all from Wild Orchid Crafts

I have used two different stamps. This first one is Lace Medallion Labels from JustRite Stampers and I Inked over the design with Faded Jeans and Broken China 

I have simply stamped along the bottom edge for this one and added Glossy Accents to the words


This is the same stamp used as an all over design and again an arrangement of flowers and small leaves with dies from Spellbinders

The sentiment on this card is cut in silver and a whole bunch of leaves added too.

I have dressed all the cards with pearls as a finishing touch and they are much prettier in the hand

I am sorry but the stamp is one that I have had for some time and I cannot find a link for it.
This last one has used the Borders and Backgrounds stamp from W+9  and I have wrapped ribbon around the layer before adding it to my card 

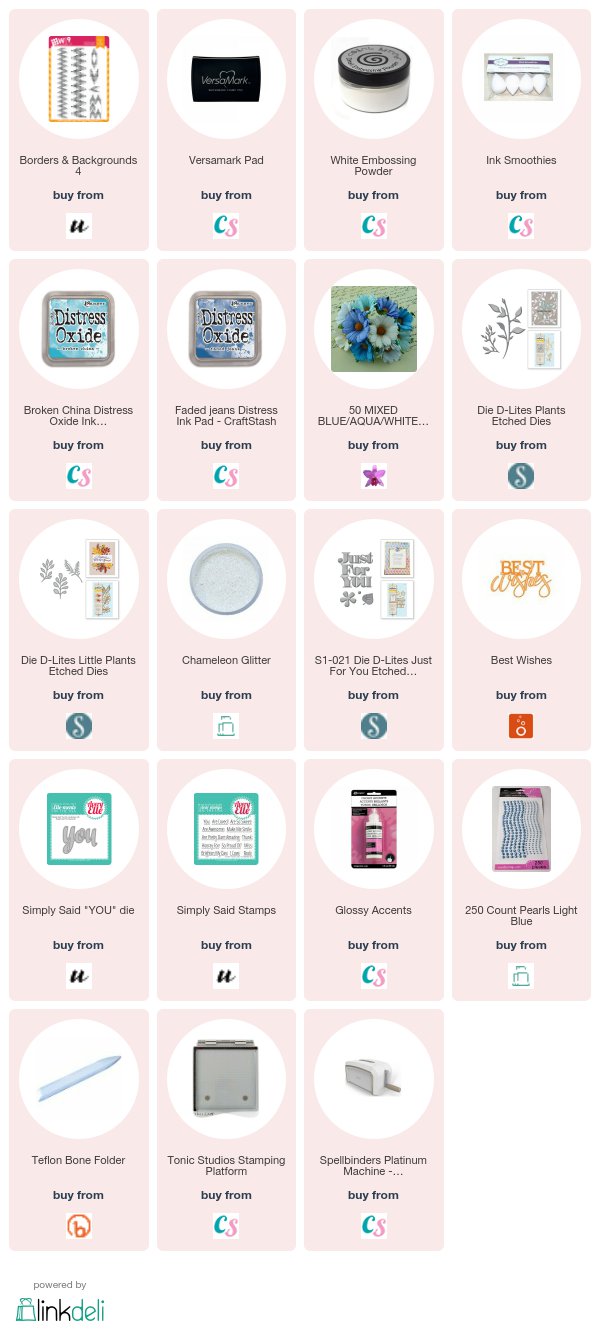
I have added the links to the products for you to see at the end of the post.

More tomorrow ...

Hugs xx
February 09, 2016

Tuesday Tutorial - Victorian Numbers

Hi Everybody,

We have used the Alphabets on several cards on the past few months but for today I thought we could dig out the numbers a see what we can do with them.  I am sure that many of you have these dies ... or numbers of some description ... and this is a pretty card to make for a special birthday or anniversary.

 Spellbinders Supplies:

  • S6-001 5x7 Matting Basics A
  • S6-002 5x7 Matting Basics B
  • S4-540 Victorian Numbers
  • EL-002 Regal embossing folder
  • GC-200 Grand Calibur Die Cutting and Embossing Machine
  • Raspberry Adapter Plate
Other Supplies:
With die #7 Matting Basica A cut two pieces of white card and
With die #7 Matting Basics B cut one layer in some pretty card
With die #6 Matting Basics A cut another layer in white
Add your chosen numbers to the white card in the top right hand corner. Space them out as you like and tape them to the card so that they don't slip and cross each other in your die cutter
Tape the numbers that you wish to use for the birthday onto the patterned card, 
Add them in the opposite corner where they will not interfere with the white card and cut them out
Stamp the sentiment onto the white card and then emboss it. 
You need to stamp first because the card will be un even once it has been embossed and difficult to stamp
 Add the white embossed layer over the patterned layer with foam pads in between.
Cut the foam pads if you need smaller ones and space them evenly around the numbers to support them on the card
Add in the pink numbers near the sentiment. I have covered my numbers with glossy accents and sprinkled them with glitter. 
Once they are dry I  threaded a silver key on to the Bakers Twine and wrapped it around the layers, tying a small bow into the twine
With foam tape in between I added it these layers to my base card.

More tomorrow ...

Hugs xx


February 03, 2016

Water Colour Wednesday - Sealed with a Kiss

Hi Everybody,

Todays water colour is using an image from Make It Crafty

There are many images and background scenes for you to choose from.

This one is called Sealed with A Kiss  and it is so intricately drawn

I have coloured her with Gansai Tambi Water Colours  and I am quite pleased with the result though it did take me some time to complete

The flowers are from Wild Orchid Crafts  and I have used some foiled teal card from Hunkydory for the background. The finished card is 6x6 and I have no idea where it is going.

More tomorrow ...

Hugs xx


January 25, 2016

Birthday Cards (Video)

Hi Everybody,

It is just as easy to make several cards in one session,  and while you have all the equipment out and on hand then that  is the time to do it.

These cards are all made exactly the same way ... same card, same stamp, same embossing powder, same design, same size

The only thing that has changed is the colours and all these pretty colours are from Papemill Direct 


The stamp that I have used is  Patterned Triangle Background  and it is a large mounted stamp from My Favorite Things.


I have used Bright White  embossing powder from WOW and it is really white when heated.

The script stamp is one of the  Large Fancy Sentiments from JustRite Stampers.

The verse sentiment on the inside of the card is from Crafters Companion and is one of their Sentimentals Range 

The enamel dots are from Want2Scrap

An easy set to make and can be used throughout the year ... and they would be suitable for male cards too

More tomorrow ...

Hugs xx

January 07, 2016

Blue friend ...

Hi Everybody,

Todays card is elegant and perfect to let friends know that they are special.

The blue card is from Papermill Direct and makes a really pretty effect when covered with the embossed parchment I have used

The parchment has been embossed with the Butterfly Folder  and added to the blue card so that the foam tape sits beneath the added oval.

For the oval I have used the Spellbinders Victorian Bow  and I have cut this in antique silver card that I bought from the craft shows

The verse is from a set by JustRite Stampers  and it fits beautifully inside the frame that matches Labels 29

The ribbon is Organza  from Mei Flower and tied in a double bow with a pale blue pearly centre over the knot

The flowers are from Wild Orchid Crafts  and put together to compliment the card.  The centre of each flower has a tiny Glitter ball also from WOC

They have added sparkle from Glitter Magic  and into the display I have added blue Hat Pin that can be removed as a gift for the recipient of your card.

More tomorrow ...

Hugs xx

October 06, 2015

Tuesday Tutorial - Romantic Rose

Hi Everybody,

Todays pretty blue card is created with the romantic Rose from Spellbinders and it makes the loveliest of cards for all your female friends. I have created mine in two shades of pastel blue but it would look good in any colour that you choose.

It is a simple layered card ... quick and easy to put together for any occasion.
Spellbinders Supplies:
Other Supplies:
From die  #3 cut two panels to make the base card from pale blue card (die #1 is always the smallest)
Take one of these panels and score and fold  it  on the short side by about an inch. Add glue to the folded edge and glue the two together along this edge only. 
This will create an  "A"  frame leaving the rest of the card open for it to stand  ... as your base card. 
Make sure that the correct side of the card is on the outside
From #2 and some darker blue card I have cut one panel and from the same base card and die #1 I have cut another smaller panel
Layer the two together with foam pads between the layers and wrap with ribbon before adding to the base card
Have a dry run with flowers and bows to see where you like them and when you are happy with the arrangement glue them in place.

 I use a hot glue gun but be careful as they get very hot and will burn your skin if you drop the glue onto it ... How do I know this ????

Heat emboss your sentiment and cut with the oval and add with foam pads to the front of the card.
Glitter the flowers and decorate with pearls for a really pretty effect to your designs.

More tomorrow ...

Hugs xx


May 06, 2015

Back to Cards ...

Hi Everybody,

After all the excitement about Isabellas' House I thought I would return to a card.

This is in a lovely shade of burnt orange and I have used the Heirloom Ovals  from Spellbinders

This is a large die and makes beautiful cards either as part of another like this ... or as a free standing card with a lovely shape by using the outer cutting edge

I have used the verse from JustRite Stampers  and stamped it in black then clear embossed

The flowers are from Wild Orchid Crafts  and are a lovely collection of Tulips, Roses, Cherry Blossom and Lilies

The pearls are from Want2Scrap  and I have added them to some lace.

Maybe not a color to every bodies taste but it does look quite pretty in the hand

More tomorrow ...

Hugs xx


April 30, 2015

Labels Four

Hi Everybody,

Todays offering is using the same technique as Tuesdays tutorial card but simply using the opposite side of the folder to get a different look

I have used the same color ink .. Cotton Candy   from the Spellbinders Celebrations Collection.  It is a very soft baby pink and I love the lacy effect that the folder gives.

So just refer back to yesterdays Labels Thirty Four tutorial for how to Letterpress ... the link will be in the side bar to your right for Tuesday Tutorials

On the top I have used #3 from 5x7 Elegant Labels Four and teamed it with a sentiment that I had already had in my "Stash" onto Labels Eleven but that is retired from Spellbinders website

The sentiment is from JustRite Stampers  and is one of a set on the stamp sheet

My beautiful pink ribbon is from Mei Flower and I have tied it into a double bow.

The flowers in my corsage and the resin flower on the bow are all from Wild Orchid Crafts  and I chose a selection of the palest pink and last but not least the tiny pink pearls are from Want2Scrap

Altogether a very pretty and feminine card for any of your friends

More tomorrow ...

Hugs xx

April 24, 2015

Friday Freebie 056

Hi Everybody,

Not a very good photograph but it is a very pretty card.

It is a 8" square card with a foiled front and a stamped and embossed sentiment on the panel

The sentiment  Good Friends  and it is from JustRite Stampers

It is part of a set that matches Labels Twenty Nine  from Spellbinders and together they make a pretty topper for your designs

The card is looking for a new home and so if you would like to own it then all you need to do is become a follower  (if your're not already)  and leave me a comment at the bottom of the post and come back tomorrow to check if you have won

If you are new to leaving comments then here is what you need to do.... 

  •  Scroll down the page to just under my signature
  • Look for the word Comment  ... the number is how many comments have already been made
  • Click the word and it will open another box for you
  • Add your comment into the box where it says ... "Leave your comment"
  • And then you will need to identify yourself with your email address or any of the other options
  • And your comment will be added once it has been moderated by me so please don't add it twice
More tomorrow ...

Hugs xx

February 05, 2015

Victorian Collection - Royal Circle

Hi Everybody,

This card is made a little differently from my normal style and I did a video a few years ago on some other ways to create this  Cross Over Card

This one creates a pocket for you add a tag to and you can add a verse or sentiment to this as you wish.

I have  used dies from the  Victorian Collection  to create the topper and the circle die is the Royal Circle

The verse has been stamped and embossed in silver onto Labels Eighteen  and then added with foam tape

I have edged mine with some lovely braid and a dded some peach ribbon to the tag which I have added to the pocket

Today I will be back at home and into my normal swing of things.
I hope you enjoyed the Create and Craft shows and will join me again the next time I am there.

More tomorrow ...

Hugs xx

December 17, 2014

Three ways to use ...

Hi Everybody,

Today I would like to introduce you to this beautiful die template from
Spellbinders Victorian Collection 
 it is called  Heirloom Oval (click the link)


 The set is in three parts and it can be used in many different ways.  Here I have tried to show you three ways to make this die work for you so that you get the full value from your purchase.

The first card has used the die to create the base  which has been hinged at the top to use in portrait view.

Then another layer is cut with the filigree pattern and layered on the top with foam pads.

I used the smaller centre part raised again with foam pads and added a simple pre printed greeting topper from Anna Griffin

The ribbon, hat pin and the  Wild Orchid Crafts  flowers all compliment the card which is very simply decorated
The second card has used the three largest dies to create the filigree pattern cut in white.

I then used the outer edge and the inner one to cut another frame in pink but without the filigree pattern in it and glued these two together

I cut another complete shape in white and added a verse to this before adding in the frame I have just created.

Then add all of this to your matted and layered base card and decorate as you wish.  I have used Crinkle Ribbon and WOC flowers ... plus the hat pin
The third card creates the base card and hinges it on the long sides to use in Landscape view.

A frame has been created as in the second card and added with foam pads to the base.

I have decorated with WOC flowers and added in a pearl flourish from Want2Scrap

All my flowers have been sparkled with Glitter Magic

I hope I have helped you to see that by varying the Orientation  the color and the decoration you can create really pretty cards that you will be proud to give

And now I am on my way to the Create and Craft Studio to show you the Teal Grand Calibur tomorrow

More tomorrow ...

Hugs xx


December 09, 2014

Reflective Moment ...

Hi Everybody,

Todays card is  in a pretty shade of blue teamed with white  and the die used is the  Reflective Moment  from Spellbinders

If you click the link you will see what the die template looks like and it is a large 5 x7 set

I have embossed the background piece of blue and then added the die cut panel with foam tape to give dimension

The sentiment is from  JustRite Stampers  and is the one that will fit the Labels Twenty Nine

I have also added that panel with foam and then edged it with Diamanté from Want2Scrap  for a really pretty finish

The beautiful flowers are from Wild Orchid Crafts  and as usual I have added fine glitter from  Glitter Magic

The satin ribbon is from  Mei Flower  and I have tied it in a bow and added a dazzler to cover the knot

Another card that I like and it's not pink !!

More tomorrow ...

Hugs xx


October 31, 2014

Friday Freebie 031

Friday Freebie 031
Hi Everybody,

The card on offer in this weeks  Friday Freebie is created in Cerise pink and white.

For this one I have used the Californian Background and created a frame around it with  Cordoba from the Spanish Collection.

Both of these dies are available from   JGD Crafts

The sentiment is  Good Friends   from JustRite Stampers stamped onto Spellbinders   Labels Thirty Three   

It is a very pretty and very bright card with the addition of matching flowers from Wild Orchid Crafts

The little gemstones are from Want2Scrap

If you would like to win it then all you need to do is  join the group of followers in the sidebar to your left  and then leave me a comment at the bottom of this post to let me know you have been to visit.

Then tomorrow morning I will pick a name from the hat and the winner will be announced in that days blog post.  I am happy to send you the card wherever you are in the world

More tomorrow ...

Hugs xx

October 22, 2014

Blue Centura Pearl

Hi Everybody,

Some "Thank Yous"  I need to do before I tell you about the card.

Firstly a thank you to all of you who responded to my running out of the silver butterflies and offered to send me some or go and but them for me.

It was very kind of all of you to offer and my extra "Thanks" go to Jan Daly and Lyn Charman who are very generously sharing some of their own with me.

I will let you both know when they arrive and I look forward to adding them to my cards again.

So the card for today is in blue Centura Pearl and white and I apologise for the bad photo.

But the daylight had gone when I took it and so it is electric light and the colors don't look true

The verse is from the   Good Friend   set from JustRite Stampers and it matches the Labels Twenty Nine die from Spellbinders.  Very useful combination to have in your crafting  "Stash"

The flowers are from Wild Orchid Crafts and if only want a small amount of flowers then don't forget that they now do starter packs just for us crafters.

The satin ribbon is from Mei Flower  and is tied in a single small bow with a Dazzler centre.

It is a pretty card but I will make sure that I take my photos earlier in the day in future while the good light is still with me.

More tomorrow ...

Hugs xx


October 21, 2014

Die Cutting Tips ...

Hi Everybody,

Over the last few weeks I have had several emails asking me about die cutting

The problem seems to be with the more intricate dies that are on the market and they can be from any company that make dies

Most people want to know how to get their card out of the die without tearing it in the process and  wasting your precious supplies

And  what better way to explain some of my tips than to make  .... a video!!

So this morning my "Film Crew" went back up his ladder with his camera to film what I wanted to share with you about die cutting

The card I use most of the time is the Hammered White  from the  Papermill Direct  and it is really good quality  255 gsm card and ideal for your card base.

It is a UK company ...  which is great if you are in the UK but if you live abroad then  you will need to check if they will ship to your country

It is the one I use in the tutorial and on Create and Craft TV and it cuts really well in the Grand Calibur.


The die  used is  Spellbinders 5x7 Detailed Scallops   and the wax paper is a Cornflakes packet !!

The beautiful flowers are from Wild Orchid Crafts  with the addition of Glitter Magic to add the sparkle

The organza ribbon is from MeiFlower  and it is tied in a double bow  using a bow maker

Give these tips a try if you are having problems with any of your dies but whether you use wax paper or not  then turning the die and shimming only the areas that won't cut are sure to work for you.


More tomorrow ...

Hugs xx


October 12, 2014

Dark and broody ...

Hi Everybody,

Todays card is a long long way from pink and frilly ... but it does you good to change tack once in while to see what you can come up with.

So this card is using black script paper for the base and over the top I have layered in the Spellbinders Reflective Moments

This is quite a large die and will fit a 5x7 card easily.

I have topped it with a verse from JustRite Stampers which matches the Labels Twenty Nine

There are several lovely verses on this stamp sheet all about Friendship

The flowers are from Wild Orchid Crafts and I have stayed with black and white ... but they are glittered up with Glitter Magic.

Into the corsage I have added in a silver Hat Pin and a small white bow with a silver heart charm attached to it.

Behind the die cut I have added in two silver fans for extra effect.

So OK it's in black but it is still a pretty card and some one is sure to like it somewhere..... I think .... I hope

If you live in Arizona and are near to the Spellbinders warehouse then you are going to love this piece of news

They are having their first ever "Warehouse Sale" in November and you are sure to pick up some fantastic bargains if you pop along and visit

For all the information just click this link ... Warehouse Sale  and be sure to tell us what you buy

More tomorrow ...

Hugs xx


October 08, 2014

One Die ... Two cards

Hi Everybody,

Being a frugal crafter I decided to make another card from what was left after cutting out the Bow Elegance die from some pretty blue card.

With careful positioning I managed to place the die where I needed it so that once the piece was cut I would have the negative to use on this card.

I added some really lovely paper behind to fill the space and then layered the other parts to the die set with foam tape.

The sentiment is from JustRite Stampers and is part of the Friend  set that matches Spellbinders Labels Twenty Nine


The flowers are from Wild Orchid Crafts  with the addition of some sparkle from Glitter Magic

Both types of ribbon are from Mei Flower and are  tied in  double bows

The pearls on both cards are  from Want2Scrap  and I have added it all around the edge of the frame.

This is the other piece used as a full card and the outer die used to create the solid base.

So from one sheet of A4 card I have got two pretty cards and nothing is wasted

The die is part of the Victorian Collection and is exclusive to Create and Craft until the end of this month ... but if you bought yours from the shows then you should have them to play with by now

More tomorrow ...

Hugs xx

August 18, 2014

Pretty in blue ...

Hi Everybody,

This pretty card is created from a pale blue and layered up with several sets of dies from  Spellbinders.

I have used foam pads in between each layer to give more depth and I have inked through the oval layer with Faded Jeans Distress ink.

The pearls are from  Want2Scrap  and they surround the sentiment.  It is from a set that is made to fit the Labels Twenty die but who says that is the only way it can be used ??


The ribbon is from my "Stash" and the single flower is from Wild Orchid Crafts

The sentiment is from  JustRite Stampers   and contains many words that can be mixed and matched to say many things

Click the links to take a look at the mentioned products

More tomorrow ...

Hugs xx


July 16, 2014

Flower Starter Packs ...

Hi Everybody,

Have you seen them ???   The beautiful starter packs of flowers and embellishments that Paul from Wild Orchid Crafts has put together for us.

He very kindly listened to my suggestion  that was based on some of the comments that many ladies wrote and said that this is what they  wanted

A small selection of different sized flowers and styles that you can add to your cards and at a cost that was reasonable

This is what he has come up with and what a really good price

I think he has done us proud ... so please pop over and take a look at the Flower Starter Packs  

The featured card shows some of WOC flowers and the rhinestone embellishment is in the bow to add that luxury touch to the design and these are available in the Mixed Flowers and Rhinestone Packs  but there are other combinations and colors for you to choose from

I hope you will like what Paul has done ... I certainly do ... so Thank You Paul for your  doing this for us

More tomorrow ...

Hugs xx


July 01, 2014

Pearl Flower Sprays

Hi Everybody,

It is such a compliment to me to see the pearls sprays popping up on many cards and I am so glad that you liked them enough to add them to your own designs

Well this little video takes it one step further and shows you how to create flowers from the pearls that you are finding if difficult to otherwise  make use of

Here  I have tucked them into my flowers to add that extra touch to the corsage and the size of the flowers will depend on the size of the beads that you use.

But it is an excellent way to use up all those that are sitting there and that you are thinking of simple throwing away.

The flowers are from Wild Orchid Crafts  and they have new flowers coming in all the time.

The pearls around the edge of the frame are self adhesive strips from Want2Scrap

This is a mixture of Carnations, Roses, Tulips and the pearl flowers and I have used Glitter Magic to add more sparkle

The background to this card is the Tied Together die from JGDCrafts


And if you don't want to add them to your flowers then simply add them to a bow to cover the knot.

The organza ribbon for this bow is from Mei Flower  and it has been tied in a double bow using a bow maker 

Another pretty idea to add to some of your "Girly" cards

And here is handy tip from Margaret Bowe who wrote to tell me that if you glue a piece of velvet to an 8" paper plate it stops your beads rolling all over the place ... and it is cheaper than a shop bought bead tray .... YaaaaY !!  Thank you Margaret

More tomorrow...

Hugs xx