Beautiful Card Designs Made Easy

April 05, 2017

Papercraft Essentials145 Safari Friends

Hi Everybody,

I have such a lot of videos to add for you this week and so there is no space to do a Water Colour Wednesday card today. 

Instead I have the latest issue of Papercraft Essentials to share with you and the video will give you some fun ideas on using this stamp and embossing folder.
There are lots more ideas with hints and tips inside the magazine and many more card ideas that you may like to try.

The magazine and gift will be in the shops tomorrow the 6th April and you can find it in selected supermarkets and craft shops or from WHSmiths.

Also direct from Moremags  for either the mag or to take out a subscription to your favorite one.

The video can be found here at ...

There are so many things that you can do with this fun stamp set and it will be suitable for lots of age groups.

I fussy cut the characters out for several of my cards and added them with foam pads underneath to give depth to my design.

But you could stamp the scene direct to card and sue the masking techniques instead.

But whatever you do have fun

More tomorrow ...

Hugs xx

April 04, 2017

Tuesday Tutorial - Iron Romance

Hi Everybody,

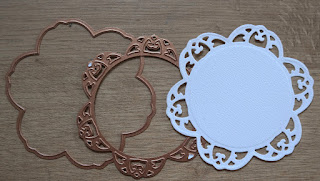
This is one of the newer dies from Spellbinders and this is called Iron Romance. 
The overall size of the die it about 4 1/2 x 6" so a good one as the complete focal point on your cards
I have used two shades of orange for my design and teamed it with cream for a really bright look
Spellbinders Supplies:
Other Supplies:

With Matting Basics A and die #7 cut two pieces in cream to create the base card
With Matting Basics B and die #7 cut one layer in the darker shade of orange
With A #6 cut another layer in the paler shade of orange
With B #6 cut another layer in cream 
Cut in cream #3 and #4 dies in the Iron Romance and several of the smaller spiked die
Cut two of the small frame dies and add them around a sentiment
Add foam pads to the back of all the large layers
 Emboss the top layer of cream card.
Flat glue the layers to the base card 
Add the cream layers from the previous step
Arrange the flowers as you like them. 
I have used from left to right:
Carnation, 15 mm Rose, Gypsophila, Iris, Anemone, Geum, Rosebuds, Tulip
Dot with glue and sprinkle with glitter to add sparkle to the petals.
Line the inside to compliment the front 

More tomorrow ...

Hugs xx


April 02, 2017

Ruby Update

Hello Everyone,

Can you believe that I am nearly eight months old already and I now try to be the boss in my house but my mum won't let me.

She says I need to be a well behaved puppy and then she will take me to lots of places that she goes too but only if I am polite

Look how much I have changed in these few months since I cam to live with my mum and dad when I was nine weeks old

I was soooo cute then but now I am simply gorgeous ... don't you think ??


Me and my friend Dougal are starting a new dog training class next month and it is our Bronze Citizens award.

We will get a certificate at the end of it from the Kennel Club  ... if we are well behaved.

We can then go on to the next stage and I will be sure to keep you posted as to how we go on.

When I am a year old I can also go to Agility Training and run up ramps and through hoops and over fences. I will have a ball but my mum will be shattered !!

It's a beautiful day today and our mums took Dougal and me on the beach.

We ran around and played and walked such a long way for two hours.

Then we got back and we had been made clean and tidy with no sand on us we snuggled up on the sofa and had a little sleep.

Isabella came to visit today as she is going to a Christening with her Daddy and Jasmine

She dressed me up in her crown and called  me Princess Ruby ... she thinks I look lovely but I am not too sure !!

More tomorrow ...

Hugs xx


April 01, 2017

Card Winner Today ....

Hi Everybody,

So today is a quick blog post because I am going to the craft show to see what goodies I can find.
It's pouring down here but at least the show will be warm and cosy.

The draw for the Card winner has been done before we leave and the name this week is yours ...

sghay

Please email me  your postal address to 
christina@card-making-magic.ccom
and the card will be on its way to you.

Please let me know when it arrives with you and I 
hope you will like it when it does

More tomorrow ...

Hugs xx
March 31, 2017

Friday Freebie 012 - Lilac Creation

Hi Everybody,

I really like todays card and it is lined inside too. It is in shades of lilac and white with complimenting flowers along both sides

There is even a matching hat pin with this one and lots of layers.

So if this is a card that you would like then all you need to do is leave me a comment at the end of the post.

From those comments a name will be chosen at random and the winner announced in tomorrows blog post.

You will have 72 hours in which to claim it.

I don't think you will be disappointed with this one as it is much nicer in the hand than the photo shows

More tomorrow ...

Hugs xx


March 30, 2017

Tonic Studios - Canvas Sneakers

Hi Everybody,

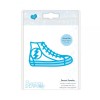
This fun card is created with one of the Kids Rococo dies from Tonic Studios.

This is the Canvas Sneakers and is perfect for any male cards that you need to make especially young boys

I have teamed it with the Best Wishes die also from Tonic and it made the easiest of cards

You will fine the instruction in my latest video on YouTube and here is the link for you   Tonic Studios - Canvas Sneakers

I hope you enjoy the video and over the next few weeks I have many more coming up for you to view.

More tomorrow ...

Hugs xx

March 29, 2017

Water Colour Wednesday - Sunflowers

Hi Everybody,

This image is from the same collection  as the poppies and both are from the Just Inklined CD called the Next Big Thing

This one has been coloured with Gansai Tambi water colours with a faux stitched edge around the circle.

Faux Stitching was a page that I added to my website many years ago but it seems to be having a bit of a comeback at present.

To the flowers I added some Glossy Accents and this tilted photo shows you a little more of the effect.

The yellow ribbon and the enamel dots jut added that finale touch and the finished card is a 6" square.

I mated the image onto yellow and then brown card and then glued the lot to a white base card

The Happy Birthday sentiment has been trimmed into  a banner and added with foam pads to the bottom of the card

More tomorrow ...

Hugs xx
March 28, 2017

Tuesday Tutorial - Intertwined Spirals

Hi Everybody,

For todays tutorial I am using one of the newer dies from Spellbinders and this is the Intertwined Spirals designed by Becca Feeken.  It is delicate and intricate and makes the most beautiful cards for you with just the one die set.
Spellbinders Supplies:

Other Supplies:
Instructions:
With the outer frame cut two layers to create the base card
With frame and insert one cut a layer in the pale pink
Add foam pads to the back of this and wrap with ribbon before adding it to the base card
With the two solid parts cut one of each in the pale pink and add foam pads between.
The foam pads are only 1 mm but give a pleasing depth to the overall look
With the shaped solid and the matching insert cut this in white
Stamp and heat emboss the sentiment onto some white card and either die cut or punch it into a circle to fit the front
Select pink and white flowers. 
I have used from the left:
Rosebuds, Sweetheart Blossoms, Cosmos Daisies, 20 mm Green leaves and Roses in three different sizes 10 mm 15 mm 20 mm 
Add a small bow to the front and one small rose to cover the knot.
Arrange the flowers along the left side and dot with glue then sprinkle with glitter to make them sparkle.
Add some small pieces of pearl flourish around the flowers and three small pink ones to the sentiment circle

More tomorrow ...

Hugs xx

March 26, 2017

Card Display ...

Hi Everybody,

Every week I give away one or more of my cards and I say that it doesn't matter if you have won before you can still enter again.
 And I am happy to send them to wherever you live at my expense.

So I just had to show you this beautiful frame that Ann Lauzon in Canada has created with three of the cards that she has won over the years that I have been doing this give away.
Christina's Cards
 Doesn't this look beautiful and I am so honoured that she would treasure my creations to this extent. I think it looks wonderful and it is something that I am sure Ann will treasure for a long time. 
Thank you for letting me show everyone what you have done and I hope it gives you great pleasure

More tomorrow ...

Hugs xx

March 25, 2017

Card Winner

Hi Everybody,

Good morning on this beautiful sunny day. The whole weekend stretches out and I am going to really enjoy it all. Today we are dog sitting all day and so later on we are taking Ruby and Dougal to Witch Wood for a good romp through the trees.

Both of them love going there and it tires them out for a few hours at least. Then tomorrow is Mothers Day and I am going out to lunch.

But before all that I have done the draw for the lovely white and silver card from yesterday and the name chosen is you ....
Maggie Phillips
 Could you email me please with your postal addres to
christina@card-making-magic.com
and the card will be on its way to you
You have 72 hour in which to claim it and I hope you will like it when it arrives with you.
Please lt me know that you have it safely

More tomorrow ...

Hugs xx

March 24, 2017

Friday Freebie 011

Hi Everybody,

Todays card is the silver and white one that I made a few weeks ago in a Tuesday Tutorial 

It really is a pretty card and it has a selection of flowers attached to it 

Click the link above to see how it was made.

If you would like to win this card then all you need to do is leave me a comment.

From those comments a name will be chosen at random and the winner announced in tomorrows blog post.

Be sure to come back and check if you enter that it is your name that is shown as I cannot chase you up. If you don't claim the card in 72 hours then it will be offered to someone else at a later date.

SC&P 161 Magazine Winner 


Cynthia Cole

Email me please with your postal address to
christina@card-making-magic.com
and it will be in the post to your straight away

More tomorrow ...

Hugs xx


March 23, 2017

Die Cutting Essentials 22

Hi Everybody,

Today this magazine is on sale in selected supermarkets and craft shops or WHSmiths and this is one idea of how to use the really useful Happy Birthday die that comes free with it.

You can also get it direct from this link  

In the video I make this card ... and I tell you what I am doing. So for those who prefer me to speak then here it is back to normal

The video is 

The lace and flower are from WOC

This pretty round card is using the same die and it looks different when you vary the colours and shapes

This one has been dressed up with flowers from Wild Orchid Crafts

And they have been given the glitter treatment to make them sparkle

The little fabric butterfly is also from WOC

For this one I have used chalks to colour the areas of the die cut.

Don't forget to spritz with a little water to set the chalks or it may rub off the card

All pretty cards and that die cut is a good one to keep on hand for any of your birthday cards

And remember that you can always take your scissors to it and snip away the bits you don't want.

But don't throw them away because they may come in handy on another card

More tomorrow ...

Hugs xx


March 22, 2017

Magazine Previews


Hi Everybody,

It's time for the new magazines again and this month there are some more fabulous free gifts for you.
The ones shown here will be in the shops on the 23td March
These videos are previews of what you can expect and the format has changed slightly with each new one.  From now forward, at the start of each video I am showing you what the magazine looks like in its wrapper

That way you will be able to decide if this is one that you would like and be able spot it more easily on the shelves.
 I am also giving you the link direct to the order page if you want to buy the magazine:
Simply Cards and Papercrafts 161
Creative Stamping 41

The first video is Simply Cards and Papercraft 161 

I have ONE copy of  SC&P161 with the gift to give away to one lucky reader,  but you will need to buy the dies yourself

These videos are done in my new style solo filming format  but I do talk in these


I have used elements from all the items in the pack and the dies are a special offer at half price from the magazine.

Please don't enter to win the magazine if you already have a subscription or your own  copy 


Creative Stamping 41 is the next video to share with you and this has a really beautiful A4 stamp set in the pack.

There is so much that can be done with this gift and the images are  suitable for male or female
This pretty bird card is created with the feathers from the L'Aquarelle Stamps 

Both cards are 6" squares and the water colours used are Gansai Tambi

The  Water Colour Wednesday card will be back next week and so my apologies that it is missing this week


More tomorrow ...

Hugs xx

March 21, 2017

Tuesday Tutorial - Heirloom Rectangle

Hi Everybody,

Todays card features a die that has been around now for quite some time and you may have this is your personal "stash"   If you do it maybe time to get it out again and try this really easy card. 
 The dies do all the work and the flowers are the crowning glory in soft shades of lilac and white
The card has been created with just the one set of dies
Spellbinders Used:
Other Supplies:
With die #4 and white card cut two layers for the base  and a layer in lilac
With dies #3 and 4 together cut another layer in white for the patterned piece
Create the base with the two white pieces by scoring along one a little way down and gluing them together along the small panel
Add foam to the back of the other two and layer the lilac and patterned pieces together
Wrap ribbon around these layers before adding to the base card
Cut die #2 in lilac and emboss this piece for more texture. Add foam pads to the back and arrange over the top of the ribbon
Stamp the sentiment of your choice and cut out with the smallest die
Cut two more in white and one in lilac
Glue the white ones together keeping the sentiment one for the top. This will give depth to the panel
Cut the lilac one in half and arrange around the sentiment panels to leave a small border.
Attach foam to the back of these
Select the flowers you would like.
From left to right I have used:
Gypsophila, Chrysanthemum, Cosmos Daisies, Tulips, Roses
Arrange the flowers in a pleasing display on your card and dot with glue then sprinkle with glitter.
Add the bow and small pearls around the flowers

More tomorrow ...

Hugs xx

March 20, 2017

Die Cutting Essentials Special Vol 4

Hi Everybody,

This Thursday the 23rd  March a new issue of 
Die Cutting Essentials Special Volume 4 
will be on sale in your local craft shops and selected supermarkets and  I am so pleased to say that some of  my cards will be one of the features in the pages.  

And I have a video to give you a sneaky peak of  DCE Special Vol 4  and show you some more ideas that I have designed

There is also a beautiful paper pack that you can use with some deep and dramatic colours in the mix.

The video will show you exactly what is in the pack and I am sure that you will have fun playing with it.

My flowers are from Wild Orchid Crafts and the pearl flourish is from Wnt2Scrap

The ribbon on the hearts card is also in the pack and is a vibrant shade of pink

If you wanted this special edition you can get it HERE

More tomorrow ...

Hugs xx