Beautiful Card Designs Made Easy

August 20, 2021

Friday Freebie - Fabulous Foliage

Hi Everybody,

This is the last of the Fabulous Foliage Stamp Sets so if you would like to win this one then this is your last chance.

It comes with Simply Cards & Papercraft and there are actually two stamps sets and a stencil in this collection.

And to be in with the chance of owning these you need to leave me a comment at the end of this post with your FULL NAME

It doesn't matter where you live I am happy to send the gift to you at my expense and it doesn't matter if you have won before. 

But you will need to come back and check if it is your name that is shown as the winner in a blog post over the weekend. You will have 72 hours in which to claim the prize by sending me your postal address.

More tomorrow ...

Hugs xx

August 19, 2021

Embossing Folders

Hi Everybody

Embossing folders are a cheap way to make cards... no that is wrong they are not a cheap way, they are an inexpensive way to create beautiful designs for your cards.

Lots of companies are now bringing out 3-D folders and they are amazing for the depth they produce and there are many ways to use them too.

In this video I have again used up some of the bits of sentiments that are already on my desk but I have combined them with beautiful frames to make them stand out.

On a couple I have simply fussy cut the shapes out of the folders and on others I have die cut them.

And rather than keep buying new things I am on a mission to use the stuff that I already have and make it work for me in creating cards.


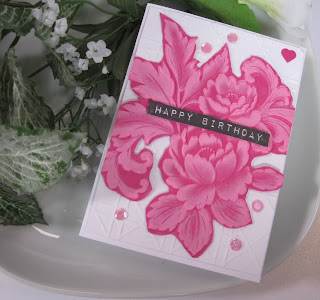
I think that most of us own some embossing folders and have some white ink in our crafting stash and this is one way to use  them and get more for your money
So I hope you enjoy this video and will try some of the ideas in it. 

More tomorrow ...

Hugs xx

August 18, 2021

Christmas Cards

Hi Everybody,

The cards shown today have also been created from scraps but these I have turned into Christmas Cards.

I have used the strips I made in coloured card and added them to the background and then cut lots of snowflakes from glitter card.

They are all different shapes and sizes of flakes and I have added them,  some flat and some with foam tape underneath them,  to give all different heights.

The sentiment has been cut from the blue mirror card, layered onto black card and then all added to some parchment 

This card has hade the strips laid in the horizontal line across the card and gold snowflakes added for effect on this one. 
These snowflakes are created from gilding flakes and they are some that I made for last years cards. I knew they would come in handy one day !!

Both cards are 5x7 and both are now ready to send to someone over the coming Christmas Season.

They are easy to cover in gilding flakes and I did a video when I first did them to show you how I made them.

I am adding it again here again to refresh your memory or to show you the technique if you are new, and it just goes to show you that nothing is wasted no matter how long it takes to use them 


I hope you enjoy watching and it is not a long video.

More tomorrow ...

Hugs xx

August 17, 2021

Ruby is Five Today

Hi Everybody,

Today my beautiful girl Ruby is five years old, and I have no idea where those five years have gone.

She was a nine week old puppy when we bought her home and both Griff and I fell in love with her straight away.

She was so small she could walk underneath the bottom tread of the staircase.

Once she could go out Griff would take her walking twice every day to the park or the beach and they enjoyed each other so much.

She must have been really confused when he died, but since then she has been my saviour. 

We go out together every day and she suits my personality perfectly. 
We can have more adventures in the woods looking for squirrels, or off to the beach and a paddle in the sea.

We can have lots of days out with Dougal who was five on the 4th August.

So here's to the next five years Ruby and we will both be old ladies by then. 

More tomorrow ...

Hugs xx


August 16, 2021

Using Up Your Scraps

Hi Everybody,

Being the crafters that we are none of us like to waste stuff that we have in our craft space. 

Whatever it is from die cut shapes to flowers we may have made to bits of left over card and papers that are lying on our work tops.

So this video will show you how I made good use of those left over bits and turned them into cards that I can send for any occasion throughout the year. 

I had some double sided sticky sheets and I used up all the strips I cut from left over card. 

I thought I might get five cards from them but I ended up with nine different styles in different sizes and on those I added any stray sentiments that I have left over too.


The cards can suit anyone that may need a greeting of some sort, if only to say thank you. 

And they are handy to keep on one side for that unexpected situation when you are suddenly asked to produce a card for some one.

You can dress them up as you like depending on your recipient. Just have fun making them in all different colours.

More tomorrow ...

Hugs xx

August 14, 2021

Winner

 Hi Everybody,

Not quite as hot here today but still pleasant and dry. And it will be time to go for a walk with Ruby as soon as this post is done. Thank you for coming back this week to see the new blog design and I am so happy that you seem to like it. There have been some lovely comments and for that I am truly grateful.

I have some  new videos to add next week and I am hoping that you will enjoy that too.

But for now the draw has been done from the comments added. 

Please not that if you didn't leave your FULL NAME then your comment will not have been added and so no chance for you to win.  I need your full name ... not initials or nicknames ... to be able to notify the correct person if they are the winner. And I ask this of you every week and also to come back and check if it is your name that is listed as the winner. 

Lets get down to business then with the winner this week. 
The name chosen at random is 

MaryJean Smith

so if you would email me your postal address please to
christina@card-making-magic.com
then the gift will be on its way to you just as soon as I can get to the Post Office.

I hope you will enjoy the beautiful die set and the magazine and be sure to let me know when it arrives safely with you.

More tomorrow ...

Hugs xx

August 13, 2021

Friday Freebie - Peony Perfect

 Hi Everybody,

Another chance to win this beautiful Peony perfect Die Set that is with Die Cutting Essentials magazine.

A good read at any time of the day and it is full of inspiration and information that you may find really useful.

You will find lots of ideas on how to use this die set as well as other projects that may spark your imagination.

So if you would like to win this set then all you have to do is leave me a comment at the end of the post.

It doesn't matter where you live or if you have won before you can still enter over and over again.

You must add your FULL NAME or the comment will not be counted. No nicknames or Initials just your full name and that way it is easier to identify you as the winner.  You will need to come back and check if it is your name that is shown as the winner and you have 72 hours in which to claim the prize  

Good Luck everybody

More tomorrow ...

Hugs xx

August 12, 2021

Altenew Flowers


 Hi Everybody,

These beautiful flowers are the Bitterroot Stencil and Die Set  from Altenew and I think it is lovely. I have really enjoyed playing with this combination and the stencil is perfect if you don't like to colour the images your self.

It is a layering stencil and comes in three parts. It was a little confusing to start but I watched a tutorial on YouTube about this one and it all became clear after that.

The die cuts out  two  flowers and two buds all in one pass and additional flowers can be added if you prefer. 

You can of course alter the design of the flowers any way you wish by adding in more or leaving some out, and then adding the leaves around the display as you like. 

Experiment with the stencil and see what you can come up with and it is far quicker than getting out your pens or water colours to make your card. 

So tomorrow sees us back to the Friday Freebie again and I hope you will take part by adding your comment and leaving your FULL NAME.

It's nice to be back 

More tomorrow ...

Hugs xx

August 11, 2021

Hello, I'm Back ...

Hi Everybody,

I am so happy to say that I am back and I really hope you will enjoy using the new look blog. There may be a few glitches to iron out yet but it should be easier for you to use and see and is much more user friendly if you are on your iPad or your mobile phone.

I have to get used to how it all works again, so please bear with me while I am in this learning curve.
I should be back to normal again and this week I am reinstating the Friday Freebie so be sure to leave your comments as you did before, at the end of the post, to be in with the chance to win.

Have a browse around and make sure you know where everything is, whilst I do some housekeeping in the background until I get the pages to look how I want them too.

Thank you everybody for being so patient while all this was done and a really big thank you to 
Jamie Carter at
WeAreWeb Design  
for the hours he has put in to make these changes happen.

More tomorrow ...

Hugs xx

August 01, 2021

Important News

 Hi Everybody,

It has been sometime now since I started my Blog and in that time I have only had one major make over, and that was a few years ago. But with all the changes that are taking place in the internet world I thought that maybe it was time to take another look and see how I can improve it. 

I have found a company, based in Liverpool, that can help me with all that technical stuff and they are going to try and give me a whole new Blog look.  Which means I have had some stuff to move. from scheduled posts. until the work is all finished.

This means that I will be out of action for the next week or so, while the work is done and then I will hopefully be up and running again. 

I have moved the Friday Freebies for a few weeks but I still have some stuff to give away with the Peony Perfect and the Fabulous Foliage sets.  So please keep a look out for me to be back online and then be sure to come and join in again for the chance to win.

Please don't worry if there are no blog posts from me for the next week. I will still be working away in the background. I hope to get quite a few videos done in that down time, and have them edited and ready to upload for you to view.

See you soon ...

Hugs xx

July 31, 2021

Winner

 Hi Everybody,

Not quite so hot here today and I like this a lot better. So does Ruby. I used to sun bathe for hours on end in my much younger days, but not any more. I just get too hot and very bored.  Autumn is my favourite time of year. 

I have had a lazy morning but I have got the draw done for yesterday’s offering,  and the name today is 

Tina Zapusek

Would you email me your postal address please to

christina@card-making-magic.com

and I will get it in the post to you straight away. I hope you enjoy playing with the set and please let me know that you have it safely.

More tomorrow…

Hugs xx

July 30, 2021

Friday Freebie - Fabulous Foliage

Hi Everybody,

Here we are again with yet another of the Fabulous Foliage Stamp Sets that is with the magazine Simply Cards & Papercraft.

If you have been trying to win one of these sets over that past few weeks then maybe today is your lucky day.

And if you don't succeed this time I still have another one to give away 

All you need to do is leave me a comment at the end of this post with your FULL NAME to be included in the draw.

From those comments a name will be chosen at random as the winner

You will need to come back and check if it is your name that is listed, and you will have 72 hours in which to claim it. 

I am happy to send this to you wherever you are and it doesn't matter if you have won before. But don't forget to add your full name or you will not be entered into the draw.

More tomorrow ...

Hugs xx 

July 29, 2021

Layered Background with die cuts

Hi Everybody

I always want to get more from my dies and I look at them carefully to see what they will offer me. The more they will do for me the better the value.

If you look carefully at the background in the circle of this card you will see the pretty layered effect that has been produced. 

I have created this by simply cutting the same day several times in different colours and layering them together in an off set pattern. 

There are other looks that can be achieved with dies like this but this is the easy way to do it, and you may like to try this for yourself .

The video will show you how I made four cards using this technique and each one is different but just as effective in its look. 


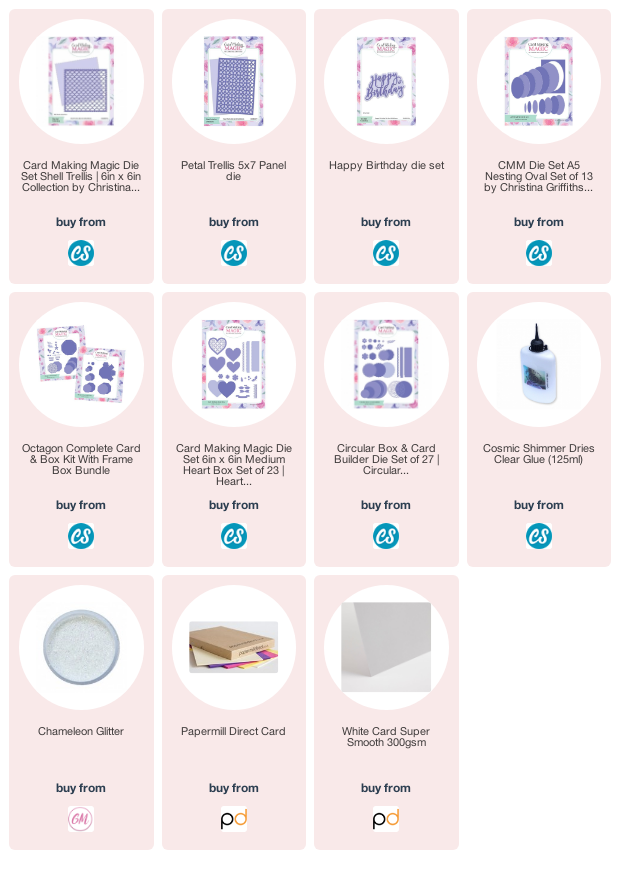
One is a variation on the Panel Card and I have simply used a heart shape to span the front with the trellis pattern inside the heart.

 It looks gorgeous and is created in the same way as the other Panel Cards I showed you a few days ago. I hope you like the effect and enjoy the video.

More tomorrow ...

Hugs xx
                                       

July 28, 2021

Spring Summer Stamp & Die Set

Hi Everybody,

These two cards have been created using the Spring Summer Stamp & Die Set and I heat embossed the flowers with clear powder.

I coloured them with alcohol markers and then used the dies to cut them out. I had to fussy cut some of them and they give a really pretty effect.

The background has been inked with Distress Oxides and then I have used a text stamp over the top in black ink and heat embossed that with clear powder

I arranged the flowers on the card front, and popped up some of them with foam tape to give height. I tucked in some of the die cut leaves behind.

The flowers centres have had some glitter sprinkled into the centres and I have added black self adhesive pearls around them as an added extra. The sentiment is a die cut glossy black card

For this card I have used a new stencil, that will be coming soon, and some texture paste to create the trellis look  It has been added to a Gelli Plate background

I used the Nesting Ovals to create my frame and I added this to the card with foam tape around the edges.

The flowers have been coloured red with markers.  
and they have been added to the frame with foam tape also 

The sentiments are some that I had lying on my desk from a previous card and I added those along the bottom of the oval again with foam tape.

The little butterfly clinging to the frame is from the stamp set and I think he adds the finishing touch.

More tomorrow ...

Hugs xx

July 27, 2021

Birthday Wishes

Hi Everybody,

Now this photo definitely does not show up the glitter card that I have used on the background and it is a beautiful bronze colour that really sparkles.

This is a 5x7 card on a white base and the die that I have used is the Rectangles Perfect Panels die set from Card Making Magic. I cut the rose filigree panel four times and layered three of them together. 

I added them to some silver mirror card and then coloured in the flowers and the leaves through the pattern in the card. The silver shines though the colour and looks very pretty. 

The fourth panel was added to the top of these to cover up any marks outside the lines and then the whole panel is layered on top of the glitter card.

I cut the sentiment four times, three in white and the fourth one in black glossy card and added that to the front also. It doesn't need any further embellishment as the glitter card says enough. 

More tomorrow ...

Hugs xx