Beautiful Card Designs Made Easy

Showing posts with label IndigoBlu. Show all posts

June 01, 2017

Gold Embossed Background

Hi Everybody,


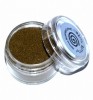
Todays card has used some lovely gold embossing powder to create a rich background for my sentiments.

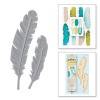
The first one has used the new feather die from Spellbinders and I have made my own stamp from the die and some craft foam.

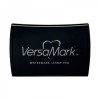
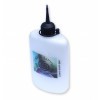
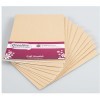
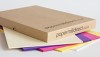
I used a layer of deep teal coloured card from Papermill Direct and stamped it with Versamark

I sprinkled it with Gold powder and heated it with a heat tool until the powder is shiny and melted

Trim this layer to fit the front of a tal base card and add with foam to raise it up a little.  Stamp and emboss the sentiment in the same way and edge with gold too. Add with foam and there you have a quick and easy card for the men in your life.

This second card took a little longer ... but the base is the same stamping and embossing in gold.

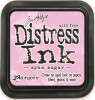
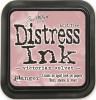
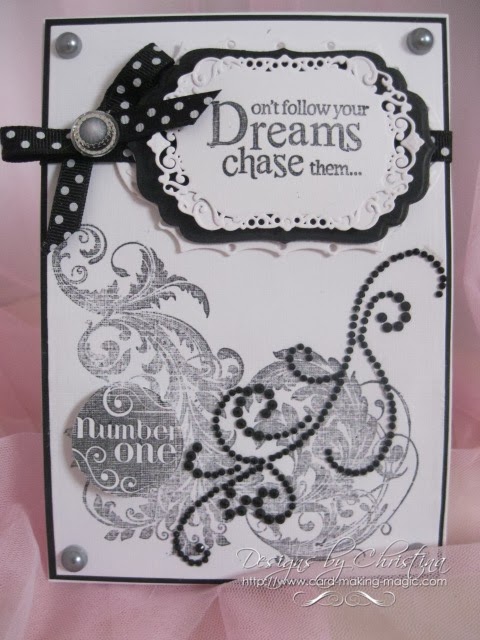
I used a large Flourish stamp from Indigo Blu that I have had for a long time. Once the heated powder was cool I used three Distress Inks to create the blend over the gold.

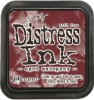
I used Spun Sugar at the top and blended it into Victorian Velvet.  The used Aged Mahogany at the bottom for a lovely Ombre Effect over the gold

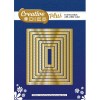
I added three gold gemstones at the bottom of the card and the sentiment is from the Pretty Quick dies range at Craft Stash

Another easy card to make and change the colours for male cards

More tomorrow ...

Hugs xx


May 18, 2014

Gilding Flakes

Hi Everybody,

A little while ago I added a card that had   Gold Gilding Flakes being used with the Spanish Collection - Seville  from Sue Wilson.

I had several emails asking me how I had made the card and so here is a short video to show you what I did.

The Seville die is from   JGDCrafts  and the Gilding Flakes are from  Indigo Blu  and they have many different colored mixes for you to choose from

The double sided sticky sheet I got at the craft  show but you can get than from many places

I have carried the theme through to the inside of the card so that it compliments the front

The ribbon is from my "Stash" but the flowers and leaves are from Wild Orchid Crafts

I have used the glitter from Glitter Magic to enhance the flowers

The sentiment is from JustRite Stampers


The video is only 10 minutes and I hope you will enjoy the effect once you give the Gilding Flakes a try for yourself .

Click this link for more ideas on using  Gilding Flakes   and also using them with your stamps

Millie Thomson
 don't forget to claim you Friday Freebie card .... as soon as you can please.

More tomorrow ...

Hugs xx

April 13, 2014

Indigo Blu Background Stamp ...

Hi Everybody,

The pretty sentiment on this card is from Crafters Companion and I have stamped and embossed it in gold and added it to gold mirror card.

The background has been stamped with the Circle Dot stamp from Indigo Blu and it is quite a large stamp.

I have covered it with Gilding flakes from the same company. A very simple card with just the addition of the ribbon.

The centre of the ribbon is part of a bracelet that I bought from Primark for a couple of £'s and dismantled to use the pieces separately.

So again this is scheduled post and tomorrow I will be back at my PC  .... I will of course be giving you the name of the Friday Freebie winner.

More tomorrow ...

Hugs xx


December 24, 2013

Just a little video .....

Hi Everybody,

Now if you have been good girls and boys over the past year you could get a little present from  Father Christmas

And if he doesn't bring you something then you may  have to buy your own !!

I have bought my self some "Crafting Goodies"  and I am going to be soooo surprised when I open them tomorrow morning.

Todays card is another one that has no flowers on it ... though I have added in the flourish from  Want2Scrap

The background flourish is a stamp from  Indigo Blu  which I have stamped in black and embossed in clear.

The two sentiment on the card are both from  Crafters Companion   and are in the Sentimentals  Range

But I really wanted to add this  short video to explain the difference between UK  and  US  card size A2 ... and it is a big difference ... as I know that when I said I was making cards in A2 some of you thought I was mad ...  let the video do the talking


I hope it goes some way into explaining the confusion that the makers of card give to use mere mortals who are cardmakers....

More tomorrow ...

Hugs xx

February 28, 2013

Bird in a Gilded Cage...

Click to Enlarge
Hi Everybody,

This card has been created using Gilding flakes for the birdcage and once again it looks much better in real life.

I like using this colour for my cards as it is one of my favorites... and of course pink is the best.

The backing paper is some that I have designed myself.

I have used a glue pen and some Glamour Dust to pick out the large Flourish along the left hand side and wrapped the   ribbon around before adding it all to the main base card.

The panels have been layered  onto  turquoise card.

I have used the middle size die from Spellbinders Grand Decorative Ovals  and cut a turquoise oval.

I added Gilding Flakes to a Scalloped Oval then added a  white Classic Oval ...  and on the top I have added the Birdcage.

I have used Gilding Flakes from  IndigoBlu  and they have some really stunning mixes of flakes.

This one is called  "Gin and Tonic" and it is a lovely combination of silver and pale green, with a tiny hint of gold.

The flowers are from Wild Orchid Crafts  and I have added in the "A" frame to the back to display the card.

Hugs xx 

January 27, 2013

Jewel Box Saga ... Pt 3

Hi Everybody,

Well this time the Give Away went off with out a hitch and both winners have claimed their prizes.  I am so pleased and I hope you will let us know how you find them .... honestly ... before we start to sell them

As for the Jewel Box ... well here we are with an update on it's progress.

So  far it has had two coats of white Acrylic inside and out and it looks much better.

The inner lining is a plush kind of material and so I followed Colleens'  advice and sprayed the material with some fabric paint.  (Thank you)

It's not perfect but it is better than the stained and faded beige that it was before.

It is a lovely rich blue and then once it was dry I glued some white lace around the edges.

I used the same technique that I used for the Miniature Dress Form  with the stamps and tissues and the video will show you how I got the look.


To make sure that I got the Flourishes pattern to position correctly I held the three loose drawers together with an elastic band.


I applied the "Slap It On" and  laid the tissue on top and pressed it in shape around the curves to the drawers.

Don't try to cut the tissue while it is wet ... leave it to dry and then with your craft knife carefully run it between the drawers to separate them.
I did the  same to the rest of the jewel box, back and front using the  Bubbles stamp  from  IndigoBlu

Then it time to step back and let it all dry before going any further.


Hope you like it so far ....

Hugs xx

January 16, 2013

Little Black Dress...

Hi Everybody,

This is the LBD that I started to paint in the video Painting Your Dress Form  ... and of course I had to leave it to dry and so it was never finished in time for the film.

 I thought I would take this opportunity to show you what I did to complete the dress form.

I made this a one shoulder style.

When it was dry I added some really beautiful Diamante and Black Pearl "Bling" from Want2Scrap  along the shoulder line and the hem of the dress.


Then the next thing was to give the form a skirt.

 It doesn't matter what material you use you can still follow the steps in the video I added yesterday 

I am pleased with this but I have yet to add in the hat peg and the hat.

But the little skirt is all fringes and silver balls and it looks much better in real life.
This is the back of the dress and for this one I painted the top part of the form with a Flesh coloured Acrylic paint.

With all the exposed skin I thought it would look better.

This is another one that my family have claimed as theirs so once the hat is done it will be going to a new home 


Now although my "Film Crew" has been kept busy he did arrange for us to go out to the cinema and for tea afterwards.

I told you we were going to see Les Miserables

What a film ... I cried most of the way through it and then had to go out to tea with blotchy cheeks, red eyes and a runny nose and sit there and order food.

Griff said to me .... "You just want to go into a corner and cry don't you?" and all I could do was nod.

Hugs xx


December 30, 2012

Beautiful Miniature Hats

Hi Everybody,
Yesterday I added the Video Tutorial to create the dress forms and today I am adding another to create the  Dress Form Hat 

This easy to make hat will compliment the mannequines and make them a far prettier gift for your friends and family.

To get the circles I have used Spellbinders but you can make them with any method that you have to hand.

The Dress Froms with the stand are from IndigoBlu

The instructions are all in the video and it is not a long one ... but I am sure that you will really love the end product.


This pink one is my favorite and I have added it to the mannequin that I am keeping for my self.

But I have been inundated with requests for these ...  I could start a business just making them to sell.

Any way I hope you will enjoy making them for yourself and please add your photos to the
Card Making Magic
Gallery Page

That way you will create your own web page on my website that you can send your friends and family to visit

And the more you add the more pages you will create.

Share all your  beautiful creations with the world.
 
Hugs xx


 ...

December 29, 2012

Those Dress Forms ...


Hi Everybody ...

I have been inundated with email requests about the Dress Forms as they are such an on trend project at the moment... and people want to know how I did them.

And so I have got my "Film Crew" busy ... after his long Christmas break ... to do a short video tutorial on how I created this look.

The dress form itself and the stamp that I used are from IndigoBlu  and the only thing I have added in is a Shaker peg to carry the hat.... and  I bought those,  in a set of ten,  from B&Q

IndigoBlu are a UK company so you will need to check if they deliver to your part of the world.  But do check out their other products as they have a really good selection of items for you to choose from.

The picture is not very large but the video ... Decorating Dress Forms ... will show this particular one being made.

In the next video ...  planned for this week ...  I will show you how to make the  hat that fits the mannequin.

The ribbon is from my "Stash"   The Spellbinder is Les Papillion for the butterflies and the "Blng" as always is from Want2Scrap

And in  answer to the questions about yesterdays post with Henry the vacuum cleaner .... Yes he does work ... he is battery operated, very small and can be used to clean out your PC's keyboard.

He is from   Amazon  ....  click the link to go to the page and he is a DESKTOP Cleaner.


But choose carefully as all the prices are different and he was NOT expensive ... just over  a  tenner  Griff says.


Hugs xx

December 20, 2012

Mannequin Parade

The other day I bought some dress forms from Cardcraft Plus  and I posted a picture of the bare mannequins on my blog.

 They are gorgeous and although the store is well worth a visit the dress forms are all gone.  How do I know this ????? .... Because I went back to buy more without success.
(Sob Sob)

So I have now decorated one of them and it is gorgeous and it is a Christmas prezzie for ...... ME!!   'Coz now it's done I can't bear to part with it ... and it is much prettier in real life.

I had such a good time adding all the little touches to the form and I have paid great attention to the detail.

I have given her a tiny pearl necklace and the small roses on her lapel are from Wild Orchid Crafts


There are tiny bows and buttons on the back of the dress to hold her necklace and the lace in place.

The butterflies are the Spellbinders Les Papillion 

The dress is created from an Indigo Blu  stamp and was very easy to do .... but I will go through the process  in a video coming soon.

This company also has bare dress forms but they are not as big as this.   They come complete with a stand and so well worth your consideration.

The stamp is called "Bubbles"  and there are some really pretty stamps to choose from.

But once the dress form was covered I couldn't stop there ... Oh no!! she had to have a hat and so that was the next thing to make.

I  made it from pink felt and then dressed it with flowers, ribbons and pearls and added in some feathers for good measure.

And here is my completed project just in time for my Christmas present.

I shall give it to myself on Christmas morning and I shall be so surprised at this beautiful gift.

Then she will take pride of place on my dressing table so that I can see her everyday.


Hugs xx