Beautiful Card Designs Made Easy

July 31, 2017

Squirrel Background

Hi Everybody,

This quick and easy card was created with just the little squirrel stamp.

It was in the free gift with Creative Stamping 46 that was on sale in July

One that is not too fussy for the male cards you may have to make. The colours are also soft and muted and there's not a flower in sight.

Making cards for men can sometimes pose a problem especially if you enjoy adding all the frippery as I do.

But I do try to give you a mix of cards for both men and women as well as all the different age groups and I hope it offers you some ideas that you can adapt for yourselves

More tomorrow ...

Hugs xx 


July 30, 2017

Fridays Winner !!

Hi Everybody,

Could somebody tell me please where Saturday has gone???? Because it seems to have just passed me by in a blur.  I have been really busy all day and before I knew it, it was tea time. So my apologies at posting so late with the winner of the Shabby Chic card from Friday.  But a name has now been chosen at random and the winner is you ...

Mavis L 

Would you email me please at
christina@card-making-magic.com
with your postal address and the card will be on its way to you.

I hope you will like it when it arrives and please let me know that you have it safely.

More tomorrow...

Hugs xx

July 28, 2017

Friday Freebie 29 - Shabby Chic

Hi Everybody,

Here is another of the  Shabby Chic cards and this one is pretty in pink and gray with lace along the bottom.

I still have several more to find new homes for yet and so I will keep adding them until they are gone.

I have the Owl card from a few weeks ago that was won  but not claimed and so that will also be offered again soon

But if this is one that you would like to have then you know what to do ... Just leave me a comment at the end of the post and then be sure to come back and check if it is your name that is shown as the winner tomorrow.

I am happy to send these cards anywhere that you are and I hope that you are enjoying this style of card.

More tomorrow ...

Hugs xx


July 27, 2017

New Pretty Quick Dies ...

Hi Everybody,

I have been really busy this week with some of the newest dies from Craft Stash. These are part of their Pretty Quick range and these will be on sale TOMORROW on the Craft Stash website.

But these videos will give you a preview of what there is and some ideas of what you can do with them.  I am showing you one card from each collection.

The first one is this Pretty Quick Stained Glass Robin   and in the video I have given you several ideas that you may like to try.

This one is my favorite and I simply used the die cut, done in gold card, as it is and added it to some white card with a Distress Ink effect added

I then coloured behind the Robin with alcohol markers and then added another gold die cut over the top.
For the video  Pretty Quick Stained Glass Wise Men   I used the die cut as a stencil to create a soft pastel card.

But the card shown here is how to keep them simple and easy to make .. no techniques just gold die cuts and white card for an elegant look to your Christmas card

This was the one I created from making a stamp with the die
with the Pretty Quick Stained Glass Candle

This is a soft water colour and I really liked this one once it was done.

I shall keep this one to send to someone over the Christmas period

And last but not least for this card I  used the
 Pretty Quick Stained Glass Angel  to create this card with a stencilled background

So there you have four videos to view and the dies will be on sale tomorrow .. Friday ... with Craft Stash

More tomorrow ...

Hugs xx


July 26, 2017

Papercraft Essentials 149 - Cottage Garden

Hi Everybody,

This months Papercraft Essentials magazine will be on sale tomorrow and with it there is a really pretty die and stamp set.

With the gift I have tried to show you some ideas that you may like to try and all are relatively easy to re create.

Having a floral background and adding a sentiment is one of the easiest ways to make a quick card and it is something I like to do with any of the floral stamps in my collection

Keep them altogether and then whenever you need to make a quick card you will have a ready made background all done and waiting

This is the video link that you may like to click to see some of the ideas I have had with this gift 
    Papercraft Essentials 149 Cottage Garden 

And if you have more time then maybe you would like to try this idea with some buttons.

I bought them from the £££ shop and I added them to a heart shape with a hot glue and then onto a Scalloped heart with foam pads


Then everything was added to a Distress Oxide panel and the floral stamp from the collection used to add more detail to the background

I really liked this card as it is different from my usual style. 
But I do like to mix thinks up a little every so often then I don't get bored

Hope you like and enjoy the video

More tomorrow ...

Hugs xx


July 25, 2017

Tuesday Tutorial - Hemstitch Rectangles and Lace

Hi Everybody,

Todays card is a combination of more of the designs by Becca Feeken and I just love her Venice Lace collection. It is so delicate and intricate and simply my cup of tea.  So here I have used several of her dies and the card is quite pretty just as it is
Spellbinders Supplies:
  • S4-653 Jubilee Tags
  • S4-791 Isadora Trinkets
  • S4-789 Francesca Label
  • S5-308 Hemstitch Rectangles
  • PL-001 Platinum Die Cutting Machine
Other Supplies:
  • Glue
  • Foam Pads and foam sheet
  • White card from Papermill Direct
Instructions:
From the outside die of Hemstitched rectangles cut two pieces in white to create the base card
Cut another one in pink for a layer
With the two dies together cut one piece in white to leave the beautiful detail around the edge
From the largest label die cut a piece of designer paper
From the largest die from Isadora Trinkets cut two pieces in white
Add the hemstitched layer to the pink one and add all to the base card
With some foam sheet under the label add  this to the centre of the card front
With small pieces of foam pads under the filigree panels add them to the top of the designer label
Stamp the sentiment of your choice in black and heat emboss with clear powder.
Cut this out with the tag from the Jubilee collection
With foam tape under the tag add this top the centre of the card 

Pretty card ofr any occasion and really quick to make 

More tomorrow ...

Hugs xx

July 24, 2017

Quick Card ...

Hi Everybody,

Just popping in today to show you a card that I made a while ago using some free stamps from Creative Stamping and some ink blending in the sky for an extra effect

It is quite bright and I think any six year old would be happy to get this.

I sued the numbers dies from Apple Blossom and the dragon was coloured with Spectrum Noir

I am in a bit of a rush today and so I don't have time to write a longer post but I will be back with

More tomorrow ...

Hugs xx


July 22, 2017

Card Winner

Hi Everybody,

Another lovely day here in the North West and I have lots to do today so I got up early to get everything done. The first thing was to get the draw for yesterdays Shabby Chic card completed and the name chosen is you ...

Lin 
Would you email me your postal address please to
christina@card-making-magic.com
and the card will be in the post to you straight away

I hope you will like it when it arrives with you

More tomorrow ...

Hugs xx


July 21, 2017

Friday Freebie 28

Hi Everybody,

Here we are again with another Shabby Chic card on offer

This one is a Birthday card and the inside is lined.

It is a lilac and lemon colour way and the photo does it no justice at all.

It really is much better in the hand and I don't think you will be disappointed with it

If this is a card that you would like to have then all you need to do is leave me a comment at the end of the post.

Tomorrow a name will be chosen at random from those comment s and announced in the blog post
So as I always say if you add your name then be sure to come back and check if it is you who has won the card.

More tomorrow ...

Hugs xx

July 20, 2017

Sausage Dog ...

Hi Everybody,

This cute stamp is from Woodware

It is one I have had in my collection for quite some time.

I bought it on a whim at a craft show I visited and it has sat in my drawer ever since.

I thought it was time to put him to good use as I have a family birthday coming up soon and this will do very nicely

I coloured it in with Spectrum Noir pens going in no particular direction or colour scheme but the result is quite pleasant and it is a fun card.

I hope my recipient likes it 

More tomorrow ...

Hugs xx

July 19, 2017

Summer Cards ...

Hi Everybody,

This months Creative Stamping has a fabulous A4 stamp set with lots of designs for you to create some summer themed cards.

Joanna Sheen is the featured designer on this months collection and this has to be one of the best value stamps sets on the market.

Each month there is a new A4 group of stamps that will help you create some really pretty cards and to buy them individually would be expensive
But these good quality stamps are FREE and excellent images ... so what are you waiting for

The video will show you some of my ideas and in it I will make a male card as I know many of us struggle when it comes to ideas for men.

Creative Stamping 46 - Garden Retreat   is not a long vidoe so you wont get bored but the card it produces can be adapted however you would like.

More tomorrow ...

Hugs xx

July 18, 2017

Tuesday Tutorial - Spellbinders Venice Lace

Hi Everybody,

The card I made for todays tutorial features one of the new dies from Becca Feeken who is a designer for Spellbinders. This is her beautiful Venice Lace Collection and it is so intricate and elegant.
I didn't have card in the shade of pink that I wanted so I used Picked Raspberry to blend white card for my backgrounds and flowers
Spellbinders Supplies:
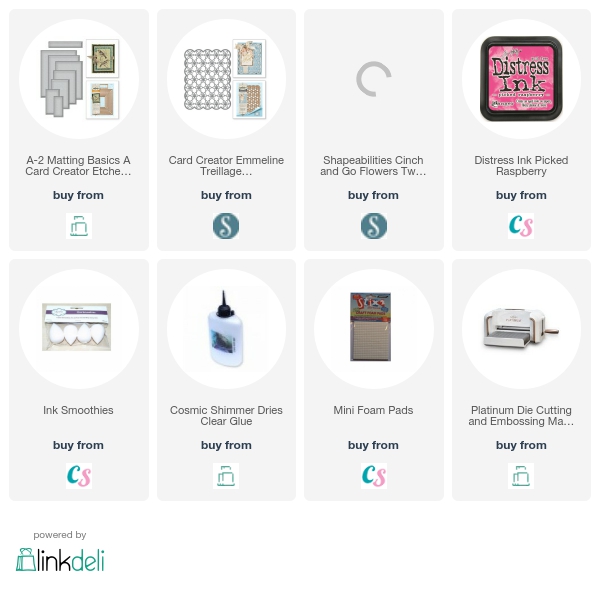
  • S5-131 A2 Matting BasicsA
  • S5-311 Emmaline  Venice Lace
  • S4-792 Cinch and Go Venice Lace flowers
  • PL-001 Platinum Die Cutting Machine
Other Supplies:
  • Distress Ink from Craft Stash
  • Pearls from Want2Scrap
Instructions:
With the largest die from Matting basics A cut two pieces in white card 
Score down one of them by about half an inch 
Add glue along this small scored panel and add the two cards together to create the base
Cut another panel in white slightly smaller
With a blending tool ink over the panel with Pocked Raspberry to create an Ombre effect and leave to dry
With both parts to the Venice Lace Emmaline die cut one in white
Add mini foam pads to the back of each of the tiny flowers
Add to the Ombre panel
Cut as many flowers and leaves as you like and with Picked Raspberry ink through the die to the flowers before you remove the card
Shape the petal with a ball tool to give dimension
Assemble the flower with a Brad and off set the petals as you go
Stamp a sentiment of your choice and sketch a black line around it
Cut out into a banner shape and add larger foam pads to the back
Assemble the pieces by adding the Ombre Vnice Lace panel to the base card
Add the sentiment where you would like it and arrange your flower and leaves to the left side of it
Add a pearl to each of the flower centres in the Venice Lace

More tomorrow ...

Hugs xx
July 17, 2017

Fuzzy Lemon ...

Hi Everybody,

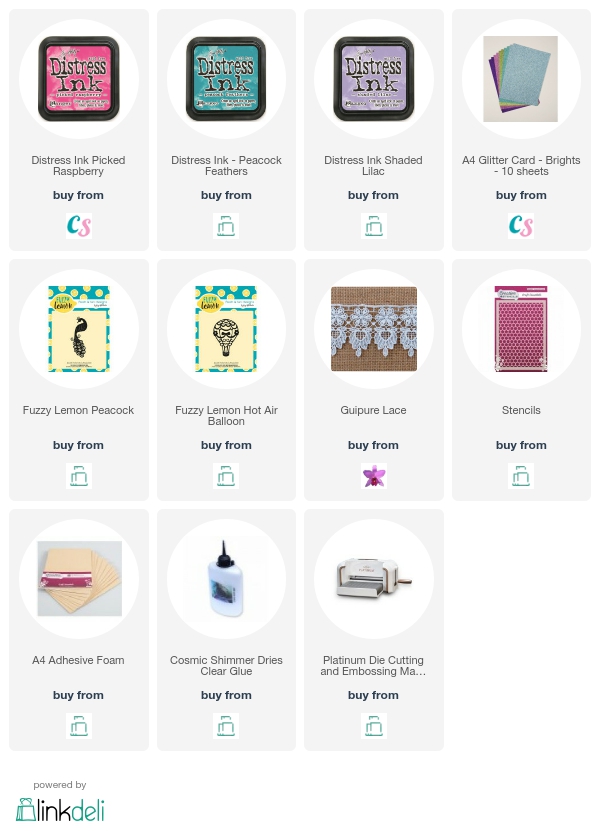
Today I have two new videos for you using the Fuzzy Lemon dies from Craft Stash

The first one is with the Peacock and I have done some ink blending to create my card.

 I have also used an inlay technique with the die cuts and added googly eyes for a little bit of fun.

The video is Fuzzy Lemon Peacock  so I hope you will enjoy it.

The second video is Fuzzy Lemon Hot Air Balloon and in this video I show you how to alter the balloon into a Christmas Bauble 

Looking at your dies in different ways will give you more "bang for your bucks"   and we all know how addictive it is to collect them.

So if you can make use of them in other ways then that has to be a bonus.

Use them as stencils ... create stamps from them ... cut them up ... turn them upside down. 

Try anything that gives you a pleasing result 

More tomorrow ...

Hugs xx

July 16, 2017

Ink Smooshing Technique

Hi Everybody,

This is a fun technique that has been around for a long time and I have done videos on this in the past.

But here is a new video on how I created three cards that all look different with this idea

These colours, Picked Raspberry and Shaded Lilac,
work so well together and produce a really vibrant card for any occasion.

I have used the kit that came with
called English Country Garden and it was featured in another video a while ago

So there you have two videos on using this kit and if you bought the magazine you will see even more cards from me on the pages in the book

I hope you will try this technique as it is fun to do and not too messy and you will be delighted with the different looks you can achieve.
Try other colour combinations and see which you like. 

Make a note of them in a note book so that you will remember the ones you liked.

More tomorrow ...

Hugs xx

July 15, 2017

Winners all round ...

Hi Everybody,

It's raining and I have a lazy day ahead of me.  So the draw for yesterdays shabby chic card has been done early and the name this week is you ...
GailGale
would you send me your postal address please to
christina@card-making-magic.com
and I will get the card in the post to you straight away

Graduation Day 

The 10th July 2017 was a really proud day for me as Vickie, my youngest daughter, graduated from Birmingham University with a Masters Degree.  She has worked really hard and deserves all the credit and I was so happy for her.

The sun was shining and it was a really lovely Gradation ceremony in a beautiful hall. Everything was so well planned and we had strawberries and cream  in the Graduation marquee afterwards.

Congratulations Vickie 

More tomorrow ...

Hugs xxx

July 14, 2017

Friday Freebie 27 - Shabby Chic

Hi Everybody,

Here is another of my Shabby Chic cards

This one is in pink and blue and has lots going on with it.

It is not lined but never the less it is a pretty card that you may like to have in your collection.

So if you would like this card then all you need to do is leave me a comment.

From those comments a name will be drawn at random and announced in tomorrows blog post.

So if you add your name then you will need to come back and check if it is you

More tomorrow ...

Hugs xx


July 13, 2017

Simply Cards & Papercraft 165 (SC&P 165)

Hi Everybody,

This magazine will be in selected supermarkets and craft stores today and the gift is really special with this months magazine

It the Little Bird Stamp and Outline Dies   and the video will show you how I created the card shown

Ar first glance the stamp set looks a little complicated but it is really easy to use.

The backing card shows you how all the little stamps will fit together.

You can create all different colours of birds and then dress the card up as much as you would like.

The blue bird card would make a great male birthday greeting

For this card I have used some beautiful flowers from Wild Orchid Crafts and put one of my pink birds in the cage and the other on top

Perfect for a female birthday and the flowers make it extra special.

You can stamp first and then die cut or die cut and then stamp whichever you prefer.

And if you have a stamping tool then that will aslo help you to get perfect placement every time

Have a look on the shelves for this lovely free gift

Not shown in the video is the quality paper pack from Prima that also comes free with the magazine.

It has beautiful papers and sentiments for you to add to your cards and lots of inspiration inside the pages .

Grab a cuppa and relax for a little while while you browse SC&P 165

More tomorrow ...

Hugs xx

July 12, 2017

Apple Blossom Kit

Hi Everybody,

This is a new kit from Craft Stash and it features Apple Blossom.

It comes in kit form with a magazine and there are Dies, Stamps, an Embossing Folder and a Stencil and some lovely papers to help you complete the look

The style  is called the Bendi Card  and the video will show you how I created this with very little measuring.
I know there are several ways to get this shape but some of them can be a little confusing.

So I thought I would simplify the design to help those that are new to cardmaking

For the picket fence I used a small die that was a magazine freebie I showed you a few weeks ago


These gifts with a magazine subscription always come in useful for  future designs and are an excellent way to build up your "stash"

On some of the cards I used the papers from the paper pack and on others I used Distress Inks and blending sponges.

But they were all fun to make and didn't take that long with the simplified version.

More tomorrow ...

Hugs xx

July 11, 2017

Tuesday Tutorial - Imperial Square

Hi Everybody,

Todays card is really pretty in pink and white and shows the versatility of turning a square die into something other than it's intended. Use any embossing folder that you have to add some texture to the card.
Spellbinders Supplies:
  • S6-021 Imperial Square
  • S6-001 5x7 Matting Basics A
  • S6-002 5x7 Matting Baiscs B
  • S2-082 Happy Birthday 
  • SEL-006 Embossing Folder
  • PL-001 Platinum Machine 
Other Supplies:
  • Papermill Direct Card
  • Craft Stash Foam sheets
  • Cosmic Shimmer Glue
  • Mei Flower Ribbon
  • Wild Orchid Crafts Dazzler
Instructions:
With Matting Basics A die #7 cut two pieces in white for the base card
With Matting Basics B die #7 cut one piece in black
With die #6 from the A set  cut one in pink and emboss this piece in any folder that you have
With the largest die from Imperial Square cut two pieces in black and pink
Cut these two in half  trim to fit the front of the layers from the previous step
And layer them one on top of the other to leave a shadow effect
Add foam pads to the back of these panels and add to the embossed layers
Wrap with pink ribbon to cover the join and secure on the back of the card.
Add these layers to the base card
Cut  the corner pieces and the centre piece in white and add a corner to each side panel 
Ink through the die to the centre piece in pale pink

Add foam pads to the back 
Add at an angle to the centre of the card and add the Happy Birthday sentiment to the middle of the panel .
Add a bow with the same pink ribbon and place a centre piece to cover the knot.

More tomorrow ...

Hugs xx