Beautiful Card Designs Made Easy

September 02, 2021

2 fer 1

 Hi Everybody,

This is a perfect example of a twofer card and I really love doing this kind of thing. It makes sure that you get your monies worth out of any die set that you have.

You can get this effect from most of the dies that you probably already have so it is worth taking another look at them and see how you can make them work.

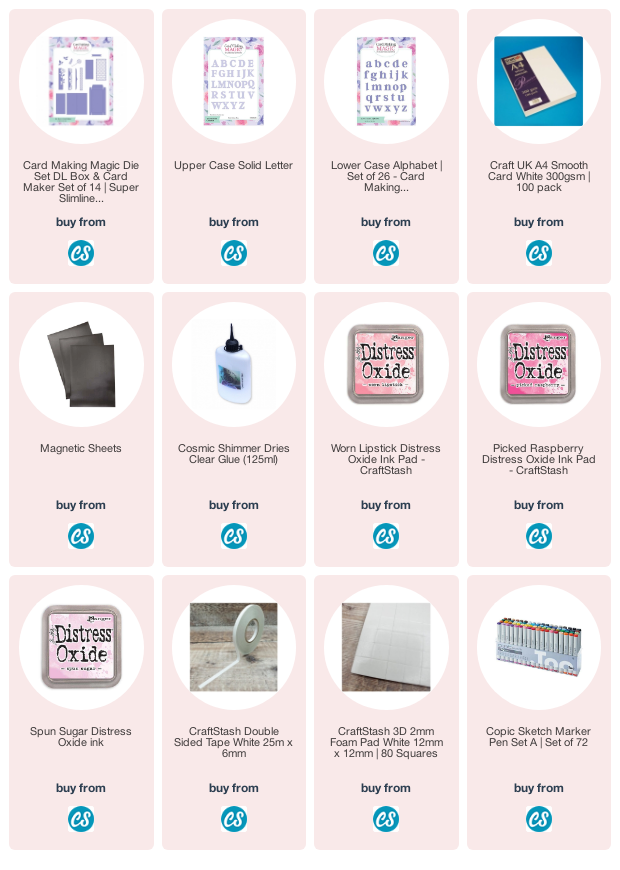
For these two cards I have used the new DL Box & Card Maker set and added in some Alphabet dies too.

For the background I simply swiped my inkpad over the card to give a stripy effect and then cut the word KIND from that panel and used this for my first card.

I inked around the edges of the open spaces and then faux stitched them too to make them stand out even more.

I threaded some of the leaves in and out of the gaps  and added a small sub sentiment to compliment the word.

For this card I added the die cut word to the detailed background  using the die from the die set.
The flower and the leaves  are also from the die set and I coloured them with Alcohol markers and then I   added them to the top. 

I used the same small sub sentiment to the top of the word and it just completes the card perfectly. 

This is a great way to create many cards, and as you have all your equipment out to make one card you may as well make a few at the same time. 
Look on your desk for any shapes you haven't used from other projects and incorporate them in to you card making session as well.

More tomorrow ...

Hugs xx

September 01, 2021

Altenew Peony Scrolls

Hi Everybody,

This is an Altenew stamp set that has matching dies and I have had it for quite a long time now.

I have used it in the past but I thought I would dig it out again and create a card using water colours. 

I am really liking the result and I used the Arteza Brush markers to make it. I have added it to an Altenew 3-D embossing folder for even more effect  and used the Label Love as the sentiment

I love Altenew products and the results are always a delight on cards for any occasion. 
 
This was another using the same set just a different colour way but just as pleasing in my opinion. I added spatters to this background and dotted sequins around both cards. 

On this second card I have also added sketchy lines around the edge for another look to my designs. 

I have quite a few stamps and dies from Altenew as my collection of their products grows, and my most recent addition has been their Craft A Life kits whcih are fantastic value.

They include stamps with dies, a 3-D embossing folder and a layering stencil for you to create some really special cards. 


More tomorrow ...

Hugs xx

August 31, 2021

3-D Embossing Folders

Hi Everybody,

A few weeks ago I showed you some cards and a video that used
3-D folders with white ink and this is one of those cards from that batch.

I have used a leaf die from Creative Expressions for the central area and that has ben backed onto the white inked pink background.

It does look really pretty and then I added a double white frame around it all. It has been added to a pink card base  and the finished size is about 4x6"

The sentiment is from Label Love by Altenew and I white embossed that onto black card, It is a very simple card and there is no other embellishment on it it but the effect is lovely.

Adding the white ink to the raised areas of the 3-D folder is such a quick and easy way to to make a card when time is of the essence. 

I am adding the video again in case you missed it first time around but you can see how easy it is to copy


More tomorrow ...

Hugs xx

August 30, 2021

Ruby Update

Hello Everyone,

I hope you are enjoying your Bank Holiday as mush as I am. The weather has been very kind and not too hot for me.

 I don't like it when it gets too hot especially with having a thick coat. But I am at the groomer's next week to have my hair done so that will be a little cooler for me. 

This was my walk through the big park her and it is called Stanley Park.  It has some lovely paths for us to follow that go through wooded areas as well as this beautiful fountain.

I would have loved to jump in for a little swim, and there was another dog already in the water, but no matter how much I barked my mum just wouldn't'  let me. When I was a baby though I did once step onto what I thought was green grass and it turned out to be just the algae floating on the top  of the lake in Stanley Park, and I went straight under.

My mum was calling me from the side, and that was when I first learned that I could swim, so I came straight back to her. I was about four months old and my mum nearly had a heart attack. Vickie and Dougal where with us too and it turned out to be quite funny once we all got over the shock.

Ever since then I have loved jumping in the water and I don't care if it is muddy either. My mum is not always happy when I am smelly though.

There is a lovely big cafĂ© in there as well that gets very busy.  My mum had some coffee and we shared a piece of toast, and they always leave water out for any dogs that ned it.
So enjoy the rest of the week and I will see you again soon. 
Love Ruby 


.


August 28, 2021

Winner

 Hi Everybody,

I hope you are all well and making the most of this Bank Holiday weekend. The weather is gorgeous today and I am hoping it stays this way for the rest of the weekend. Ruby and I will be going out walking later and I am sure she will tell you of her adventures when she next comes on.

 In the meantime I have done the draw for yesterday’s offering and the name this week is 

Tammy Joyce

Would you email me your postal address please to

christina@card-making-magic.com

and I will get the pack in the post to you straight away. I hope you enjoy it and p,ease be sure to let me know that you have it safely

More tomorrow …

Hugs xx

August 27, 2021

Friday Freebie - Peony Perfect

Hi Everybody,

And here we are at the end of the last few weeks of giving away two fabulous sets complete with the magazines.

 This is the last chance to win Peony Perfect for yourself, and all you have to do is leave me a comment at the end of this post with your FULL NAME.

I hope that the past winners, of these, or any of these sets, have enjoyed playing with them and getting as much enjoyment from the magazine too.

Always a good read as you sip your cuppa and relax for a little while.

From those comments one name will be drawn, at random, as the winner and if you do add your comment then be sure to come back and check if it is your name that is shown as the winner in a blog post over the weekend.  And don't forget you need to add your FULL NASME ... no initials or nicknames but the full name that you have.

More tomorrow ...

Hugs xx

August 26, 2021

Floral Birthday Card

 Hi Everybody,

Todays card has a beautiful flower on the front and I created this with some Foamiran that I have in my "Stash" It was very easy to work with and it comes in many colours

I used white and some peach on my cards with green for the leaves. And although I used a hot iron with mine you really don't need to if the thought of messing about with a hot iron puts you off.

The foam can be moulded from the warmth of your hands by rolling it in your palms. It is probably not as deep a crease but it will work .

The card above is the one that I made in the video but for another one I simply made some Rose buds and added them in a bouquet.

I added copper gilding flakes to these petals and
 tied them with a bow. The card size for this one is A2

The technique to make the buds is a little different but still not hard to do. And they fill an empty space if added with a group of larger flowers


I hope that this is something you will try for your self and I am sure you will be delighted with the flowers you make. Especially when you see the price of some ready made ones these days.

More tomorrow ...

Hugs xx

August 24, 2021

Slimline Box & Card Maker De Set

Hi Everybody,

Did you get to see Pauline Hickey demonstrating the brand new Slimline Box &  Card Maker Dies on Hochanda yesterday. 

This is a fabulous die set and there is also a DL size as well.
In the video I have shown you how I have used the die set and with my card I have created an envelope that matches. 

There is such a lot of versatility in any of these die sets that you need never be stuck for how to finish them off. I have had so much fun playing with them and if you managed to get yours from the shows then I hope you enjoy them as much.

I have even created a Slimline Easel Card that fits inside the box  and if you would like a video then just let me know and it will be done.

So these are only two die sets from the new collection and I will be adding more videos to showcase them all in the next few weeks. 

They are all available at Craft Stash so why not pop over there and take a look. 

In the meantime I hope you will enjoy the video that I have put together for you. It's not too long so you won't get bored.

Just long enough for a morning break with a cuppa and a biscuit ... or some chocolate !!


Latest Offers*

25% Off Past Card Making Magic

With code: CMM25

Landing Page: CraftStash

STARTS: 24 August 2021 ENDS: 31 August 2021


NEW Card Making Magic Slimline Boxes

Landing Page: CraftStash

STARTS: 24 August 2021


More tomorrow ...

Hugs xx

August 23, 2021

Make Your Own Ink Pads

Hi Everybody,

Every day there is new stuff coming onto the market and we are all tempted to buy. But what about all the stuff that we already have,  tucked away at the back of a  cupboard.

Stuff that was not cheap to buy and that may have only been used once ... or twice if your lucky ... and then forgotten about. 

Forgotten because you don't remember it is there, or forgotten because you can't remember how to use it.????. 

The same applies to techniques that maybe inspired those buys and now we have discarded them for something new.

Using Baby Wipes was something I did years ago and it created some lovely designs, and was a really cheap way to create multi coloured ink pads for your self.


This little video may just spark a memory of how you used it, of if you are new to card making then it maybe something that you want to try out. It's not going to cost you much to give this a go and baby wipes are really cheap and can be picked up anywhere.

Alcohol refill inks are available from lots of places and I used Spectrum Noir refills from Crafters Companion for my cards and you will only need a few colours to get a really lovely look.

More tomorrow ...

Hugs xx
. .

August 21, 2021

Winner

 Hi Everybody,

Sorry to be so late with the draw but it has been a funny kind of day and this is the first ch ace I have had to blog. It’s now 22.10 here and soon be my bed time but I will get this post done first and then go up the apples and pears.

The name pulled at random from the hat this time is …

Mavis Lynch

Would you  email me your postal address please to 

christina@card-making-magic.com

And I will get it in the post to you straight away. I hope you enjoy playing with it and please let me know when you have it safely.

Good night everybody.Sleep tight. 


August 20, 2021

Friday Freebie - Fabulous Foliage

Hi Everybody,

This is the last of the Fabulous Foliage Stamp Sets so if you would like to win this one then this is your last chance.

It comes with Simply Cards & Papercraft and there are actually two stamps sets and a stencil in this collection.

And to be in with the chance of owning these you need to leave me a comment at the end of this post with your FULL NAME

It doesn't matter where you live I am happy to send the gift to you at my expense and it doesn't matter if you have won before. 

But you will need to come back and check if it is your name that is shown as the winner in a blog post over the weekend. You will have 72 hours in which to claim the prize by sending me your postal address.

More tomorrow ...

Hugs xx

August 19, 2021

Embossing Folders

Hi Everybody

Embossing folders are a cheap way to make cards... no that is wrong they are not a cheap way, they are an inexpensive way to create beautiful designs for your cards.

Lots of companies are now bringing out 3-D folders and they are amazing for the depth they produce and there are many ways to use them too.

In this video I have again used up some of the bits of sentiments that are already on my desk but I have combined them with beautiful frames to make them stand out.

On a couple I have simply fussy cut the shapes out of the folders and on others I have die cut them.

And rather than keep buying new things I am on a mission to use the stuff that I already have and make it work for me in creating cards.


I think that most of us own some embossing folders and have some white ink in our crafting stash and this is one way to use  them and get more for your money
So I hope you enjoy this video and will try some of the ideas in it. 

More tomorrow ...

Hugs xx

August 18, 2021

Christmas Cards

Hi Everybody,

The cards shown today have also been created from scraps but these I have turned into Christmas Cards.

I have used the strips I made in coloured card and added them to the background and then cut lots of snowflakes from glitter card.

They are all different shapes and sizes of flakes and I have added them,  some flat and some with foam tape underneath them,  to give all different heights.

The sentiment has been cut from the blue mirror card, layered onto black card and then all added to some parchment 

This card has hade the strips laid in the horizontal line across the card and gold snowflakes added for effect on this one. 
These snowflakes are created from gilding flakes and they are some that I made for last years cards. I knew they would come in handy one day !!

Both cards are 5x7 and both are now ready to send to someone over the coming Christmas Season.

They are easy to cover in gilding flakes and I did a video when I first did them to show you how I made them.

I am adding it again here again to refresh your memory or to show you the technique if you are new, and it just goes to show you that nothing is wasted no matter how long it takes to use them 


I hope you enjoy watching and it is not a long video.

More tomorrow ...

Hugs xx

August 17, 2021

Ruby is Five Today

Hi Everybody,

Today my beautiful girl Ruby is five years old, and I have no idea where those five years have gone.

She was a nine week old puppy when we bought her home and both Griff and I fell in love with her straight away.

She was so small she could walk underneath the bottom tread of the staircase.

Once she could go out Griff would take her walking twice every day to the park or the beach and they enjoyed each other so much.

She must have been really confused when he died, but since then she has been my saviour. 

We go out together every day and she suits my personality perfectly. 
We can have more adventures in the woods looking for squirrels, or off to the beach and a paddle in the sea.

We can have lots of days out with Dougal who was five on the 4th August.

So here's to the next five years Ruby and we will both be old ladies by then. 

More tomorrow ...

Hugs xx


August 16, 2021

Using Up Your Scraps

Hi Everybody,

Being the crafters that we are none of us like to waste stuff that we have in our craft space. 

Whatever it is from die cut shapes to flowers we may have made to bits of left over card and papers that are lying on our work tops.

So this video will show you how I made good use of those left over bits and turned them into cards that I can send for any occasion throughout the year. 

I had some double sided sticky sheets and I used up all the strips I cut from left over card. 

I thought I might get five cards from them but I ended up with nine different styles in different sizes and on those I added any stray sentiments that I have left over too.


The cards can suit anyone that may need a greeting of some sort, if only to say thank you. 

And they are handy to keep on one side for that unexpected situation when you are suddenly asked to produce a card for some one.

You can dress them up as you like depending on your recipient. Just have fun making them in all different colours.

More tomorrow ...

Hugs xx

August 14, 2021

Winner

 Hi Everybody,

Not quite as hot here today but still pleasant and dry. And it will be time to go for a walk with Ruby as soon as this post is done. Thank you for coming back this week to see the new blog design and I am so happy that you seem to like it. There have been some lovely comments and for that I am truly grateful.

I have some  new videos to add next week and I am hoping that you will enjoy that too.

But for now the draw has been done from the comments added. 

Please not that if you didn't leave your FULL NAME then your comment will not have been added and so no chance for you to win.  I need your full name ... not initials or nicknames ... to be able to notify the correct person if they are the winner. And I ask this of you every week and also to come back and check if it is your name that is listed as the winner. 

Lets get down to business then with the winner this week. 
The name chosen at random is 

MaryJean Smith

so if you would email me your postal address please to
christina@card-making-magic.com
then the gift will be on its way to you just as soon as I can get to the Post Office.

I hope you will enjoy the beautiful die set and the magazine and be sure to let me know when it arrives safely with you.

More tomorrow ...

Hugs xx

August 13, 2021

Friday Freebie - Peony Perfect

 Hi Everybody,

Another chance to win this beautiful Peony perfect Die Set that is with Die Cutting Essentials magazine.

A good read at any time of the day and it is full of inspiration and information that you may find really useful.

You will find lots of ideas on how to use this die set as well as other projects that may spark your imagination.

So if you would like to win this set then all you have to do is leave me a comment at the end of the post.

It doesn't matter where you live or if you have won before you can still enter over and over again.

You must add your FULL NAME or the comment will not be counted. No nicknames or Initials just your full name and that way it is easier to identify you as the winner.  You will need to come back and check if it is your name that is shown as the winner and you have 72 hours in which to claim the prize  

Good Luck everybody

More tomorrow ...

Hugs xx

August 12, 2021

Altenew Flowers


 Hi Everybody,

These beautiful flowers are the Bitterroot Stencil and Die Set  from Altenew and I think it is lovely. I have really enjoyed playing with this combination and the stencil is perfect if you don't like to colour the images your self.

It is a layering stencil and comes in three parts. It was a little confusing to start but I watched a tutorial on YouTube about this one and it all became clear after that.

The die cuts out  two  flowers and two buds all in one pass and additional flowers can be added if you prefer. 

You can of course alter the design of the flowers any way you wish by adding in more or leaving some out, and then adding the leaves around the display as you like. 

Experiment with the stencil and see what you can come up with and it is far quicker than getting out your pens or water colours to make your card. 

So tomorrow sees us back to the Friday Freebie again and I hope you will take part by adding your comment and leaving your FULL NAME.

It's nice to be back 

More tomorrow ...

Hugs xx

August 11, 2021

Hello, I'm Back ...

Hi Everybody,

I am so happy to say that I am back and I really hope you will enjoy using the new look blog. There may be a few glitches to iron out yet but it should be easier for you to use and see and is much more user friendly if you are on your iPad or your mobile phone.

I have to get used to how it all works again, so please bear with me while I am in this learning curve.
I should be back to normal again and this week I am reinstating the Friday Freebie so be sure to leave your comments as you did before, at the end of the post, to be in with the chance to win.

Have a browse around and make sure you know where everything is, whilst I do some housekeeping in the background until I get the pages to look how I want them too.

Thank you everybody for being so patient while all this was done and a really big thank you to 
Jamie Carter at
WeAreWeb Design  
for the hours he has put in to make these changes happen.

More tomorrow ...

Hugs xx

August 01, 2021

Important News

 Hi Everybody,

It has been sometime now since I started my Blog and in that time I have only had one major make over, and that was a few years ago. But with all the changes that are taking place in the internet world I thought that maybe it was time to take another look and see how I can improve it. 

I have found a company, based in Liverpool, that can help me with all that technical stuff and they are going to try and give me a whole new Blog look.  Which means I have had some stuff to move. from scheduled posts. until the work is all finished.

This means that I will be out of action for the next week or so, while the work is done and then I will hopefully be up and running again. 

I have moved the Friday Freebies for a few weeks but I still have some stuff to give away with the Peony Perfect and the Fabulous Foliage sets.  So please keep a look out for me to be back online and then be sure to come and join in again for the chance to win.

Please don't worry if there are no blog posts from me for the next week. I will still be working away in the background. I hope to get quite a few videos done in that down time, and have them edited and ready to upload for you to view.

See you soon ...

Hugs xx

July 31, 2021

Winner

 Hi Everybody,

Not quite so hot here today and I like this a lot better. So does Ruby. I used to sun bathe for hours on end in my much younger days, but not any more. I just get too hot and very bored.  Autumn is my favourite time of year. 

I have had a lazy morning but I have got the draw done for yesterday’s offering,  and the name today is 

Tina Zapusek

Would you email me your postal address please to

christina@card-making-magic.com

and I will get it in the post to you straight away. I hope you enjoy playing with the set and please let me know that you have it safely.

More tomorrow…

Hugs xx

July 30, 2021

Friday Freebie - Fabulous Foliage

Hi Everybody,

Here we are again with yet another of the Fabulous Foliage Stamp Sets that is with the magazine Simply Cards & Papercraft.

If you have been trying to win one of these sets over that past few weeks then maybe today is your lucky day.

And if you don't succeed this time I still have another one to give away 

All you need to do is leave me a comment at the end of this post with your FULL NAME to be included in the draw.

From those comments a name will be chosen at random as the winner

You will need to come back and check if it is your name that is listed, and you will have 72 hours in which to claim it. 

I am happy to send this to you wherever you are and it doesn't matter if you have won before. But don't forget to add your full name or you will not be entered into the draw.

More tomorrow ...

Hugs xx 

July 29, 2021

Layered Background with die cuts

Hi Everybody

I always want to get more from my dies and I look at them carefully to see what they will offer me. The more they will do for me the better the value.

If you look carefully at the background in the circle of this card you will see the pretty layered effect that has been produced. 

I have created this by simply cutting the same day several times in different colours and layering them together in an off set pattern. 

There are other looks that can be achieved with dies like this but this is the easy way to do it, and you may like to try this for yourself .

The video will show you how I made four cards using this technique and each one is different but just as effective in its look. 


One is a variation on the Panel Card and I have simply used a heart shape to span the front with the trellis pattern inside the heart.

 It looks gorgeous and is created in the same way as the other Panel Cards I showed you a few days ago. I hope you like the effect and enjoy the video.

More tomorrow ...

Hugs xx


July 28, 2021

Spring Summer Stamp & Die Set

Hi Everybody,

These two cards have been created using the Spring Summer Stamp & Die Set and I heat embossed the flowers with clear powder.

I coloured them with alcohol markers and then used the dies to cut them out. I had to fussy cut some of them and they give a really pretty effect.

The background has been inked with Distress Oxides and then I have used a text stamp over the top in black ink and heat embossed that with clear powder

I arranged the flowers on the card front, and popped up some of them with foam tape to give height. I tucked in some of the die cut leaves behind.

The flowers centres have had some glitter sprinkled into the centres and I have added black self adhesive pearls around them as an added extra. The sentiment is a die cut glossy black card

For this card I have used a new stencil, that will be coming soon, and some texture paste to create the trellis look  It has been added to a Gelli Plate background

I used the Nesting Ovals to create my frame and I added this to the card with foam tape around the edges.

The flowers have been coloured red with markers.  
and they have been added to the frame with foam tape also 

The sentiments are some that I had lying on my desk from a previous card and I added those along the bottom of the oval again with foam tape.

The little butterfly clinging to the frame is from the stamp set and I think he adds the finishing touch.

More tomorrow ...

Hugs xx

July 27, 2021

Birthday Wishes

Hi Everybody,

Now this photo definitely does not show up the glitter card that I have used on the background and it is a beautiful bronze colour that really sparkles.

This is a 5x7 card on a white base and the die that I have used is the Rectangles Perfect Panels die set from Card Making Magic. I cut the rose filigree panel four times and layered three of them together. 

I added them to some silver mirror card and then coloured in the flowers and the leaves through the pattern in the card. The silver shines though the colour and looks very pretty. 

The fourth panel was added to the top of these to cover up any marks outside the lines and then the whole panel is layered on top of the glitter card.

I cut the sentiment four times, three in white and the fourth one in black glossy card and added that to the front also. It doesn't need any further embellishment as the glitter card says enough. 

More tomorrow ...

Hugs xx 

July 26, 2021

Rainbow Butterflies

Hi Everybody,

This pretty card is a 5x7 and it is created with one of the dies from the original Card Making Magic Collections

It is the Butterfly Border Die Set and it comes in three separate pieces. The main butterfly section and the other two will help you to create the border to whatever width you would like and whichever side of the card too.

For my creation I have just used the main section and I have cut it four times in white card and layered them together. 

The final layer has been inked with Distress Oxides  in rainbow colours and then cut out with the same die and added to the top of the other layers. 

I have added them to the top of an embossed panel and then glued all of it to my base card. The embossed panel doesn't show up very well in the photo but it is there. 

I have dotted some rainbow sequins around the butterflies as  a finishing touch. 
They came in a box with separate compartments for each colour ... that is until I dropped it on the floor and now they are all mixed up.!!! 
 I don't have the patience to stand and sort them all out again and so they can just stay mixed up. 

More tomorrow ...

Hugs xx
 

July 25, 2021

Ruby Update

 Hello Everyone,

Are you enjoying all this hot weather ??  I can't say that I am, it is far too hot for me. 

But my mum takes me out early in the day or later  to avoid the heat and that is much better for me.

 We always take lots of water with us so that I can have a little drink every so often

The other week when we went to Lytham we saw a family of ducks on the water and I was really quiet so as not to frighten them. 

Well today we saw a family of  Teddy Bears in their rowing boat and they where having a lovely time cruising around on the water.

Lots of people where stood around watching them row along and every so often the little one at the back would wave. I barked to say hello, and everybody laughed at my greeting. 

I really wanted to get into the water with them,  coz you know I love to swim. But my mum wouldn't let me  jump in. There was another little black fella there and he wanted to get in as well and his mum wouldn't let him either.

Anyway once we get home I can have a snooze. I have a Cool Mat and it is lovely to lie on that for a while until tea time and then I can go for another little jaunt with my mum.

Bye for now

Love Ruby xx


July 24, 2021

Winner

 Hi Everybody,

Busy day today and not one bit of crafting done. I have done what my mum used to call bottom cleaning. You know the stuff … under the beds, top of the doors and windows, all the boring stuff. But it’s done and then I took a pair of shears to my back garden and chopped down a load of over grown plants. There’s now room in my garden for me and Ruby. And after all that I took her for a long walk in Witch Wood and Lytham town centre.

But I have just done the draw for yesterdays offering and the name this week is …

Donna Rinckel

Would you email me please with your postal address to

christina@card-making-magic.com

and I will get it in the post to you straight away.   Please let me know that you have it safely and I hope you will enjoy playing with it.

More tomorrow…

Hugs xx

July 23, 2021

Friday Freebie - Peony Perfect.

 Hi Everybody,

Here is yet another chance for you to win one of the Peony Perfect die sets that I have on offer. And there are still two more complete sets with the magazine yet to give away.

All you need to do it leave me your comment with your FULL NAME and I cannot stress enough that if you don't leave your full name then you will NOT be entered into the draw.

This really is a useful die to have and the magazine is full of inspiration and information that you are sure to find interesting.

So add your comment and then be sure to come back and see if it is your name that is shown as the winner. I have no way to contact you if you don't come back and you will have 72 hours in which to claim the prize .... but only it you add your FULL NAME.    Need I say more 

More tomorrow  ...

Hugs xx

July 22, 2021

Arrow Fold Card

 Hi Everybody,

This style of card has been around for a long time and some of the videos I have watched on how others make it are full of measurements.

Now there is nothing wrong with that but I get totally lost in sixteenths of an inch and seven eights, it leaves me completely numb.

So I came up with another way and this is the best way I can make this card, easily, and it suits me perfectly..

The finished result is so pretty and you can decorate this any way you wish. I of course had to add in the flowers and glitter, along with some pearls ... but no ribbons this time.
I hope you will give this a try and find it as easy as I did.

The video is not long but it will give you a better idea of the steps I took to make it.

It would suit any occasion and male or female, if you leave off the flowers. This is a single photo of one of the cards.
 The first picture makes it look too complicated as there are three together in that one.

But whatever you make it for  have fun in the process.

More tomorrow ...

Hugs xx

July 21, 2021

Leafy Corner Die Set

 HI Everybody,

Todays card is created using the Leafy Corners and the colour scheme for this one is simply black and white.

It is a 5x7 card base and I have embossed the front of the card. 

The top panel had been die cut from white card using the largest corner die in the set.

I have created one panel from the backing die and then another panel and used the filigree piece and both have been added together.

These have then been added to the top of the card and trimmed off along each side to fit. I found a lovely piece of corner diamante in my stash so I have added that to the panel to enhance it some more..

The flowers are a mixture of daisies, roses, and some black poppies and I have glittered them up to glitter in the sunshine.

It looks much better in the hand than on the photo

More tomorrow ...

Hugs xx

July 19, 2021

Panel Card

Hi Everybody,

Todays cards are all easy to make and are really pretty once they are completed., and the video will show you how I created them. Just enough time for a brew and a biscuit to relax and view.

The papers I have used are some that I have had for years. They are in a pad that I got from the £££shop many moons ago and I have forgotten all about them until my recent rummage.in the craft room

I chose three from the pack that all blended together and decided where I wanted them to go.

I added the large striped one to the back panel, and the other two I have used on the front panels. The card base is a white. 300 gsm smooth card.


I am sorry but I stupidly forgot to ad the video and so there is nothing for you to see. 
But it's there now. 
In the video I make two cards, with a third one already completed, so at least you can see a variation of the design.

 I haven't used any dies, apart form the greeting one, but you could use them for the centre panel if you wished ,and I will cover that in another video coming soon.

I have added my usual display of flowers along the bottom edge and they have been sparkled with a dot of glue and some glitter.

The sentiment has been cut three times and stacked together to give extra dimension.

More tomorrow ...

Hugs xx

July 18, 2021

Just my style ...

Hi Everybody,

Out of all the cards I have added in the past week this one has to be my favourite. It's pink ... it's floral ... and it's big.

It didn't start life this big, but as I was putting it all together I came to the part where I needed to add the flowers, and I realised at that point that I had added it to the base card Upside Down .... what a plonker !!

I had to cut the back off the card and add the front to a much larger base to make it the right way round. 

So while I was doing that I added in lots more pink and white layers.

The spotty background to this card is Foiled and on top I have added the verse stamped on an oval. I also lined the inside of all last weeks cards and I forgot to mention that to you.

I added a little butterfly to the card as well and you can just make it out in this close up.

This is another card that is better in person than on a photograph and the flowers blend with it perfectly.

They have been glittered for effect and the pink pearls are dotted around the card 

Another card that I am really pleased with.

More tomorrow ...

Hugs xx