Beautiful Card Designs Made Easy

February 27, 2017

Tonic Studios - Combining Dies

Hi Everybody,

For todays card I am working with some really lovely Tonic Studios Dies.
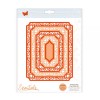
 The large layering die will give you a really good sized base and then you can add decoration or other layers as you wish.
 I decided to keep this one really simple and let the dies do all the work for me and this is the result in a lovely pink and white 
The large die is Swirling Frames  and I have embossed the top white patterned layer.
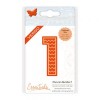
The Large Numbers dies are a useful addition to any crafting collection and can help you to personalise cards for any occasion or age group.
The Birthday Swirl is another large die and I created my sentiment in gold glitter card for my top layer and then added it over the numbers for a different look.

The links will take you to all the products on the Tonic UK website but the option to switch to US is there for you if that is where you are based. Have a good browse whilst you are there for more lovely dies 


February 26, 2017

Ruby Update


.

Hello Everyone,

Thank you all for your well wishes on my recent operation and here I am feeling a little sorry for myself once I came home.

But my mum has been pampering me and that is lovely and she made this BabyGro to fit me so that I can't bite at my wound.

She cut the legs shorter at the back of a baby's sleep suit so that I can still do what I need to do but it covers my tummy and keeps it clean .... clever eh??

I am not allowed to run around or jump so my mum is carrying me up and down stairs at present as I want to be with her all the time.
I am not allowed to go to my doggy day care just yet or play with my best friend Dougal until I am a little stronger.

But Vickie came to visit me and I was soooo pleased to see her. I kissed her all over her face and ears and made her laugh.


By the end of the week I was feeling much better

Here I am relaxing with my mums favorite magazine but I have to admit though that I am getting a little bored now and need to go out and play.

I especially want to see Dougal as I have really missed him and we have such fun together.

I will be back to  my old self again soon and then I will share more of my adventures with you

Bye for now xx


February 25, 2017

Card Winners ...

Hi Everybody,

It's wet and windy here today and I have filming to do later this afternoon. But at least I am earlier with the draw for the winners of yesterday's cards.

The names this week are ...
Jeanne Thomas
Kaye Charles
So if you could email me please with your postal address to
christina@card-making-magic.com
They will be on the way to you both

Please let me know that you have them safely

More tomorrow ...
Hugs xx

February 24, 2017

Friday Freebie 007/17

Hi Everybody,

Here I am with two cards for this weeks FF and for these I have used Designer Paper from AnnaMarie Designs 

Over the top of that I have die cut the pretty panel called Floral Trellis from Spellbinders

My flowers are from Wild Orchid Crafts and are a mixture of  Tulips, Carnations, Roses, Cherry Blossoms, Chrysanthemums
and Tuscany Rosebuds 

All have been sparkled with fine glitter

So would you like to have one of these cards?

 Then all you need to do is leave me a comment at the end of the post and from those comments two names will be chosen 

In tomorrows blog post the names will be announced

Then you have 72 hours in which to claim your card.

 I am happy to send the card to you wherever you live even if you have won one before

But I cannot chase you up so it is up to you to come back and check if it is your name shown

Plus I don't know which one you will get ... it's pot luck !!

More tomorrow ...

Hugs xx

February 23, 2017

Floral Frames Collection

Hi Everybody,

Today I want to tell you about some brand new dies that are being added to the Craft Stash website. 
They are a lovely collection called  Floral Frames  and there are 12 different dies and wraps that  match each other. plus a set of stamps to enhance your projects even more
I have used the All Occasions and the Dahlia dies and wraps and created the projects shown in the picture above

There are four videos in total and each one will cover something different so that together you can create a gift for some one special.
One will show you how to create a pretty wrapped candle and another will take you through making the box to put it in 
Then you will have the choice of either a layered round card or a beautiful floral square card to go with your gift

I hope you enjoy the videos and that you will give them a try.
 Each of the coloured and underlined words is a link to either the product or the videos and it will open another window for you

More tomorrow ...

Hugs xx


February 22, 2017

Water Colour Wednesday - Canary Love

Hi Everybody,

This beautiful image is from Saturated Canary and it is called Canary Love 

I have had this Digital Image for a long time and so you may have to search for it if it is one that you would like

The original image has a canary alongside the girl but to fit it into the frame I had to cut it off.

Nevertheless I don't think it spoils this card at all  and I was quite pleased with the end result.

I have used a mixture of Gansai Tambi water colours and Spectrum Noir pencils to get the look I wanted

I fussy cut around the image and raised it up on the grey background with foam pads and then added the frame also with foam.

I get my rolls of foam and foam pads from the £££ shops and I use it by the ton and never have any trouble getting hold of it

The flowers are from Wild Orchid Crafts and they are a mixture of Tulips, Gypsophila and Roses in two different sizes 10mm and 15mm

Some of you have written to me about the flowers and wanting to know what I have used so I will try and include them in the list each time I use them.

But if you don't know what to order ... because of the vast choice of designs when you go to WOC website ... then why not try the starter packs that have been put together by Paul especially for you to try.

More tomorrow ...

Hugs xx 


February 21, 2017

Tuesday Tutorial - Blooming Collection

Hi Everybody,

For todays card I am once again mixing and matching dies and one is Medallions Three which I have used many times in the past.  
The other is called Blooming Collection and it creates a really pretty open fretwork type of frame.  The bow is created with the DecoFun Bow maker and this is the first ribbon I have tied with it
Spellbinders Supplies:
Other Supplies:

With die # 8 from the matting basics cut two pieces in white and Create A Hinged Card
Create smaller layers leaving just a small border around the edge in blue and white 
Emboss the smallest white layer in any folder that you have
Add the blue and white layers together
With both parts of Medallions Three cut a layer in blue
Add small foam pads in strategic areas that cannot be seen from the front
Create a smaller white mat that has been embossed to sit under this die cut
Add the die cut to the top of this panel
With Silver Mirror Card cut one layer and again add small foam pads so that they cannot be seen from the front
Add these layers together and wrap ribbon around them threading it under the silver frame
Add to the base card 
Add small foam pads around the die cut circular frame of the die and stamp and heat emboss your sentiment onto the solid part 
Add in a double tied bow and place one single rose in the centre
Dress with more flowers in the top right corner. 
I have used Roses in two sizes, three rosebuds, Gypsophilla and one cherry blossom for my display
All have been dabbed with glue and glittered to make them sparkle

More tomorrow ...

Hugs xx


February 20, 2017

Another Freebie

Hi Everybody,

Today I have another magazine freebie to tell you about and this one is

This will be on sale in selected supermarkets and craft shops on Thursday 23 rd February.

You can also get it from WHSmiths or direct from More Mags 


 Using that link you can take out  a magazine subscription if you prefer and that way you will always be sure to get your favorite magazine

The gift is called Darling Doilies and it is in three sections to make some lovely adornments for your designs.  

The video is available on YouTube and is

You can keep it simple if you wish and this is just a one layer card so will fit into an ordinary envelope for posting.

Or you can dress it up with pretty flowers and make a box to put it in

Here I have used Roses in two sizes 20mm and 15mm ... plus Tuscany Rosebuds and tulips.

All have been sparkled with glitter and the  gingham ribbon has been glued in place under the bouquet


The flowers and the pearls centre on the bow are all from Wild Orchid Crafts

The pearl flourish is from Want2Scrap

More tomorrow ...

Hugs xx

February 19, 2017

Magazine Freebies ...

Hi Everybody,

Here I am with the latest in what is FREE with this months magazines. And this month there are some real treats in store for you. 
These are on sale on the 23rd February so keep your eyes peeled for them

So to start with here is Simply Cards and Papercrafts 160 and the gift is this stunning Hydrangea Set that can be used in lots of ways.

In the video I have used Embossing Paste and coloured it with Distress Inks to make this really pretty card.


The Hydrangea Set  will show you how I did this one and it is easy to do  Flip the stencil over for another look or use chalks.

 This one I have done in Water colours and then spritz the background to make the paint run.

 It gives a diffused look to the card and I really like this effect.

As well as the stencil there is an embossing folder and a stamp set that is really useful too and can give you even more designs to work with.

It includes sentiments as well as other items for you to create your own scenes and backgrounds


The next one to look out for is Creative Stamping 40 and the large A4 stamp set that comes with the magazine

 Creative Stamping 40 - Handmade with Love   is the video to show you the sneaky peak of this collection and some of the things that I have done with it.

Two really good magazines that are full of info for you and step by step instructions on how to make many cards.

More tomorrow ...

Hugs xx


February 18, 2017

Todays Winner ...

Hi Everybody,

Not too bad a day here and I have lots to to do this afternoon.  Mainly prepping for videos over the weekend to bring you lots of new ones in the next week or two.

But this morning the draw has been done and the name  chosen at random was yours ...

Maria Illsley
so if you could email me please
christina@card-making-magic.com
with your postal address the card will be on its way to you 

You have 72 hours in which to claim it and please let me know that you have it safely once it arrives.

Have a good weekend 

More tomorrow ...

Hugs xx

February 17, 2017

Friday Freebie 006/17 - Pink Floral

Hi Everybody,

A really pretty pink and white floral card is on offer today and this is prettier in the hand than the photo shows.

It is in my favorite colour and with all the things I like to add especially the flowers.

So here is another card on offer for you and if this is one that you would like to have then you know what to do

Just leave me a comment at the end of the blog post and then from those comments a name will be chosen as the winner

You will need to come back in the morning to see if it is you and then you have 72 hours to claim it.

Please leave your full name as there are lots of people with the same first name and I won't know which one you are.

Good Luck everybody. Please scroll back for yesterday's post as it was a late addition ....sorry!

More tomorrow ...

Hugs xx

February 16, 2017

New Card Kit

Hi Everybody,

Today I wanted to tell you about a new card kit that is in the shops and this is from Hunkydory.

It is the Design Collection and this is the very first Issue for you to see.

In the kit there is a magazine that will take you step by step on how to use all the various elements that you will find in the pack  and there is something there for every level of card maker

The card pack is fill of things for the new card maker and you can make many designs from this in no time at all.

There are foiled cards and beautiful backing papers as well as inserts for many of them

I have also created a video to show you some of my ideas on using this versatile kit that is on sale in the shops right now.

Design Collection Issue I  is sure to please you and give you lots of scope whatever level you are at in your craft.

Open it up and have fun and see what you can come up with

More tomorrow ...

Hugs xx


February 15, 2017

Two Posts in One ...

Hi Everybody,

Because of the change in my Tuesday Tutorial and the Water Colour Wednesday this week I thought it may be a good idea to combine the two and create a card with some water coloured flowers. 
I have used Spellbinders dies for my design and the flowers are bright and cheerful.
Spellbinders Supplies:
Other Supplies:
  • Rose pink and white card from Papermill Direct
  • Gansai Tambi water Colours
  • Water Colour Card
  • Wink of Stella Clear Glitter pen
  • Foam pads of varying thicknesses
Instructions:

With the largest die #8 from the Matting Basics cut two panels and create a hinged card
Hand cut a slightly smaller layer in rose pink to leave a thin border around the edges
Cut another layer in white, again leaving a small border,  and emboss in the folder.
(The card will be wider than the folder so emboss most of it and then move the card along to emboss the remainder.
 Partially cover the folder with the embossing plate and run through the machine. 
The pattern is busy enough not to notice any discrepancies in it )
Glue the two layers together and add to the base card with foam tape between to give dimension
With the solid die to Medallions Three cut one piece in rose pink and then with both parts together cut a filigree layer in white
Add these two together with foam pads between the layers and then more foam on the back of the pink card
Stamp, colour and cut as many flowers and leaves as you would like for your card
I stamped the sentiment twice and then used the banner die to cut each word separately 

Add the Medallions layer to the card and place a pearl in each corner
Arrange the flowers in the centre panel as you like them and use foam pads of varying thicknesses under them and the leaves.
 Keep two of the smaller flowers to one side
Add foam to the banners and arrange on the flowers then add the smaller flowers so that they just overlap the banners.
Add a little shading to the banners to make them look curved
Lightly add the glitter pen to the flowers for a little sparkle

More tomorrow ...

Hugs xx


February 14, 2017

International Ambassadors Informal Blog Hop

Hi Everybody,


We, some of the International Ambassadors for Spellbinders,  have been doing this informal blog hop for over two years now and between us we have covered many subjects and themes.

This month we are doing Valentines Day and using some of the newer dies that are there for you to buy.

For my card I chose the  Bowlicious  die set is in three parts and one of the cutting edges can be moved to extend the depth of the bow
You can use it to add a separate bow to the edge of your card or you can layer it up to create a more full look.

Change the colour scheme and alter the sentiment and it can be used all year round

Now why not pop over to my colleagues and see what they have in store for you this month.

Linda Lucas    Australia
Yvonne van de Grijp   Netherlands
Christine Emberson    UK

Leave them a comment to say you have been.

Thank you so much for your continuing support

More tomorrow ...

Hugs xx

February 13, 2017

Floating Cup ...

Hi Everybody,

So todays project is one of the beautiful floating cups

I really enjoyed creating this and I used quite a lot of flowers on it and they are all from Wild Orchid Crafts

I add them with a hot glue gun so that won't fall off and then I add my glue and glitter to add the sparkle

The pearls string was wound around the flowers at the end and also glued in place.


The tea cup and saucer are from an old set that hasn't been used for years. Just sat in a cupboard gathering dust

You can pick these old tea sets up really cheaply in junk shops or car boot sales

It makes such a pretty display and is a real talking point as people want to know how it is done.

If you don't know how to make these and you  would like a video then please let me know and your wish will be my command.


There is an International Ambassadors Blog Hop tomorrow so the Tuesday Tutorial will be on Wednesday instead, 
and  I may combine it with a water colour as well  ...  but it's only for this week ... back to normal next week 

More tomorrow ...

Hugs xx