Beautiful Card Designs Made Easy

September 17, 2024

Creating with Altenew Flowers

Hi Everybody,

Todays card is created with flowers made from the Craft A Flower kit from Altenew. It is the Sulfer Cosmos flower and it is lovely.

I have cut my layers for the flowers in blue and then once they are assembled I gave gone over the petals with the Wink Of Stella pen.

The flowers have been added to a handmade inky background and an aperture cut into the card for effect. 

The finished card is a 5x7 with the fold at the top, and it is much prettier in the hand as the flowers sparkle when turned in the light.


This was a playtime session and for the yellow flowers I used the Layered Rose, again from Altenew, and this die was free with a magazine a long time ago.

These have also been added to a handmade background and the white net added to the top, but this card is only an A6 size.

I had fun making these flowers and the time spent was very relaxing.

More tomorrow ...

Hugs xx

September 16, 2024

Trellis Card - Variation Three

 Hi Everybody,

Here is another version of the popular Trellis Card and this one is so very easy to make. 

The video is not long and so won't up take too much of your time to view.

This is the second time I have done a similar type of card and the first one was about ten years ago. So well over due for a refresh.

It is easy to do and the width of the strips can be altered to give you yet another look.

You could also add them in a different pattern, for instance a sunray effect on the card and this would look lovely. 

In the first video I added them as a weave on the card with lots of flowers too.

But you can have fun doing them any way you wish. Click the link to view the video and I hope you enjoy it.

Trellis Card Variation Three


Please leave me a comment and "Like" the video and be sure to subscribe if you aren't already.

Thank you 

More tomorrow ...

Hugs xx

September 15, 2024

Gail Knapton - Winner

 Hi Everybody,

It was very pleasant here yesterday and although I am still having trouble walking I did manage to take Ruby for a little walk with Vickie and Dougal.  We didn't go far and we didn't go fast just a leisurely stroll and then home.

The draw for the magazine has been done and the name today is 

Gail Knapton

so if you would email  me your postal address please  to
christina@card-making-magic.com

I will get it sent off to you straight away. 

I hope you find it a good read and please be sure to let me know that you have it safely 

More tomorrow ...

Hugs xx

September 13, 2024

Friday Freebie - Altenew Poinsettias

Hi Everybody,

Today I am back to offering, over the next few weeks,  some magazines that you are sure to find informative.

The first one is  Simply Cards & Papercraft and the beautiful Altenew Poinsettia Die & Stamp set.

This is a flower that although it is always very popular at Christmas it can be used all year round.

Just swap out the colours and add it to you designs for some really lovely on trend flowers that will suit any occasion.

There is also the link for you to download some papers that can be used with the stamp and die set.

If this is something that you would like to have then all you need to do is leave me a comment at the end of this post with your FULL NAME

From those comment one name will be chosen as the winner and announced in a blog post over the weekend so be sure to come back and check if it is your name that is shown.

You will also get the magazine to brows at your leisure and that is always full of ideas and inspiration for you to try.

More tomorrow ...

Hugs xx

September 12, 2024

Bokeh Effect

Hi Everybody,

Todays little card is created with the Bokeh Effect on the front panel and there are many different ways to obtain this look.

It is a Japanese word often used in photography and it means blurred. 

This effect is that the back ground looks blurred, like the lighting in a photograph that is taken from a distance and it is not focused correctly.

I have created mine with Distress Oxides, and a large finger dauber and stencil but you can use anything that you have in your crafty stash.

It us another easy way to make individual and unique backgrounds for your design and is far more satisfying than buying more papers.

The sentiment is one of a set that I got from Amazon and is one I reach for often.
The top is cut in a blue to math the pattern and the base is silver.
The panel has also been mounted onto a blue mat 

This is a video I did on the technique some time ago and in that one I used water colour paints.

 I thought it appropriate to add it again here

More tomorrow ...

Hugs xx 

September 11, 2024

Trellis Card - Variation Two

 Hi Everybody,

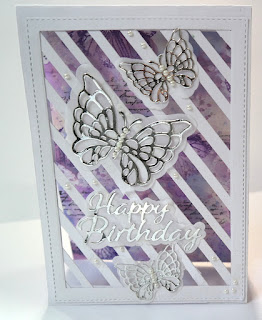
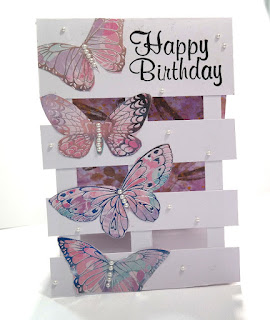
Today I am doing a different take on the Trellis Card from yesterday by simply moving the strips to another area.

Once you have tried this why not try them in another place for even more changes to your design.

The video will show you how I got this look and I have used another handmade paper for the inside of the card. 

Such an enjoyable way to create unique papers for any thing you make


The butterflies are just cut from a paper pack that has been out for quite some time, but you could use ephemera packs or stamp and colour your images as you please.

The ones I had left over I added to the back of the card for more interest.

The video is not long and yet the card is so pretty and the finished size of mine is 5x7.

You can make this any size you want,  as there is not really any measuring to do, just adjust the strips to suit the size

More tomorrow ...

Hugs xx

September 10, 2024

Trellis Cards - Variation One

 Hi Everybody,
Today I am sharing a 
that has been made with a handmade panel for the back. 

I really enjoy making my own background in this way and you can get so much variation in the finished card and I show you in the video how I get the look.

I got the idea for the ink smoosher from NBCards on YouTube and it is such a simple concept but so effective.

I have added this video to a Playlist called Trellis Cards and that will share with you many ways to create different looks with this simple design.

The card is easy to make and yet stands out from the crowd because of its unusual design.  

It is a style that has been around for a ling time ... I am just late getting on the bus !!

But I hope you enjoy the video and will come back for more as I have more ways to make trellis cards coming up in future videos.

More tomorrow ...

Hugs xx

September 09, 2024

Pocket Card & Variations

 Hi Everybody,

Today I am starting a new min series and I am re-visiting some old videos in the process.
I am going to make cards from one basic shape and give the old videos  a new lease of life.

Pocket Card
I have not bought anything extra, I have just used things that I already have in my crafting stash.

I have used the same die set throughout for my decorations and it was released a long time ago from my Nested Circles Collection 

The first picture is a complete pocket card and the video will show you how to get this look.


You could also simply leave the flaps loose and decorate the inside with the detailed layer if you prefer. Thus giving you two variations to use 

Side Fold Card


These next two cards are with the fold at the side, and it could be on either side.

I have used the die cut as a detailed lacey layer  that you can see through...


Top Fold Card

... and this one has the fold at the top using the detailed layer at the bottom to hold the card upright.

I have used a 300 gsm card, but if yours is lower than that the you may need to glue two detailed layers together for the strength to hold the card base upright.

This gives you three more variations on the theme to add to your arsenal.


This lilac card has the two flaps going in opposite directions but the card will still stand on its own.


For this I have cut the largest die to create a base, and I have added that behind the detailed layer,  to give this layer a more solid look.

But whichever way you decide to do this it will give you a really pretty card to send to your recipient, male or female and what ever the occasion. 

I hope you enjoy the video 

More tomorrow ...

Hugs x

September 08, 2024

Michele Coffey - Winner

 Hi Everybody,

It's grey and dull here today and I don't know if it will brighten up any, but here's hoping it will.

I am having great trouble walking at present and so I doubt if Ruby will get her walk today.
 I have an appointment with the doctor best week and so I am hoping they will be able to sort things out for me. First thing in the morning is really painful and getting up stairs takes me ages ... thank the lord for banister rails is all I can say !!!!

The draw has been done for the Spellbinders Set 3 and this time I am hoping it will be claimed.
The. name today is 

Michele Coffey

so could you send me your postal address lease to

christina@card-making-magic.com

and I will get it sent off to you straight away. Please let me know that you have it safely and I hope you enjoy playing with it when it arrives.

More tomorrow ...

Hugs xx

September 06, 2024

Friday Freebie - Spellbinders Set 3

 Hi Everybody

Here is another chance to win the Spellbinders Set 3 that was not claimed the other week .and it is a lovely die and stamp set with an embossing folder.

You can make some beautiful designs with this set and make it work in your own personal collections. 

So if this is something that you would like to have then all you need to do is leave me a comment at the end of this post with your

  FULL NAME

Then be sure to come back and check if your name is shown as the winner over the weekend. 

You will have 72 hours in which to claim the prize.

More tomorrow…

Hugs xx


September 05, 2024

Using Scraps ...

Hi Everybody,

This card has been created from left over pieces of gold card.

I used brushed gold, glitter gold and bright gold at the bottom and cut them into equal panels before adding them to another panel.

I wrapped gold twine around this and then added it to my base card,  whcih is an A6 size, with foam tape to raise it up.

I cut the butterfly from the bright gold card and some parchment and added that to the top of the twine along the bodyline.

The sentiment is also bright gold.

The panels where too big for the first card, but the bits I trimmed off I made into another card.

I also found some left over gold embossed parchment, and I tore that into a strip for the front of my card.

That sits under the small panels that have been added to some more parchment.

From the bright gold I cut one strip and several dots to add to the front for decoration.

 I also cut some leaf shapes to add to the small gold panels.   

The sentiment is from an old Card Making Magic release. 

Another great way to use up any odds and ends you may have lying about and it saves you money in the process.

Plus it is far more satisfying then tossing them into trash can

More tomorrow ...

Hugs xx

September 04, 2024

Colouring Acetate

Hi Everybody,

Todays card has a background created on Deli Paper, as I did in yesterdays cards,  but this one has a fussy cut flower added to the front and that has been done on acetate.

I stamped the image with Versamark on to the acetate and and then heat embossed it with white powder. You will need a heat proof acetate for this as an ordinary one with shrivel in the heat,

Ink smudges very easily on acetate and it is difficult to get it to stamp properly with some inks. The Versamark worked really well for my design

Stazon is another answer as it is permanent on any non porous surface and gives a lovely clear image. It comes in many colours and has refills that you can buy at the same time 

Just be mindful that your stamp could slip on the acetate surface and needs extra care

I used alcohol inks to colour this image and I coloured them from the wrong side.
This gives you a diffused look once you view it from the correct side again.
I fussy cut the image out once the colouring was dry and I added it to my card. with glue dots in strategic places  

The butterfly was cut from silver card for the detail and parchment for the backing and I kept the wings loose sot hat they can be raised up a little to give the appearance of fluttering on the panel.
The sentiment is also cut in silver

It turned out to be a bright and petty card and once again used up things that I had made from previous crafting sessions and so wasting nothing.

More tomorrow ...

Hugs xx 

September 03, 2024

Jewel Colours

Hi Everybody,

These beautiful cards are created in jewel colours from my alcohol inks but this time they are done on Deli Paper.

This is a thin kind of paper that is a greaseproof on one side and absorbent on the other.  It is what your food is  sometimes wrapped in you go to the takeaway to buy it.

I got mine from Amazon and it was really inexpensive. 
It does a lovely job and the colours are gorgeous. 

Some one asked me if tissue paper could be used instead and I find tissue paper is too thin and it tears very easily when exposed to moisture.

The Deli Paper is much stronger and yet still can be torn along the sides to add to your card. If you have greaseproof paper in your kitchen then give it a try. 

I have hand torn both of these cards and if you tear the paper towards you, with the colour facing you,  then you will get the white edge to the paper that looks pretty.

It die cuts beautiful too and can be added to your cards, scrapbook pages of journals.

On the top card I have gold heat embossed some butterflies and  I have used coloured inks to add the dots to the panel.

The bottom card has been crinkled up and then I lightly rubbed gold gilding wax added to the top of the creases.

I dressed both cards with gold butterflies and Happy Birthday sentiments, and both are 5x7 top folded card bases 

More tomorrow ...

Hugs xx

September 02, 2024

Old Idea ...old video

 Hi Everybody,

My apologies for adding this old video from seven years ago but I have not been well over the past few days and not feeling up to doing a new one to show you. So I hope this one will entertain you until I feel better.

It was done many years ago and Griff  filmed it and although I use alcohol inks in it you could use your favourite medium to create the look.

Because this is such an old video I am able to add it here on the blog and not just the link back to YouTube.


Thanks for all your lovely comments on the mini series for Parchment Ideas, it makes me really happy that you enjoyed the videos.

I will be back to normal soon with another mini series for you to enjoy and in this series I will be revisiting some of the old card shapes that have been around for a long long time.
It will also update some of my older videos too.

More tomorrow ...

Hugs xx

September 01, 2024

Ann Topp - Winner

 Hi Everybody,

I don't think this weather knows what it wants to do today , or any other day for that matter.
It has been a real mixed bag going form one season to the next in a few short days.
In fact it has been an awful summer and it is nearly over with. 

But I have done the draw and hopefully, this week, this one will be claimed.
I can never understand why people add there names to a free gift and then do not claim it as theirs.

So the winner today is 

Ann Topp

Would you email me with your postal address please to
christina@card-making-magic.com
and  will get it in the post to your straight away.

More tomorrow ...

Hugs xx

August 30, 2024

Friday Freebie - Spellbinders Set 4

 Hi Everybody,

This is the last of the Spellbinders sets that I have on offer and this is set 4.

It is a matching die and stamp set along with beautiful Rosette Wall embossing folder that is sure to make some lovely backgrounds for you designs.

Last weeks offer has not been claimed and so I will add it again later on and hope that it goes next time.

But if you would like this set then all you need to do is leave me a comment at the end of the post with your 

FULL NAME

From those comments one name will be chosen and announced in a blog post over the weekend so it is up to you to come back and check if your name is shown as I have no way of letting you know if you are the winner.

I am happy to send this to you where ever you are and it doesn't matter if you have won before.

More tomorrow ...

Hugs xx

August 29, 2024

Parchment & Marker Pens

 Hi Everybody,

I know that not everybody has alcohol ink refills  but most of us have alcohol pens of many different brands.

But is doesn't matter whcih brand you have this look can be achieved with any of them.

I also use Isopropyl Alcohol as it is a lot ... and I mean a LOT... cheaper than blending solution and the effect is not that much different.

Try to get the higher percentage if you can as it will work much better that the lower one. I used 99.9% and it wouldn't go any lower than 91%.

I got a one litre bottle from Amazon and it is not expensive and will last you for ages.

I have shown other videos in the past where I have used it to Colour Ribbons and Flowers 

The card to the left has been done with the pens as shown in the video but I have used lots of coloured pens to produce the dots around the sentiment.

It just gives another look to the end result and I quite like it too. You can of course leave it off if you prefer. 

The video is a little longer than usual but I hope you enjoy it anyway.

Parchment & Marker Pens

Clicking the YouTube links will open  new windows in for you to view the videos listed but please come back here when you are finished.


I  have really have had a good time playing with Parchment and using it in lots of different ways.

For the card to the right I was inspired by a tortoiseshell brush that I have in my bedroom and I picked out the colours as close to it as I could.

It is the same style as the green one done in the video,  and I like both of them .

More tomorrow ...

Hugs xx

August 28, 2024

Parchment Scraps

 Hi Everybody,

Playing with the parchment over the last few weeks has produced quite a bit of left over pieces and so this was one way to put them to good use.

I added them to some white card to give them strength and then I cut them down into banner strips, of varying widths and lengths,  with a little fish tail at the end of them. 

For this top card I layered them on to an embossed panel with foam tape in between each banner and I mixed up the colours so that each one would be on a different colour.

I dotted small dots around the front and they are created from the hole punch and gold card, and I added the video for that a few weeks ago.

They do look very effective on my card. and these strip have been added vertically on my design  

On the card to the left I followed the same process but dressed this card in silver and added these strips horizontally to the embossed panel

The butterflies have been backed on to parchment  and the wings curved up a little to give movement

Just by playing I have created some lovely cards from bits of  parchment  that would otherwise have been wasted.

And had some fun in the process.

More tomorrow ...

Hugs xx

August 27, 2024

Parchment Panels

 Hi Everybody,

In the video yesterday with
I made quite a few backgrounds and rather than waste them I have turned them into cards.

This is the parchment done with the Sunray Stencil and some blue and lilac inks and the result is really very pretty and subtle.

This one is done by taking the ink onto the parchment once the stencil has been removed and so gives a positive image.

I have added gold embellishments to the front of the card, and both the sentiment and the butterfly have got more parchment behind them. 

The finished card us a 6x6 with the fold at the top as I think a card stands better when done this way.

The card to the left is also a 6x6 and this was done by rubbing the inks onto the parchment through the stencil and so taking the negative colour onto it.

Both show the Sunray stencil but in completely different ways, and each is as pretty as the other.

For this one I have added a silver die cut that was already on my desktop and added it with a large grey flower to the front of my card, and I turned this one into a Birthday Card.

Have fun with your parchment and use any of the ideas that I have added to the blog pages over the last few weeks.

It is a lovely material to work with and it is nit expensive but gives impressive results.

More tomorrow ...

Hugs xx

August 26, 2024

Parchment & Alcohol Inks

 Hi Everybody,

Today I am adding the video that I mentioned last week and this one is using the parchment with some alcohol inks that I have had for some time and never used.

Mainly because I was intimidated by them, but now it's time to put my brave face on and have a go with them.

There are lots of good tutorials on YouTube with these inks and I have watched loads.

 This is my effort with them and the first time they have been out since I did the Yupo Paper Videos ages ago. 

Parchment & Alcohol Inks 

I hope you enjoy this video and it is part of the Parchment Ideas playlist on YouTube.

I have to say I have enjoyed playing with them and I intend to do more,  but I want to incorporate the Gelli Plate with them too and see what looks I can achieve there. 

You can use the refills for alcohol pens or simply scribble the pens onto the parchment and then spread the colour around with the Isopropyl for a blended look.

More tomorrow ...

Hugs xx

August 25, 2024

Heaney Hong - Winner

 Hi Everybody,

There is a strange object in the sky today and its one we haven't seen much of this summer. It's called the sun and today it shines bright mixed in with the wind. But maybe it will stay dry enough for Ruby and I to go out somewhere later on.

I have done the draw for the beautiful Spellbinders on offer and the winner today is 

Heaney Hong

so if you would send me you postal address please to
christina@card-making-magic.com
I will get it in the post to you straight away.

I hope you like it when it arrives and please let me know that you have it safely.
Have fun

More tomorrow ...

Hugs xx

August 23, 2024

Friday Freebie - Spellbinders Set 3

 Hi Everybody,   

This is the third Spellbinders set to be offered on the blog and this week it is the Doily Art Embossing Folder with a beautiful die and stamp to go with it. 

Spellbinders has been at the front of die cutting for years and their dies are so incredible and a pleasure to work with creating beautiful shapes for all your projects.

So would you like this one ? 

Then all you need to do is leave me a comment at the end of this post with your 

FULL NAME 

to be in with a chance to win.

I am happy to send this to you wherever you are and it doesn’t matter if you have won before.

Just be sure to come back and check if it is your name that is shown over the weekend as the winner.

More tomorrow…

Hugs xx


August 22, 2024

Parchment & Embossing Folders

HI Everybody,


So here is another old video that is now in the YouTube Playlist and this is colouring the flowers that have been created with an embossing folder.

It is another video that has ben added to the playlist on YouTube and is an older video done in 2021.

It fits in with all the others that are in that
 Parchment Ideas Playlist
and I hope you enjoy watching it.


I still have a little bit more to go with the parchment but at present I am practising with some bottles of alcohol inks that I bought ages ago and have never used. 

So watch this space and they will  be along shortly and I am still using the heavy weight parchment that I have in my stash.

More tomorrow ...

Hugs xx
August 21, 2024

Parchment Ideas - Butterflies

 Hi Everybody,.

Today I am adding a video from the Parchment Ideas Playlist in YouTube and this one is six years old.

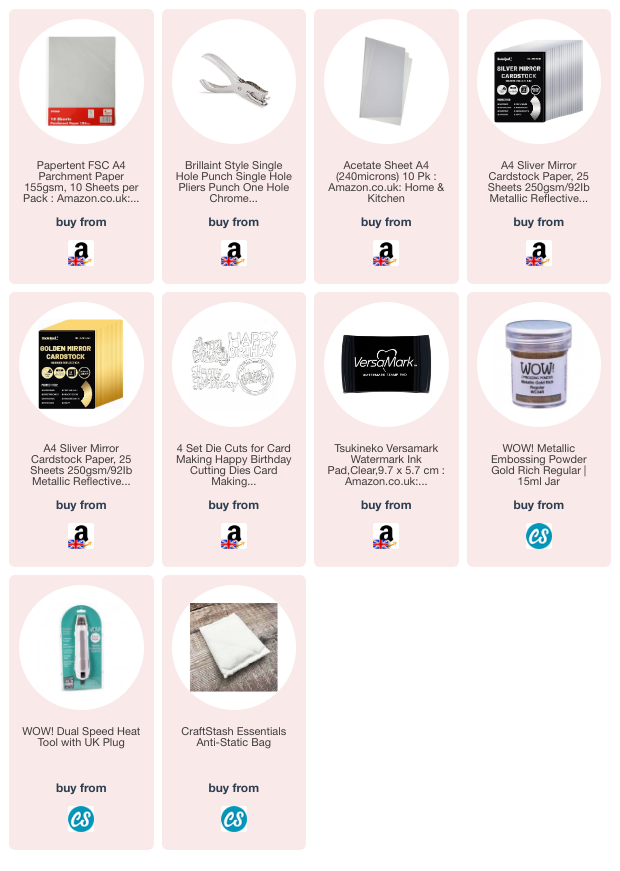
It shows how I made the butterflies and added them to a card then created the matching box.

It uses the 5x7 Complete Card & Box set from the original Christina Collection so if you have this set then you are good to go, but I don't think it is available any more.

 You can use use any butterfly dies that you have and make beautiful embellishments for your designs.

Parchment Butterflies

My apologies for adding an older video but I have been out most of the day with Pauline Hickey who was visiting me from her home town. 

It has been a lovely day and we went out to Lytham Hall and looked around the garden centre then we had a tasty lunch and a good natter.

So that is my excuse for no new video today ....

More tomorrow ...

Hugs xx 

August 20, 2024

Parchment & Gelli Plate

 Hi Everybody,     

I am still with the parchment theme and this time I have dragged out my Gelli Plate. 

I haven't used this much and so I am relatively new to it but I thought I would give it a go with some of my parchment and I am quite happy with the results.

The top card has had some stripes torn from the coloured parchment and I used a large silver flourish that I had on my desktop.

The video 
Parchment & Gelli Plate  
will show you how I got the look and maybe you would like to try it also.
I always use a heavier weight parchment as it stands up better to being used as a card base or a shaker pocket and it can be heat embossed too as I have shown in previous videos.

I have used lots of silver mirror card to highlight my designs and it adds richness to the card.

I hope you enjoy the video and please leave me a comment and subscribe to my channel for lots more videos in the future.

More tomorrow ...

Hugs xx
August 19, 2024

Parchment & Foiling

 Hi Everybody,   

This pretty card is created using the parchment from the past few videos along with some foil in a Bright Gold colour for the Leaves of the design.

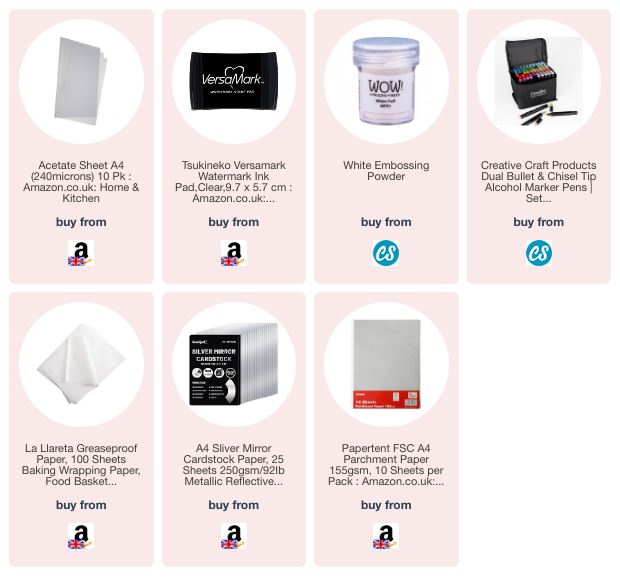
I used the bright gold from Deco Foil as it is designed to work with the Deco Foil Transfer Duo Gel.

The gel is amazing and it can be used with or without a hot foil machine. I know they are an expensive item to buy and not everybody wants one.

So I chose to use it with something that I already have and that is my die cutting machine. The Duo Gel means the foil is added with either heat or pressure and so the die cutter is perfect. 

The Deco foil comes in many many colours and will do exactly what you want it to do. 

There are variegated foils, rainbow foils, holographic foils, pastel shades, jewel shades. opal foil as well as black, white, several shades of gold, including rose gold and silver

 But be careful  when you buy as not all foils are the same and work in different ways.

Should you think that you have done something wrong or your not getting the result you expect then check the foil you are using as it may be the wrong one for the job you are doing.

The video 

Will show you how I made thee cards and the result is  lovely with a touch if luxury to them.

The foiled parchment can be die cut to any shape you want.  or torn to suit your creations .

Have a play and see what you can come up with I am sure you will be surprised

Both the gel and the foils look expensive but there is such a lot in the pot of gel or the pack of foils that they go along way and are well worth trying if you like foiling your projects and don't want the expense of buying a hot foil machine

More tomorrow ...

Hugs xx

August 18, 2024

Linda Massey - Winner

 Hi Everybody,

I have loads to do today and no inclination to do any of it ….. I am dog sitting Dougal this morning while Vickie has an appointment to go to and then I really need to go shopping.

But I have done the draw for the Spellbinders set on offer and the name today is

Linda Massey

Would you please email me your postal address to

christina@card-making-magic.com 

and I will get the pack in the post to you straight away. I hope you enjoy playing with it and be sure to let me know that you have it safely.

More tomorrow…

Hugs xx