Beautiful Card Designs Made Easy

February 21, 2017

Tuesday Tutorial - Blooming Collection

Hi Everybody,

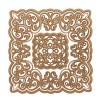
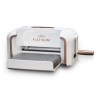
For todays card I am once again mixing and matching dies and one is Medallions Three which I have used many times in the past.  
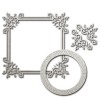
The other is called Blooming Collection and it creates a really pretty open fretwork type of frame.  The bow is created with the DecoFun Bow maker and this is the first ribbon I have tied with it
Spellbinders Supplies:
Other Supplies:

With die # 8 from the matting basics cut two pieces in white and Create A Hinged Card
Create smaller layers leaving just a small border around the edge in blue and white 
Emboss the smallest white layer in any folder that you have
Add the blue and white layers together
With both parts of Medallions Three cut a layer in blue
Add small foam pads in strategic areas that cannot be seen from the front
Create a smaller white mat that has been embossed to sit under this die cut
Add the die cut to the top of this panel
With Silver Mirror Card cut one layer and again add small foam pads so that they cannot be seen from the front
Add these layers together and wrap ribbon around them threading it under the silver frame
Add to the base card 
Add small foam pads around the die cut circular frame of the die and stamp and heat emboss your sentiment onto the solid part 
Add in a double tied bow and place one single rose in the centre
Dress with more flowers in the top right corner. 
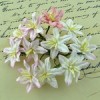
I have used Roses in two sizes, three rosebuds, Gypsophilla and one cherry blossom for my display
All have been dabbed with glue and glittered to make them sparkle

More tomorrow ...

Hugs xx


February 20, 2017

Another Freebie

Hi Everybody,

Today I have another magazine freebie to tell you about and this one is

This will be on sale in selected supermarkets and craft shops on Thursday 23 rd February.

You can also get it from WHSmiths or direct from More Mags 


 Using that link you can take out  a magazine subscription if you prefer and that way you will always be sure to get your favorite magazine

The gift is called Darling Doilies and it is in three sections to make some lovely adornments for your designs.  

The video is available on YouTube and is

You can keep it simple if you wish and this is just a one layer card so will fit into an ordinary envelope for posting.

Or you can dress it up with pretty flowers and make a box to put it in

Here I have used Roses in two sizes 20mm and 15mm ... plus Tuscany Rosebuds and tulips.

All have been sparkled with glitter and the  gingham ribbon has been glued in place under the bouquet


The flowers and the pearls centre on the bow are all from Wild Orchid Crafts

The pearl flourish is from Want2Scrap

More tomorrow ...

Hugs xx

February 19, 2017

Magazine Freebies ...

Hi Everybody,

Here I am with the latest in what is FREE with this months magazines. And this month there are some real treats in store for you. 
These are on sale on the 23rd February so keep your eyes peeled for them

So to start with here is Simply Cards and Papercrafts 160 and the gift is this stunning Hydrangea Set that can be used in lots of ways.

In the video I have used Embossing Paste and coloured it with Distress Inks to make this really pretty card.


The Hydrangea Set  will show you how I did this one and it is easy to do  Flip the stencil over for another look or use chalks.

 This one I have done in Water colours and then spritz the background to make the paint run.

 It gives a diffused look to the card and I really like this effect.

As well as the stencil there is an embossing folder and a stamp set that is really useful too and can give you even more designs to work with.

It includes sentiments as well as other items for you to create your own scenes and backgrounds


The next one to look out for is Creative Stamping 40 and the large A4 stamp set that comes with the magazine

 Creative Stamping 40 - Handmade with Love   is the video to show you the sneaky peak of this collection and some of the things that I have done with it.

Two really good magazines that are full of info for you and step by step instructions on how to make many cards.

More tomorrow ...

Hugs xx


February 18, 2017

Todays Winner ...

Hi Everybody,

Not too bad a day here and I have lots to to do this afternoon.  Mainly prepping for videos over the weekend to bring you lots of new ones in the next week or two.

But this morning the draw has been done and the name  chosen at random was yours ...

Maria Illsley
so if you could email me please
christina@card-making-magic.com
with your postal address the card will be on its way to you 

You have 72 hours in which to claim it and please let me know that you have it safely once it arrives.

Have a good weekend 

More tomorrow ...

Hugs xx

February 17, 2017

Friday Freebie 006/17 - Pink Floral

Hi Everybody,

A really pretty pink and white floral card is on offer today and this is prettier in the hand than the photo shows.

It is in my favorite colour and with all the things I like to add especially the flowers.

So here is another card on offer for you and if this is one that you would like to have then you know what to do

Just leave me a comment at the end of the blog post and then from those comments a name will be chosen as the winner

You will need to come back in the morning to see if it is you and then you have 72 hours to claim it.

Please leave your full name as there are lots of people with the same first name and I won't know which one you are.

Good Luck everybody. Please scroll back for yesterday's post as it was a late addition ....sorry!

More tomorrow ...

Hugs xx

February 16, 2017

New Card Kit

Hi Everybody,

Today I wanted to tell you about a new card kit that is in the shops and this is from Hunkydory.

It is the Design Collection and this is the very first Issue for you to see.

In the kit there is a magazine that will take you step by step on how to use all the various elements that you will find in the pack  and there is something there for every level of card maker

The card pack is fill of things for the new card maker and you can make many designs from this in no time at all.

There are foiled cards and beautiful backing papers as well as inserts for many of them

I have also created a video to show you some of my ideas on using this versatile kit that is on sale in the shops right now.

Design Collection Issue I  is sure to please you and give you lots of scope whatever level you are at in your craft.

Open it up and have fun and see what you can come up with

More tomorrow ...

Hugs xx


February 15, 2017

Two Posts in One ...

Hi Everybody,

Because of the change in my Tuesday Tutorial and the Water Colour Wednesday this week I thought it may be a good idea to combine the two and create a card with some water coloured flowers. 
I have used Spellbinders dies for my design and the flowers are bright and cheerful.
Spellbinders Supplies:
Other Supplies:
  • Rose pink and white card from Papermill Direct
  • Gansai Tambi water Colours
  • Water Colour Card
  • Wink of Stella Clear Glitter pen
  • Foam pads of varying thicknesses
Instructions:

With the largest die #8 from the Matting Basics cut two panels and create a hinged card
Hand cut a slightly smaller layer in rose pink to leave a thin border around the edges
Cut another layer in white, again leaving a small border,  and emboss in the folder.
(The card will be wider than the folder so emboss most of it and then move the card along to emboss the remainder.
 Partially cover the folder with the embossing plate and run through the machine. 
The pattern is busy enough not to notice any discrepancies in it )
Glue the two layers together and add to the base card with foam tape between to give dimension
With the solid die to Medallions Three cut one piece in rose pink and then with both parts together cut a filigree layer in white
Add these two together with foam pads between the layers and then more foam on the back of the pink card
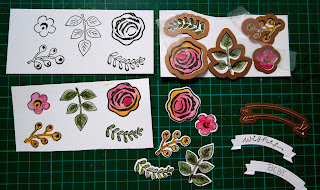
Stamp, colour and cut as many flowers and leaves as you would like for your card
I stamped the sentiment twice and then used the banner die to cut each word separately 

Add the Medallions layer to the card and place a pearl in each corner
Arrange the flowers in the centre panel as you like them and use foam pads of varying thicknesses under them and the leaves.
 Keep two of the smaller flowers to one side
Add foam to the banners and arrange on the flowers then add the smaller flowers so that they just overlap the banners.
Add a little shading to the banners to make them look curved
Lightly add the glitter pen to the flowers for a little sparkle

More tomorrow ...

Hugs xx


February 14, 2017

International Ambassadors Informal Blog Hop

Hi Everybody,


We, some of the International Ambassadors for Spellbinders,  have been doing this informal blog hop for over two years now and between us we have covered many subjects and themes.

This month we are doing Valentines Day and using some of the newer dies that are there for you to buy.

For my card I chose the  Bowlicious  die set is in three parts and one of the cutting edges can be moved to extend the depth of the bow
You can use it to add a separate bow to the edge of your card or you can layer it up to create a more full look.

Change the colour scheme and alter the sentiment and it can be used all year round

Now why not pop over to my colleagues and see what they have in store for you this month.

Linda Lucas    Australia
Yvonne van de Grijp   Netherlands
Christine Emberson    UK

Leave them a comment to say you have been.

Thank you so much for your continuing support

More tomorrow ...

Hugs xx

February 13, 2017

Floating Cup ...

Hi Everybody,

So todays project is one of the beautiful floating cups

I really enjoyed creating this and I used quite a lot of flowers on it and they are all from Wild Orchid Crafts

I add them with a hot glue gun so that won't fall off and then I add my glue and glitter to add the sparkle

The pearls string was wound around the flowers at the end and also glued in place.


The tea cup and saucer are from an old set that hasn't been used for years. Just sat in a cupboard gathering dust

You can pick these old tea sets up really cheaply in junk shops or car boot sales

It makes such a pretty display and is a real talking point as people want to know how it is done.

If you don't know how to make these and you  would like a video then please let me know and your wish will be my command.


There is an International Ambassadors Blog Hop tomorrow so the Tuesday Tutorial will be on Wednesday instead, 
and  I may combine it with a water colour as well  ...  but it's only for this week ... back to normal next week 

More tomorrow ...

Hugs xx


February 12, 2017

Ruby Update ...

Hi Everybody,

Here I am ...  it's me Ruby again looking as cute as ever ... and I am nearly six months old now.

I am growing  very quickly and I have lots of adventures each week.

On Monday I am going to the vets so that I wont have unwanted puppies and my mum is going to pamper me and take care of me while I recuperate.

So gentle walks only as I get better and I wont be able to see my best friend Dougal for a while as we play rough and run around all over the place.

This lovely photo was taken by Sally from Tail Waggers  and I am with some of my friends from doggy day care

We have a lovely time and Sally look after us and takes us all out for a walk in the fields and parks I go every Wednesday and I love it

Dougal goes there too and he is sitting behind me in the photo and he's going for a hair cut today !!.


Do you member me telling you about my unexpected swim the other week in the lake in Stanley Park?

Well Dougals mum Vickie has bought us both a jacket that dries and keeps us warm at the same time ...  just in case we fall in the water

It keeps my long ears covered and wraps around me and over my back and legs and is quite thick and snugly

It may be warm but we are not too sure at the moment of this new fashion

More next time ...

Bye for now xx 


February 11, 2017

Card Winner ...

Hi Everybody,

It's really cold here but dry and fine at the same time so we will be taking Ruby out for her walk later.
I know that some of you in other parts of the world have got deep snow at present and although it looks really pretty it is NOT my favorite substance
So roll on spring and summer and some lovely warm weather again

We have done the draw for the card this morning and the name this week is yours 

Lynn Charman

so if you could email me please with your postal address to
christina@card-making-magic.com
the card will be on its way to you straight away.

Thanks to all of you for taking part

More tomorrow ...

Hugs xx

February 10, 2017

Friday Freebie 005/17 - Hello Friend

Hi Everybody,

Todays FF is yet another card that was created on video and the title is Ombre Effect and Die Cutting

It was created using the waste pieces from a Spellbinders Grate Effect die and the look is just something a little different.

So if this is a card that you would like to have then all you need to do is leave me a comment.

From those comments a name will be chosen at random and the winner announced in tomorrows blog post.

You will need to pop back in the morning to see if it is you who has won the card

You have 72 hours to claim it and if it is not claimed then it will be offered again at a later date.

More tomorrow ...

Hugs xx


February 09, 2017

Chalkola Chalk Markers

Hi Everybody,

This is a product that is new to me and I was asked by Chalkola Chalk Pens   to try them out and tell you what I found.

These are liquid chalks and unlike the powdery chalks I have used in the past they don't need to be set with hairspray as they won't rub off on your fingers

They are designed to be used on non porous surfaces and they wash off easily with water or window cleaner or a wet wipe and leave no marks at all ... not even the red and black markers. Use them on mirrors, plastic, white boards, acetate and windows.

You could really have some fun with these at Valentines Day or Christmas. Imagine drawing red hearts on your mirrors and then being able to simply wipe them off after the day has ended.

But I thought I would try them out on a porous surface and I decided to make a card and film the process as I went along.

Chalkola Chalk Pens  are available from the Chalkola website and the link is at the top of the page or from Amazon 
and you can use this code to get 15% off from either place 15OFFSTR

They are child friendly but I wouldn't let a child under three play with them ... water based, odour free, non toxic and long lasting and BRILLIANT !! 

I have used them to label glass jars and the unit in the craft room so that I know what is in each cupboard. And when I move things around I can simply wipe it clean and re label


More tomorrow ...

Hugs xx

February 08, 2017

Water Colour Wednesday - Floral Card

Hi Everybody,

A really simple card to make  and I have used Gansai Tambi to water colour the flowers and leaves.

It is from a set by Altenew called Peony Scrolls and it has a matching die set to help you get a neat look.

I got mine from Sevenhills Crafts and the sentiment is also Altenew ... Painted Inspiration

I have added in some sequins and they are a big bag of them from the £££ shop and they go a long long way.

The background is created with Altenew Mini Inks and the Brush Strokes stamp from Spellbinders.

Not a lot to this one but I think it turned out OK

More tomorrow ...

Hugs xx


February 07, 2017

Tuesday Tutorial - Deco Lux

Hi Everybody,

Today we have a card in silver and white that is really easy to make. 
It's just layers with foam between them and it gives a really dramatic effect . 
 The card is just over 6" and the addition of the flowers makes it suitable for a wedding card too. 
Spellbinders Supplies:
Other Supplies:

With the outer edge die cut two and create a hinged card 
With both dies together cut a  patterned panel in white
Hand cut a silver mirror card layer to sit between them
Add the filigree piece to the silver mirror card with foam between and then wrap with organza and satin ribbon
Tie a layered bow using both ribbons together
With #5 from the plain Labels Forty Two cut one layer in silver
With #4 from the Decorative Elements cut one in white card
Layer these two together with foam in between for dimension
With the Border Sentiments cut two in white card and one  in silver and layer them together for extra strength

Add the smaller panel on the top of the base layers
Add the sentiments to the card and decorate with pretty flowers
Dot with glue and sprinkle with glitter for a really lovely effect
Add the bow and the shiny dazzler 

Alter the sentiment and this would make a lovely Wedding or Silver wedding card

More tomorrow ...

Hugs xx

February 06, 2017

Time flies ...

Hi everybody,

I can't believe how quickly time goes by and I have another birthday looming next month. 

It is also nearly a year since I joined the Craft Stash Design Team

This is one from the first batch of cards that I made for them.

I seem to have come along way since then and my videos are now a regular part of their website.

They have an area named Inspiration Gallery  and that is where you will find a lot of my work along with the other designers on the team.  It has been a really good journey so far and you all seem to enjoy the magazine freebies that I now cover.

There are some wonderful free gifts coming up in the future so keep a look out for your favorite margarine ( oooops ) magazine and be sure to get it.  

The videos about the freebies always go "Live" the week before they are on sale in the shops so it gives you a sneaky peak of what is coming and you can then decide if this is one that you would like.

Thanks for watching my vidoes and for continuing to visit my blog and leave your comments both here and on YouTube 

More tomorrow ...

Hugs xx.

February 05, 2017

Pop Up Happy Birthday

Hi Everybody,

This card looks intricate to make but I promise you that it is not.  I even have a video that was made a long time ago showing you the basic steps to take and then you can dress it up any way you wish.
 The Easy Stepper card needs no measuring either so I hope you will give this a try. 
This is a more up to date look to my card and I really like this one
For this card I have used cream for the base and then Labels Eight to cut the filigree panel in gold glitter paper from  Craft Stash

The  Happy Birthday Pop Up  is a little die that cuts out the words and then all I have done is glue along the edges and added to one of the steps. There are other ways that you can use the die but this just suited my purpose completely

My floral arrangement is as always from Wild orchid Crafts   and into the display I have added a lovely Hatpin. The lace  and the bead flower along the bottom are also from WOC

This is a card that looks so much better in the hand

More tomorrow ...

Hugs xx


February 04, 2017

Todays Card Winner ...

Hi Everybody,

It's a beautiful day here today and I really hope it stays this way as I have lots of things to do. Later today Vickie Griff and I are taking Isabella out to tea at her Daddy's restaurant and I am really looking forward to it.

Griff and I were also in  Jamie's  last night and I had the most amazing  meal.
 I am pleased to say that he is doing really well and if you wanted to dine in there on Saturdays you would need to book as the restaurant is full for the next two Saturdays.

Anyway ... the draw for the butterfly card has been done and the name this week is yours ...

Iris Harborne
please can you email me with your postal address to 
christina@card-making-magic.com
and the card will be on its way to you straight away.

I hope you will like it when it arrives and please let me know when  it does.

More tomorrow ...

Hugs xx

February 03, 2017

Friday Freebie 004/17 - Butterfly Parchment

Hi Everybody,

This is another card that was created on video in the film 
It is very easy to do but gives a lovely effect that can be altered with the colour of card that you add under it

The folder that I used is from Crafters Companion but I have had it a while now and I don't know if it is still available

Would you like to own this card ? Then all you need to do is leave me a comment at then end of the post.

 From those comments a name will be chosen at random and the winner announced in tomorrows blog post 

You will have 72 hours to claim the card  and it doesn't matter if you have won one in the past.

I will send the card wherever you live and you don't need to have a blog to enter.

More tomorrow...

Hugs xx

February 02, 2017

Papercraft Essentials 143 - Fairy Wishes

Hi Everybody,

The Papercrafts Essentials 143 will be on sale in selected supermarkets and craft shops on the 9th February 

With if comes the lovely free stamp set called  Fairy Wishes and the video is a sneaky peak at what you will get


There are two silhouette fairies in this set with 
plenty of sentiments and little items for you to personalise the card


I have given you some ideas in the video and there will be many more in the magazine.  

It also has the embossing folder and you can create some lovely effects simply using that.

You can make it as simple or as intricate as you wish.

But the free gifts that I show you from all the magazines that I cover are of good quality and if looked after will last you a long time.  All you need to do is have fun playing with them and of course enjoying the magazine of your choice at the same time

More tomorrow ...

Hugs xx

February 01, 2017

Water Colour Wednesday - Pink Tulips

Hi Everybody,

A really simple card for todays water colour but one that I quite like.

This is an image from Just Inklined and is one I have done many times before.

 It is on the CD The Next Big Thing and I always say that it is sad that this CD is no longer available

So if you have it treasure it as there is so much on this disc. And if you do manage to find it any where snap it up.

This is just a simple coloured image layered onto some spotty card and then wrapped with ribbon.

I added a pearl flourish around the cup and some larger pearls in the top corner

You could add any sentiment to this that you liked and it would suit any occasion.

More tomorrow ...

Hugs xx