Beautiful Card Designs Made Easy

November 08, 2012

White on White

Click to Enlarge
 Here is another White on White Card and I did this one for a birthday that is coming up in December.

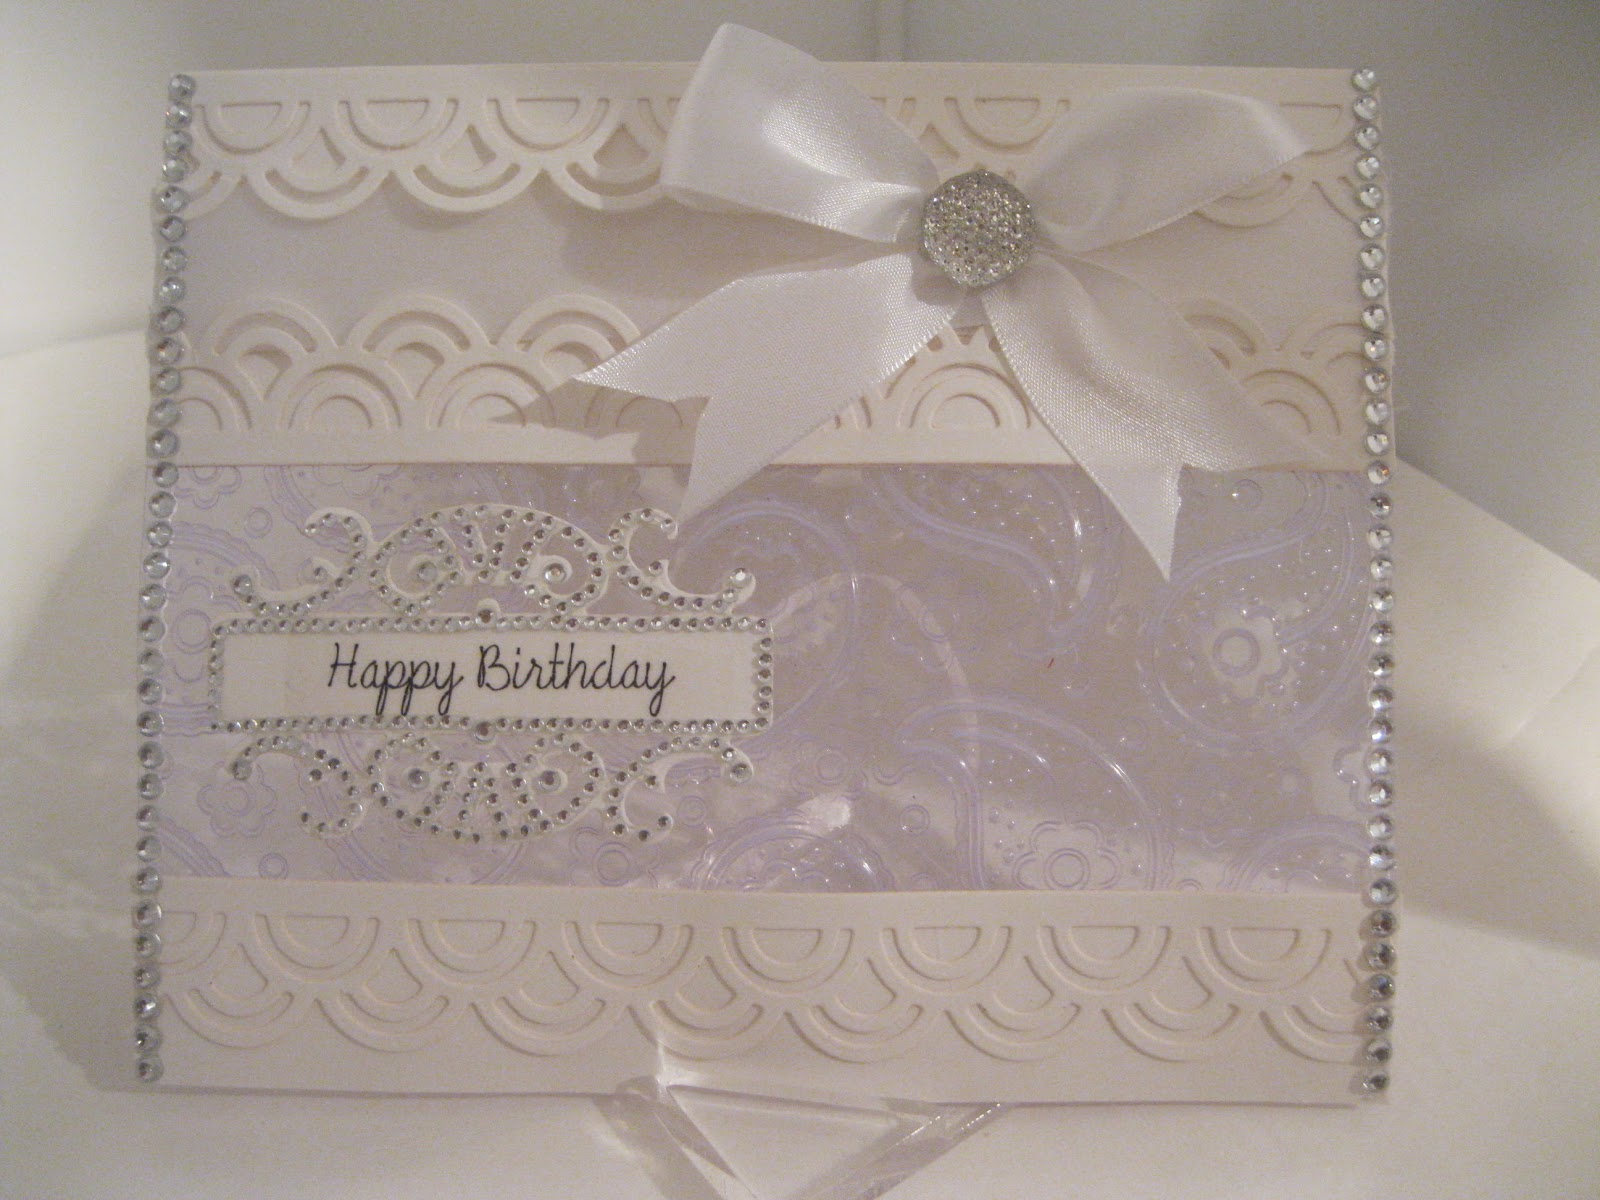
I have used a thick white stain ribbon to slide under the borders and made a large bow from the same ribbon.

The centrepiece is a Dazzler from   Creative Studios

I have folded an A4 card in half and used it with the fold at the top.


After folding the card in half I cut  the front section in two again and  made it smaller by about  6cms.   I used a piece of acetate that was about 9cms wide to fit into the gap to leave a panel that was see through, with the card adhered around it.

(Unfortunatly the stand, although clear is visible and spoiling the look of the acetate)

I  embossed the Acetate before adding it to front panel.   I cut out three of the Asian Accents borders and added them ... two to the top and one to the bottom of the card.

The embossing folder that I used was the Paisley M-Bossabilities ... and it is a double sided folder from Spellbinders..... but you will need the Raspberry plate to use it in the Grand Calibur.

Between the two top borders I added my white ribbon and the bow with the Dazzler centre, and along each side of the card I added in my beautiful Diamante Bling from Want2Scrap

The sentiment was stamped onto the same white card and then I used the Fancy Tags 3 with the matching Bling and added it to the Acetate panel.

Quite an effective card and the embossed acetate makes it just that little bit different.

Hugs xx

November 07, 2012

Another way to use ....


...  Cherry Blossom from Spellbinders.
It makes you think of summer months and beautiful pink and white flowers.

It is a very useful die for your crafting "Stash" in it's own right  and it will make some beautiful additions to my cards as the weather warms up again.

But because of the cost of these dies I didn't want to waste it in the winter months ...  so it has to work for me to get more from  any  die that I buy.

So on went the thinking cap and this is the result....
A Christmas Wreath
 

I have cut lots of the branches in all the sizes and I have added Glamour Dust to each one to represent ice.

I used the middle sized flowers,   cut  in two shades of red and layered up,  alternating the shades,  and  each has a tiny Diamante in it's centre.

I found some red and white gingham ribbon in my "Stash" which fit the bill perfectly,  and the bobbly cord was added underneath.

I layered up two co-ordinating papers and used the ribbon and bobbles to cover the join then  added the bow with a gemstone to cover the knot.

They have been matted and layered onto Kraft Card.

The sentiment was stamped onto a circular card and then the branches arranged around the circle ... cutting them if needed to make them fit to create the wreath.

I dotted the layered flowers in the branches and glued the bow in place.

The Diamante strip is from  Want2Scrap   and I have cut the two sizes to fill the corners on my card.


So this will be going to somebody this year to wish them a very Merry Christmas

 
Hugs xx

November 06, 2012

Spellbinders Hexagon Pinwheel Box

Click to Enlarge
This pretty little box is ideal for smaller cards or invitations that you may want to send... it's more like an envelope really.

It is very easy to make ...  but you will need a die cutting machine with a larger cutting area as the die is too big to go through the Big Shot that I have.


The die itself is  available from Save On Hobbies at an excellent price.

I have used Centura Pearl  for this one from Crafters Companion  and it has been embossed to add some texture to the card.

It is the Spellbinders Grand Hexagon Pinwheel Top Box  and that title is quite a mouthful ... try saying it fast.

I struggled saying it on the video.
But a  video on this project  is here for you  and it answers  some of the  questions I have had about how to  fold it correctly.

The Diamante is from Want2Scrap

I will also show you how to create the small card that can be placed inside.

 And as long as the embellishmetns are kept low it will fit.

On this one I have cut up some Guipure lace for the leaves and added them behind the flowers.

I like how it looks and they are for  "Thank You" cards for  wedding gifts
Hugs xx

November 05, 2012

WooHoo .... Look what I've got ....


I am so very very pleased with this "Blinkie" that  I have received from  Spectrum Noir  today... it is in recognition of the videos that I have produced on this fantastic colouring system.

I started with an Introduction to these pens and then covered colouring skin tones and hair.  There is also a video on clothes and a specialised one for jeans. The last one was on the  storage system that has been introduced by Crafters Companion to store any of your marker pens.

I am adding it to the very centre of the page ..... and I am so very pleased with my self for the work I did to get this Accreditation.  I shall proudly display it in my side bar and add it to the website too.

It takes pride of place and I will get a certificate too that I can frame  and add to the wall in my craft room.  Oh! I am like the cat with the cream and I can't stop smiling.

                                                       
I am much too excited to add any more so I will close for now and just sit back and savour my award.

Back to some cards tomorrow

Hugs xx

November 03, 2012

Picture Frames


This another project for the  Design Team that I have joined and again uses digital images from  their shop.

Following on from yesterdays suggestion of NOT making cards ... but using your digital images to create something else instead.

Both of these are A4 picture frames from Ikea and the images are already coloured from Paper Creators  and they make excellent pictures which are ideal for a childs bedroom.

The first one is Sassy Sally Clowns Around  and on this one I have glittered the flower and the nose and added Googly eyes to the character.

Then I have added  pearls  to the buttons... and used pearls around the edge of the mount... and Pearl Flourish close to the image.

The picture has been framed with the Asian Accents Border in red and then added under the glass to the frame. This can either be free standing or added to the wall.

This image is  Jennis Purrfect Costume  and for this I have used the Moroccan Accents to frame the picture.

On this I have glittered the bows in her hair, the inside of the ears, and the cuffs.

The Diamante Flourish,  the border around the image and the Pearls in the previous one are all from Want2Scrap

Both are very pretty projects and will given with love at Christmas to two very special children.

Hugs xx