Beautiful Card Designs Made Easy

July 30, 2015

"YOU" card .....

Hi Everybody,

One of the dies that I use a lot from Spellbinders is the word YOU

This simple die can be teamed up with so many stamps to say just about anything that you like

I like to cut the word from Craft foam and then add it to the word cut again in card that matches my design.

It really makes a statement piece on your creations and is very tactile for the recipient.

Here I have just used a matt black card and black craft foam

The background to my card is created with the  Criss Cross  pattern

I have added in raised panels at the top and bottom using the Curved Borders One 

My beautiful flowers are from Wild Orchid Crafts  and are a mixture of Gysophillia, Roses, Camellia, small buds and some Cherry blossoms

I have also added in some long curly stems to the display and used both blue and white flowers

The steel Gray pearls are from Want2Scrap  and the butterflies are a Martha Stewart punch called Monarch

The stamp set I have used is  Simply Said - You   from Avery Elle and there are lots of sentiments on the sheet making it a very useful addition to my "Stash"

More tomorrow ...

Hugs xx


July 28, 2015

Tuesday Tutorial - Using the waste

Hi Everybody,

This is the Grate Effect die that I have used many times and it you can create some lovely cards with the whole pattern

Way back in March I showed you  Embossing with dies  using this same die to push the pattern into your card without cutting it.

But for todays tutorial I am going to show you how to use the bits that would normally been thrown away and we will create a really sparkly card with some glitter

It is going to be photo heavy so my apologies for that before I start.


Spellbinders Supplies:

Other Supplies:

With the outside edge to this die cut two panels in white card and hinge them together to form your base 

Then with a piece of double sided adhesive sheet cut another one and leave it to one side for now.

With both parts to the die and another piece of white card cut out the whole die and emboss.

Then very carefully you are going to remove the card from the die so that all the waste pieces remain in the slots
Keep the full piece for another project and make sure that all the small waste bits are seated into the die.

Peel the backing off one side of the double sided adhesive sheet and place it on to the waste pieces

Make sure to press it down onto them so that they are all caught onto the adhesive.

Then again being very careful ... lift the adhesive sheet with all of these pieces stuck to it away from the die.

With the glitter of your choice you can now spread it over the top of the panel and press it in to the glue with your fingers.

Make sure that it is all covered and then dust off the excess glitter and return it to its container.

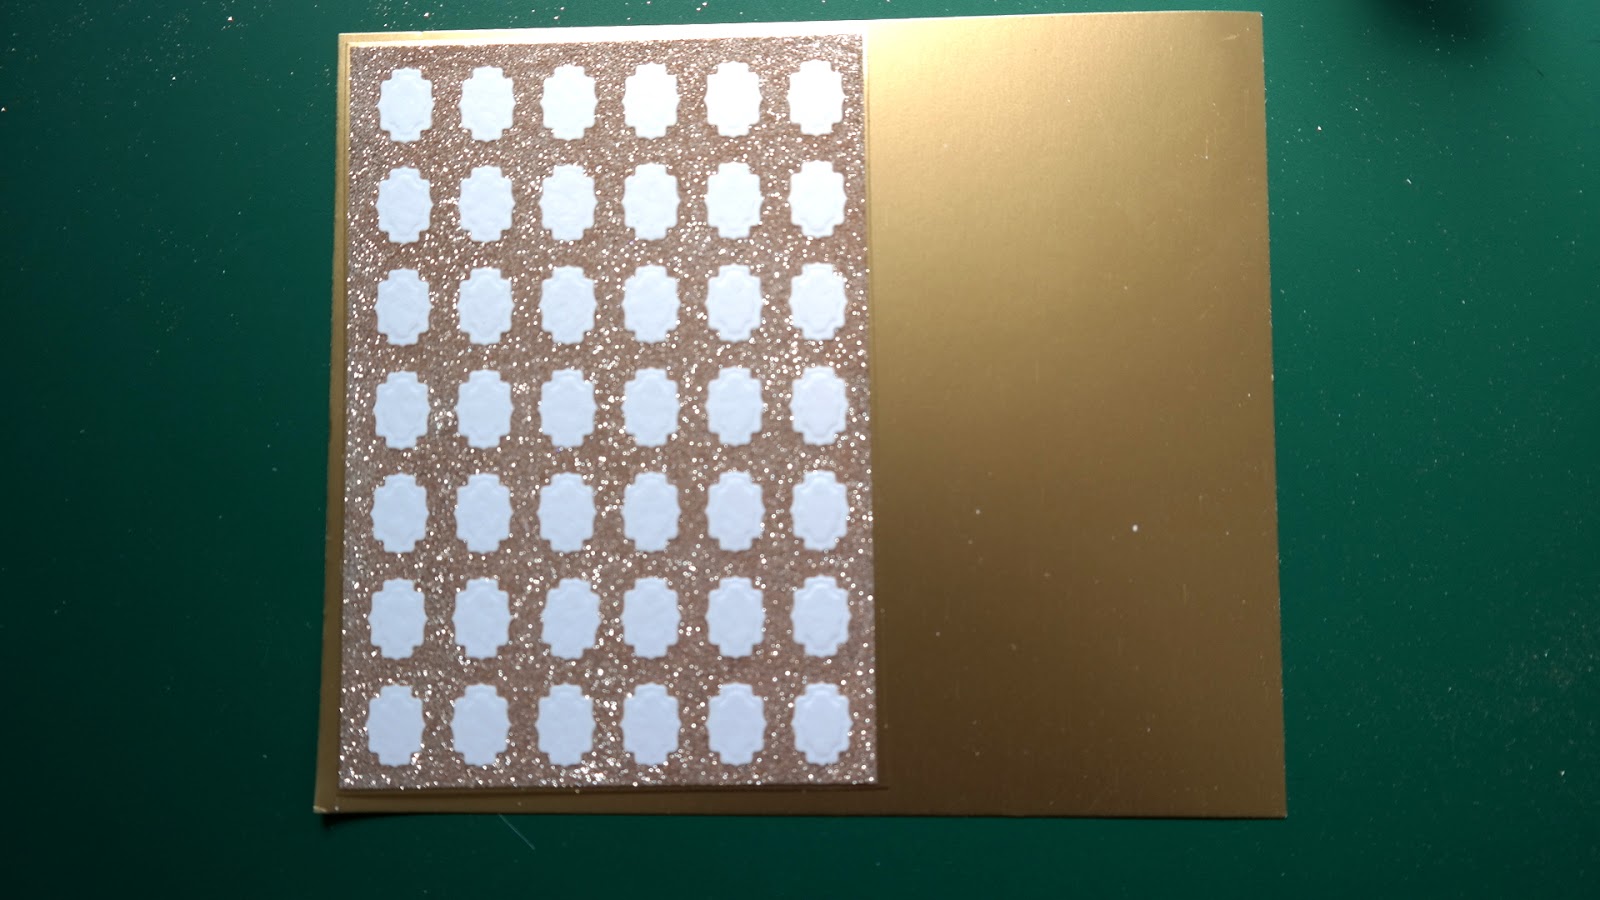
Once the glitter is on the panel I like to remove the backing off the other side of the adhesive sheet and layer the glittered panel on to some white card.

Then I can trim it down to the size I want for the base card I made earlier.

I also layer it again onto some gold card leaving a small border around the edge

Wrap these panels with some white ribbon and stamp and emboss your sentiment
Cut it out with the Circle die that fits your chosen sentiment and layer it with the Scalloped Circle. Scatter with a few pearls

Add in the flowers of your choice and there you have a lovely card and no waste at all from your die

More tomorrow ...

Hugs xx


July 25, 2015

Card winner is ...

Hi Everybody,

Up bright and early this morning and have lots to do before the holiday. We are going on a cruise to the Baltics and because my "Film Crew" has been so good ... I am taking him along too.  I am really looking forward to this cruise and it is a fantastic way to take a holiday.

Once you have unpacked everything is with you,  in one place and each day you wake up in a different country. With new tastes, sounds, smells  and sights to experience.  We will visit nine countries as we sail and get the chance to visit them if only for a short time

We will be taking lots of photos and I will share them all as soon as I can.  So the blog posts will be a little sporadic over the next few weeks.  I have set up some to go out automatically and I have scheduled the Tuesday Tutorials ... just to keep you busy while I am away.

But the draw has been done and the name pulled from the hat today to win the pretty pink card is ...

E Michaels ...

Can you send me your postal address please to 
christina@card-making-magic.com
so that I can post the card to you before we leave.

You have 48 hours to claim the card and I hope you will like it. Please let me know when it arrives with you.

The next post will be the Tuesday Tutorial and I think you will like it

Hugs xx


July 24, 2015

Friday Freebie - 070

Hi Everybody,

So here we are with FF card 70 and it has gone so quickly.

For this weeks card I have gone back to one that was featured in a Tuesday Tutorial

I used Labels Thirty Four  along with the matching Decorative Labels  and the embossing folder

The flowers, centre pieces and the Dove are all from Wild Orchid Crafts  and are things I love to add to my designs.

The ribbon is from Mei Flower  It is a soft satin that ties so easily into a pretty bow

If this is a card that you would like to have then join the group of followers and leave me a comment.

From those comment a name will be chosen at random and the winner announced in tomorrow Blog post.   You will have 48 hours to claim the card so please pop back to check that it is you.

Please Note ...

There won't be a Friday Freebie for the next three weeks as I am going on holiday and won't be here to post them  off to you. But I will have a treat when I return back home

More tomorrow ...

Hugs xx

July 23, 2015

Card Class ...

Hi Everybody,

The ladies in my card class have been coming to me now for  over a year  now and they have both come so far.  We get on very well and I think we all look forward to our Wednesday sessions.

I try to do something a little different each time they are here and this is one of the weeks when we tried some water coloring.

We had to do some preparation in advance so that everything was ready to start

We stayed with the same colors for both ladies but they chose different dies to create the layers

These are Marys' Cards and on one of them she chose to accentuate the green with some pretty ribbon


 These are Brendas' card and she has chosen the blue ribbon for hers

All are A2 sized cards and although similar you can see some of the changes that they have both made.

More tomorrow ...

Hugs xx