Beautiful Card Designs Made Easy

November 08, 2015

Card Winner ....

Hi Everybody,

This is very late post for me and it's now 11pm and I have just watched the last episode of Downton Abbey.  It was happy and sad all in one go and I am sorry it has ended. It was undoubtedly the best series on TV.

What am I going to watch on Sunday nights now ???

We arrived home from the NEC safe and sound this afternoon and I must admit I enjoyed my day there. It was lovely to meet those who stopped by to say hello and I hope I get the chance to do it again in the future.

 The draw for the card that was offered last Friday has been done and the name selected is ....
 
  Jean Bullock ...
Can you email me please with you postal address to
christina@card-making-magic.com
and the card will be in the post to you straight away
I hope you will like it and please let me know when it arrives with you

More tomorrow ...

Hugs xx

November 06, 2015

Friday Freebie 092

Hi Everybody,

Todays card is back to my favorite colour Pink and for this one I have turned to Spellbinders Lace and Frills Texture plate

I have Letterpressed  the pink ink onto the card and the link is to a tutorial to show you what I did.

The video uses an embossing folder but the principal is exactly the same

If you would like to have this card winging its way to you then all you need to do is leave me a comment. From those comments a name will be drawn and the winner announced in a Blog post.

But that won't be until Monday as I am away this weekend. I will be at Birmingham NEC  and this time I will be demonstrating for Spellbinders.

Now I have never done this sort of thing before so it is all going to be a bit of an adventure

Christine Emberson and I are the two UK Ambassadors and we will be on the Aceville Publications stand. I will be there on Saturday 7th November,  so I hope you will pop along and say "Hello"

Please come back and check the blog though to see if it is your name that is announced as you only have 48 hours in which to claim the card once the name has gone live.

You will need to email me ... christina@card-making-magic.com ... with your postal address and not here on the blog as there is no email address attached to the blog

More tomorrow ...

Hugs xx


November 05, 2015

Friends ...

Hi Everybody,

This little A2 sized card has been stamped with the Vintage Flowers stamp set from Altenew and I got mine from Make the Day Special 

It has a  matching die set  for you to cut the flowers, leaves and branch out perfectly for you each time.

But for this card I stamped directly to card.

Once I had the flowers in place I stamped my sentiment, in black ink,  over the top of them,  and then heat embossed it in clear powder.

The stamped words are  Grand Sentiments by My Favorite Things also from MTDS

I inked around the edges of the card with Salty Ocean Distress Inks fading it in towards the centre for a Vignette look

The white satin ribbon is from Mei Flower  ribbon and a little acrylic flower from Wild Orchid Crafts to the bow are all I have added.

I know this is not my usual style but it does you good every so often to play with other ideas and keep your mind active and fresh.

More tomorrow ...

Hugs xx

November 04, 2015

Cards for the Neighbours !!

Hi Everybody,

I had a little play the other day when it was cold wet and windy and these cards are what I came up with

I made six Christmas cards all the same and used my Brusho Crystal Colours to get the background

The  Sleigh and Reindeer stamp was free with Simply Cards and Papercrafts and everything else was in my "Stash" already.

They all have ribbon and Bakers Twine on them and I have added in two gold bells to each bow.

I think they turned out quite pretty and the neighbours don't visit my blog so they won't see them until they get them !!

More tomorrow ...

Hugs xx

November 03, 2015

Tuesday Tutorial - Photo frame with Labels 48

Hi Everybody,

Today I am showing you something a little different and travelling along the home decor route to produce this petty picture frame using Spellbinders Labels 48.  
All the steps are shown for you to make your own and the result can be for any occasion that you wish
Spellbinders Supplies:
Other Supplies:
Instructions:
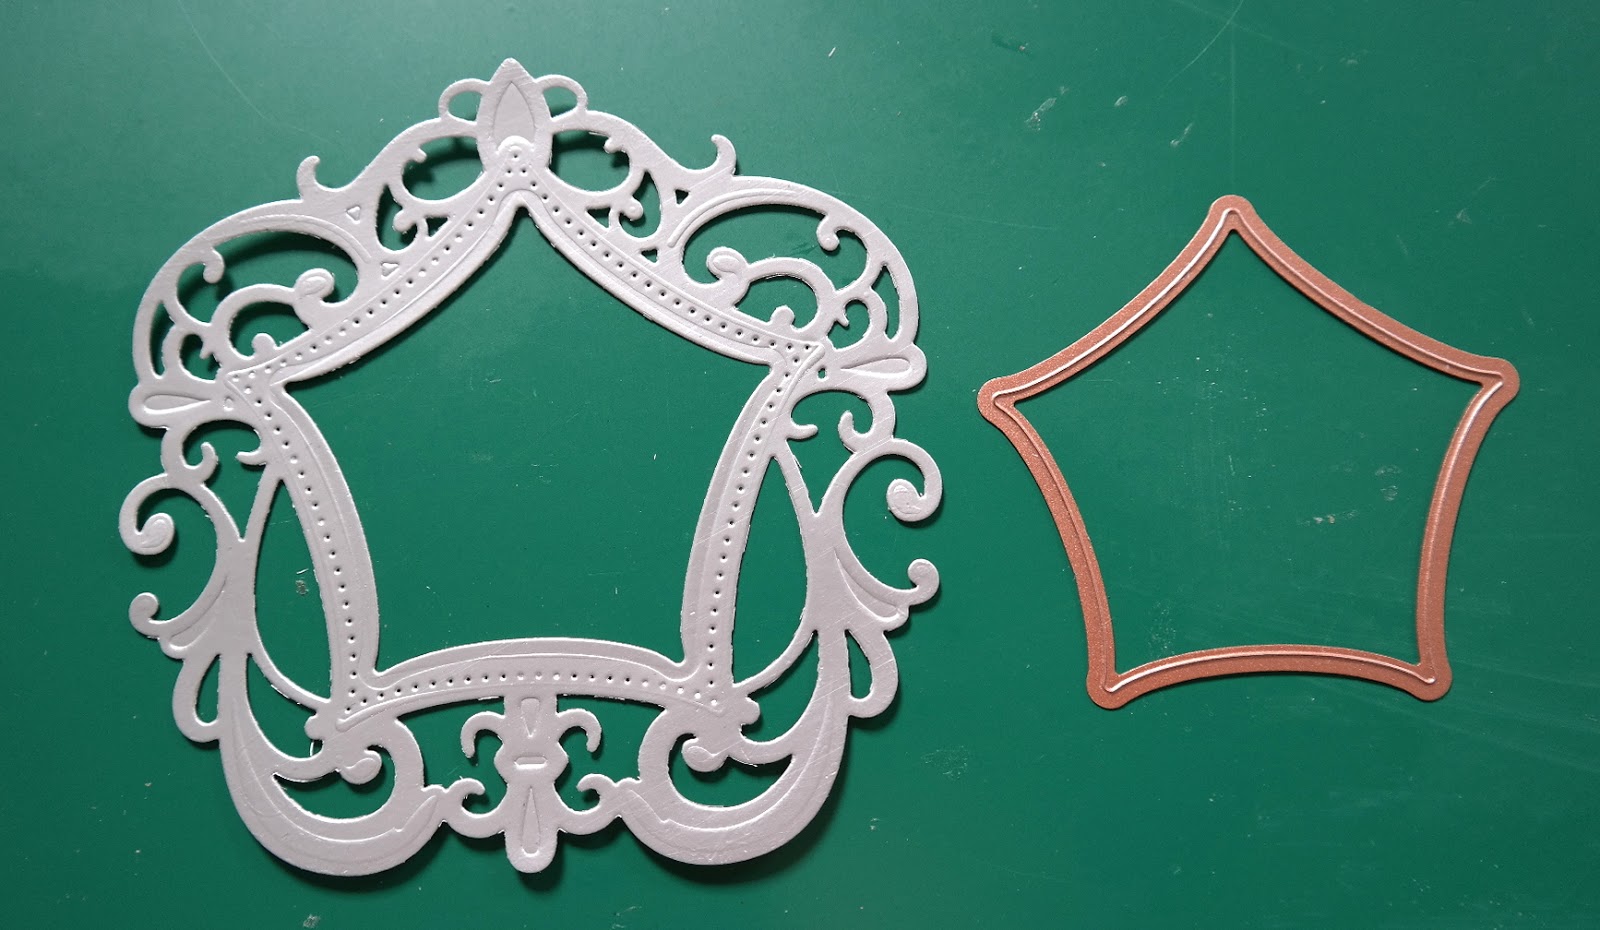
With Decorative Elements Labels 48 and dies #3 and #4 cut four  pieces from silver card and marry two of them together and glue in place. this will give extra strength to the back of your picture frame
Take the glued piece and  use the top scrolls on the die cut as a guide and line them up on a scoreboard and score down by about one inch. 
Then carefully bend these ... but don't fold them over. 
Set the third piece to one side for now
Take the fourth piece and with die #4 from Labels Forty Eight cut out the aperture
 With some thin Acetate and the largest die #5 from Labels Forty Eight cut one shape 
Choose the photo that you wish to use and make sure that it fits inside the die #5 and cut this out too
Add the Acetate to the frame with the aperture and glue the photo to the third solid  panel.
Then neatly add some glue and place the acetate frame over the photo and press together making sure that all the scrolls are lined up to.
 So now you have two double layered panels ... one with the photo and acetate  and the other is solid
Add glue to the bent over area only and marry the top edges neatly together, making sure that you have the frame and photo the correct way up.
 This will create the "A" frame with the die cut layers and allow your picture frame to stand.
I threaded ribbon around my frame ... but only the front part, otherwise you will fasten it all together and it wont open and stand.
I added in the flowers and some pearls
Make your frame from different colours to suit the occasion ... and this would make a really pretty photo frame for baby or wedding photos.

More tomorrow ...

Hugs xx