Beautiful Card Designs Made Easy

June 10, 2012

Nestaboard ... Labels 20

This has to be one of my favorite shapes as the Labels 20 is so versatile.

I featured this card earlier in the year but it is well worth showing again.

This time the Nestaboard shape has been treated to a  technique using Silver Gilding Flakes.

You will find it explained in the video  Mosaic Card

For this I used two of the shapes from the Nestaboard Labels 20  and layered them together.  The lace along the bottom adds a really feminine touch.

The Roses are handmade and the  video Paper Roses  will show you how to make these for yourself.   You will always have flowers to match your projects if you use the same ones as the base card.

The Nestaboard is available from Want2Scrap  and they will ship worldwide so that you too can enjoy their lovely "Bling"

Hugs xx

June 09, 2012

Nestaboard ... Lacy Ovals

This pretty shape is created from the largest Nestaboard shape in the  Lacy Ovals  and gemstone Nestabling frames the shape.

Both of these products are from   Want2Scrap  and are explained more  in the video  Alternative Spellbinders

The Skeleton leaves,  White Gardenias  and Roses  are  from Wild Orchid Crafts 

There are also some stems of pearls on gold wire but I can't remember where I got them from ...  soreeee!
I have used Gilding Flakes to get the Gold effect and the bottom of the oval has had some tear drops from a pair of un-used earrings added to it.
I also glued into the oval some matching pearls to complete the look.

The sentiment is layered onto a Fluer Di Lis Accent and I cut another in gold card as a shadow effect.  I used the smallest peice of gemstones from the Nestabling to frame it.

Both shapes are suspended from one of the Elegant Posts.

Hugs xx


June 08, 2012

Nestaboard ... Labels 2

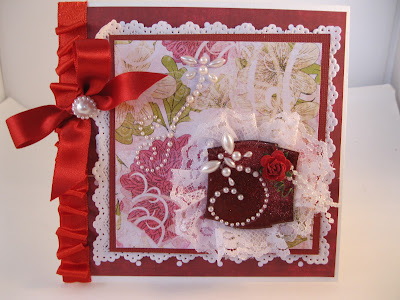
This is another shape from the Nestaboard  family and this one is the Labels 2 that matches the Spellbinder die.

With this one I have inked it up with Versamark and covered it in red embossing powder then heated it and sprinkled in some Glamour Dust while it was still hot.

Around the back of the shape I have added some white lace and  on the front I have used a red Rose  from Wild Orchid Crafts  and curled  the wire from the flower around a  cocktail stick.

Once added to a card it looks totally different ... and with this one I have used a white square doily in the baackground.
The ribbon technique is explained in the tutorial   Ruffled Ribbon  and  is very easy to achieve.

The Nestaboard and the Pearly Swirls are from  Want2Scrap and make a real statement to any card.

Hugs xx

June 07, 2012

Nestaboard ... Scalloped Hearts

This is a product called Nestaboard from  Want2Scrap

It is compressed board that is used to match ... or instead of the Spellbinder dies. 

It is an excellent alternative to buying the dies ...  as they are pricey and you may not want to buy them.

But these are much less expensive  .... and they give a really pretty effect that you can dress  up anyway you like.

There are several shapes in decreasing size to each packet for you to create your own toppers.

And the company will ship worldwide too.
This is the largest one from the  Scalloped Hearts  I have covered the shape in  pretty pink paper and then edged  it with the matching  pink gemstones from  the same company.
The flowers are from Wild Orchid Crafts  and this is the topper that was made using all these wonderful products.

But when added to a card front with a lacy square doily in the background and  the result is very pretty.
The addition of the organza ribbon and the punched butterfly add the final touch and is a card I would be very happy to send for any occasion.

Hugs xx


June 06, 2012

Matting and Layering

A cardmakers term that  needs to be explained as many new  cardmakers are stopped in their  tracks by words  that those of us who know  how to make cards use  willy nilly.

I remember going to a computer  class many years ago and being asked by the tutor  "Do you know anything about computers?"    To which 80% of the class said a most emphatic "NO!!!"

She then proceeded to tell us to use the mouse to add the cursor to the search box ... and click,  add the title  "Whatever it was.... "  and hit enter.

Most of us spent the next few minutes looking for furry creatures running around, wondering what a cursor was,  why we needed to hit anything and  where and what it was we were entering. 

So a not very  helpful tutor and a not  very explicit lesson, as she clearly didn't understand  the answer "NO" to  her own question in the first place.

I know when  I started to make cards it was something I had never come across and I  couldn't find a detailed answer to  my question   "What is matting and layering?" ....

Having been asked the same question ...  and  not wanting to be tarred with the same brush as  my earlier  tutor with the PC's, ...  I decided to make a short video to explain  exactly what  Matting and Layering   is.

It is aimed at those people new  to this hobby  who don't know all  these terms  that are bandied about.

It has had a good response from lots of people ...  so I seem to have hit the correct level and I am happy to be of use to the many many  people joining the growing band of new cardmakers every single day.

It is for  You  that  Card Making Magic   was born.

Hugs xx