Beautiful Card Designs Made Easy

Showing posts with label Distress Ink. Show all posts

June 14, 2017

Simply Cards &Papercraft - Family Ties

Hi Everybody,

I have another free gift to tell you about today with my favorite magazine Simply Cards and Papercraft Issue 164. It will be on sale in selected supermarkets, craft stores and WHSmiths on the 
15 th June

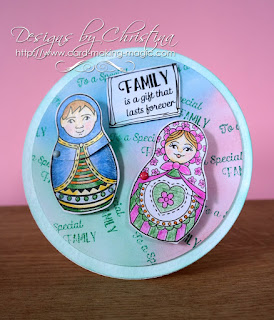
Family Ties is a set Nesting Dolls dies and stamps.that will give you the chance to colour these beautiful dolls for your self 

There is also a paper download of sentiments and pre coloured dolls ... especially useful for those who don't enjoy colouring and they will help you to make cards quickly when you are in a hurry.

Simply cut out the sentiment that you want,  and then use the dies in the gift to cut out the dolls,  and add them to your card

The card to the right has been created in that way and all I have done is make the background with a stencil, add the dolls with foam pads and place the sentiment at the top ... done ... quick and easy !!

You can get the magazine or a subscription from More Mags

But for this card I took a lot more time and stamped the dolls and coloured them with Spectrum Noir pencils.

I created the background with stamps and Distress Inks.

The video will show you how I made the dolls open to reveal another one inside just as the real Nesting Dolls would be

It is not difficult to do but the card it produces is a fun one to give.

Here is the video for you 

Enjoy it and the magazine with it's wonderful free gift

More tomorrow ...

Hugs xx

June 13, 2017

Tuesday Tutorial - Framed Floral Card Front

Hi Everybody,

This pretty card is made with a complete card front die and that has to make life more simple when you need a card in a hurry.  I have used bright silver mirror card to create the front and that adds the sparkle that I was looking for
Spellbinders Supplies:
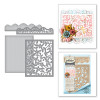
  • S6-117 Framed Floral Card Front
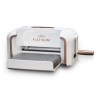
  • Platinum Die Cutting Machine
Other Supplies:
  • Distress Inks
  • Dries Clear clue
  • Foam pads
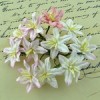
  • Flowers from Wild Orchid Crafts
  • Glitter from Glitter Magic
Instructions:
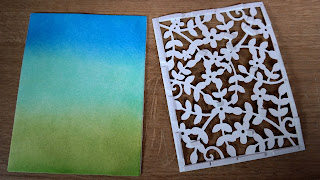
With the outer die of the Framed Floral die cut  three pieces of white stamping card and use two to create the base card
With the third piece and the Distress Inks blend all three colours on to the panel.
I have started at the top and used Salty Ocean, Cracked Pistachio and Shabby Shutters
It looks smoother one it is dry
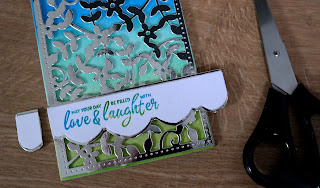
With the Silver mirror card I have cut the two dies together to create two panels ... one for the card front and the other to give me extra leaves to tuck behind my flower
Add small piece of foam to the filigree panel so that they cannot be seen from the front and add to the blended panel
Stamp a sentiment of your choice on to some white card.
 ( I used two of the inks I had blended earlier to create a two tone effect for my words) 
Cut this out with the long solid solid strip.
Then cut another solid strip in the silver and divide this in two.
Arrange around the sentiment strip to leave a small border at the top and bottom
Add this sentiment strip to the filigree panel and trim as needed on each side.
Trimming from the back give a neater finish
Add all this to the base card
Trim some f the leaves from the other piece of mirror card and choose a flower to blend with your colour scheme
Arrange the leaves around your flower and dot the flower with glue and sprinkle with glitter
Dot each of the flower centres with a pearl

More tomorrow ...

Hugs xx 


June 01, 2017

Gold Embossed Background

Hi Everybody,


Todays card has used some lovely gold embossing powder to create a rich background for my sentiments.

The first one has used the new feather die from Spellbinders and I have made my own stamp from the die and some craft foam.

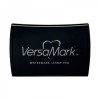
I used a layer of deep teal coloured card from Papermill Direct and stamped it with Versamark

I sprinkled it with Gold powder and heated it with a heat tool until the powder is shiny and melted

Trim this layer to fit the front of a tal base card and add with foam to raise it up a little.  Stamp and emboss the sentiment in the same way and edge with gold too. Add with foam and there you have a quick and easy card for the men in your life.

This second card took a little longer ... but the base is the same stamping and embossing in gold.

I used a large Flourish stamp from Indigo Blu that I have had for a long time. Once the heated powder was cool I used three Distress Inks to create the blend over the gold.

I used Spun Sugar at the top and blended it into Victorian Velvet.  The used Aged Mahogany at the bottom for a lovely Ombre Effect over the gold

I added three gold gemstones at the bottom of the card and the sentiment is from the Pretty Quick dies range at Craft Stash

Another easy card to make and change the colours for male cards

More tomorrow ...

Hugs xx


April 05, 2017

Papercraft Essentials145 Safari Friends

Hi Everybody,

I have such a lot of videos to add for you this week and so there is no space to do a Water Colour Wednesday card today. 

Instead I have the latest issue of Papercraft Essentials to share with you and the video will give you some fun ideas on using this stamp and embossing folder.
There are lots more ideas with hints and tips inside the magazine and many more card ideas that you may like to try.

The magazine and gift will be in the shops tomorrow the 6th April and you can find it in selected supermarkets and craft shops or from WHSmiths.

Also direct from Moremags  for either the mag or to take out a subscription to your favorite one.

The video can be found here at ...

There are so many things that you can do with this fun stamp set and it will be suitable for lots of age groups.

I fussy cut the characters out for several of my cards and added them with foam pads underneath to give depth to my design.

But you could stamp the scene direct to card and sue the masking techniques instead.

But whatever you do have fun

More tomorrow ...

Hugs xx
January 30, 2017

Coffee and Cream

Hi Everybody

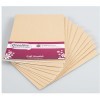
Todays card is using some really pretty card in cream from  PMD  and then using inks to colour the rest as a highlight to bring out the features in the lace.

The card is a 5x7 top folded card as this is my favorite way to make any cards that I do.

Having the fold at the top helps the card to stand better especially if you add as many embellishments to it as I do

So I have mixed old dies with new ones here and I really love the new Graceful Floral Lace from Becca Feeken.

For this card I have used Distress Ink Ground Espresso and inked through the die before removing the card and it gives you this lovely pattern on your lace.

It is so pretty and a wonderful addition to any feminine cards.

The other is the Botanical Heart Pair  and this I have cut three times and glued them together.

This is another favorite trick of mine as it gives strength and depth to the die cut and makes it stand out on the card. Try it ... it works wonders

The card has been wrapped in ribbon and the layered with a pearl strip and then the bow added to the top.

The Happy Birthday Sentiment has also been cut several times and glued together for effect, and is also a new die from Spellbinders.

More tomorrow ...

Hugs xx


January 24, 2017

Tuesday Tutorial - Flowers & Lace

Hi Everybody,

For todays card I am using some old and new dies together and creating a really pretty design with only card elements on it. I like to add lace and flowers to my creations and with these dies I can add both and it doesnt cost the earth. 
And with dies I can re create the whole look time after time just altering the colours in the card or the inks I use.
Spellbinders Supplies:
Other Supplies:
Instructions:

With die #7 from the matting basics cut two pieces in cream and create a hinged card
Hand cut a slightly smaller layer in pink to leave a narrow border around the edge
Hand cut another slightly smaller layer in cream and emboss this in the folder
Glue the two hand cut layers together
Cut one layer in cream and hand cut a layer in pink to fit beneath the die cut
Glue these two together just around the edges then add foam tape at the back
Select the florals that you wish to use and cut them in cream
Ink through the die before you remove the card. Abandoned Coral for the flowers and Mowed Lawn for the leaves
Cut one strip of the Graceful Floral Lace and use small foam pads in strategic places to the back of the die cut so that they cannot be seen from the front
(I love this die and it looks really pretty if you ink through it before removing the card)
Add the Two Way Street panel to the embossed layers and wrap the lace strip around them all.
Add small foam pads to the florals that you cut and arrange them and the leaves onto your card as you like.
Cut the sentiment of your choice form the Phrases several times and glue them together for strength.
Add to the card front as you like .
I then added Glossy Accents and Glitter to my die cuts 
Vary the florals, sentiments, arrangement and the colours for another look to your card 

More tomorrow ...

Hugs xx