Beautiful Card Designs Made Easy

September 11, 2012

Not A Christmas Card ....


Click to Enlarge
I thought I would have a change from Christmas cards with this one and I brought out the Spellbinders.

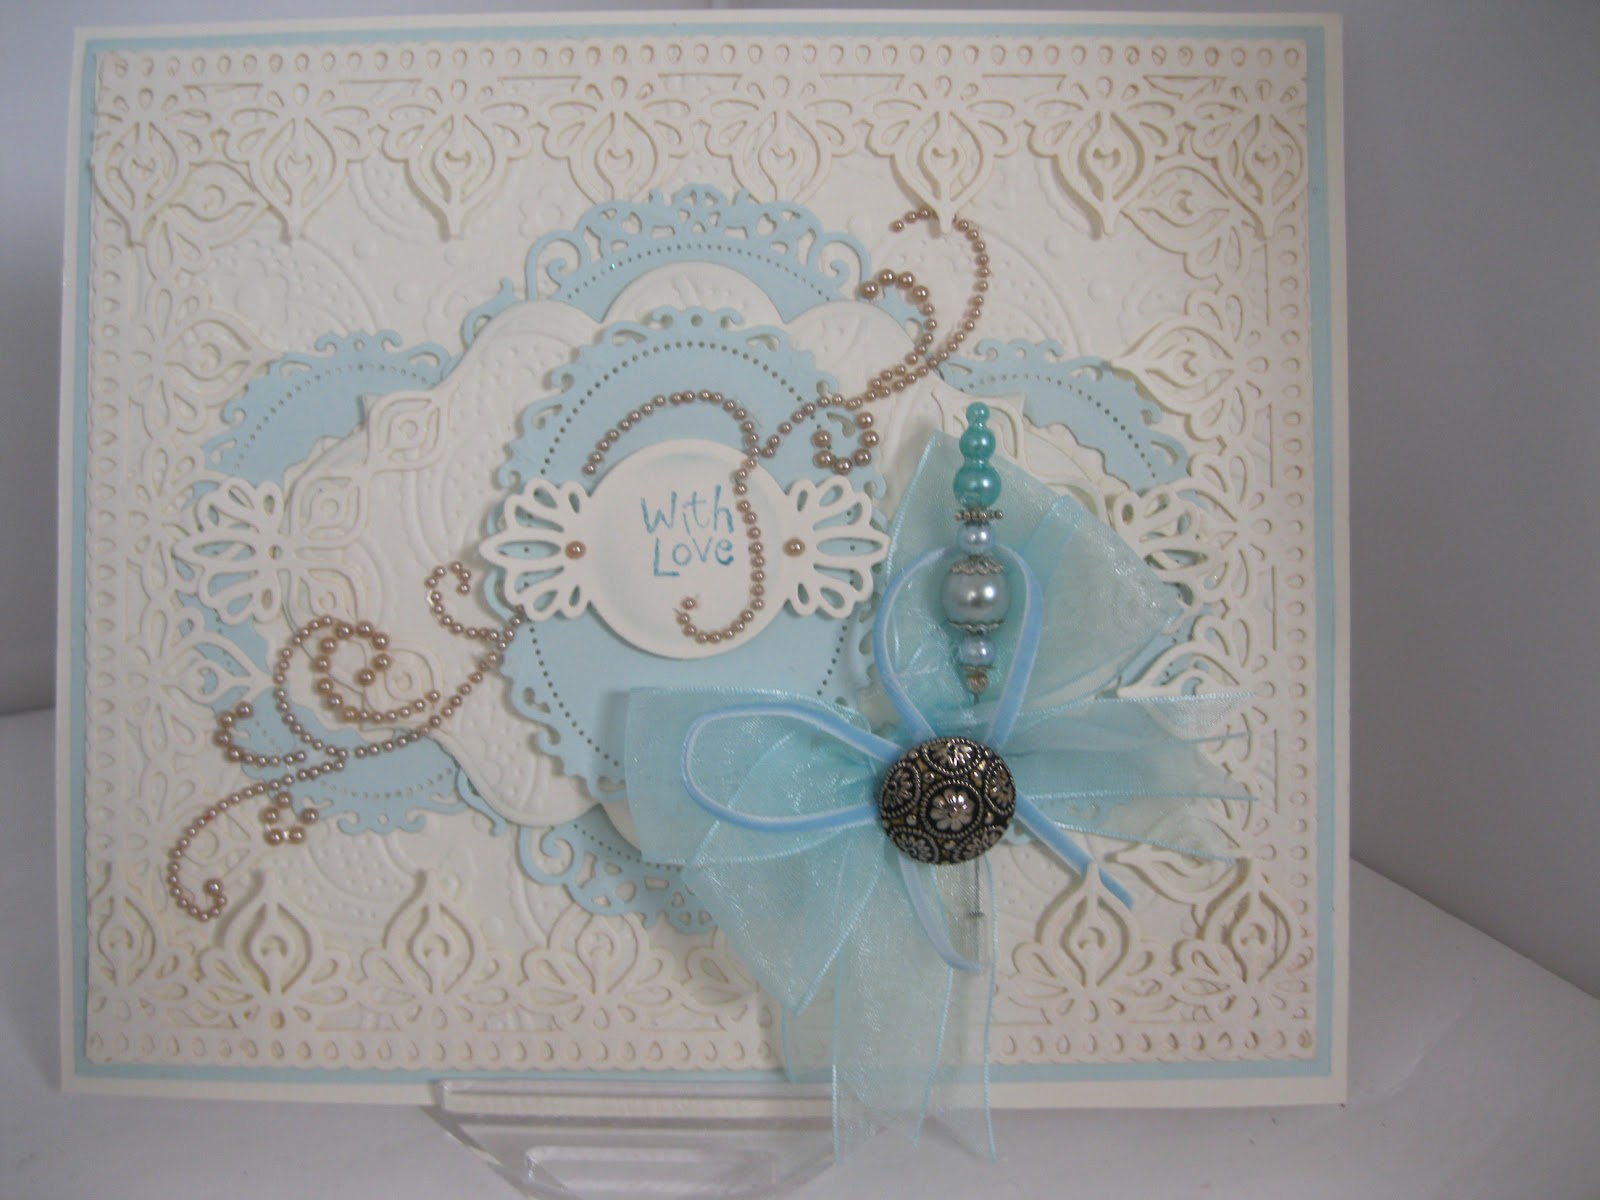
I have  mixed and  matched many  of the ones that I have and I really like the  look of this card.

The colour is a soft teal  and cream and the oragnza  ribbon matches the card  perfectly.

In the  centre of the bow  I have added a  Vintage button  and the  Decorative Hatpin  is pushed throught  the centre  of the knot.

The Spellbinders  are in BOLD  to highlight the ones I have used for this card.
 
The background has been run through  the  Paisley M-Bossabilities folder  and then edged with the Persian Accents borders on each side.

I have cut Floral Ovals three times using the largest and the second largest dies and added them in Teal at the back ... with the two smallest on either side and the largest in the centre.

Labels 20 has been cut and embossed and raised on foam pads to the centre of the card.  Perisan Accents corners have been placed on either side of the label.

Another Floral Oval has been added in Teal to the back of the sentiment, which is cut in cream from the Persian Accents.

The Pearly Swirl is Le Creme Finesse from Want2Scrap  and I have curled it down the side of the card and around the "With Love" sentiment.

And the  reason it is  curled around  the sentiment is  because ...  I slipped with the  wording  and added  a  mark  (idiot!) .... so  covered it up with  the Swirl.

Hugs xx


September 10, 2012

Creating Card Stands

Click to Enlarge
I promised to share  several different ways that I use to make your cards free standing ... and over the weekend this is what I came up with.

Creating Card Stands  is another short video. 

I have tried to think of all the ways that could be adapted so that cards can be displayed in a very pretty way by the recipient.

I have covered the "A"Frame that I have used for quite some time and then moved on to ways to use the beautiful ornate stands that I discovered last week

These can be made out of any  card that goes with your colour scheme and I have given you some tips on what to do to make sure that your cards don't fall over.
 I got these  little stands  from  Ebay  and the link will take you to the straight to the page

And then I have also shown you how to make the most of your Spellbinders to create a frame that will be glued to the back of the card. 
You can adapt many of the dies that you may already have in your collection as long as it fits the back of your card.


And just in case you are saying that you don't have any Spellbinders or you don't want to buy the little card stand there is also a way that you can freehand cut a stand ... and so there is no excuse at all not to give this a go.


Hugs xx

September 09, 2012

Spellbinders Heirloom Ornament


Click to Enlarge
I have been busy playing again and this time I have used the  Spellbinders Heirloom Ornament to create more  decorations that could be suitable for Christmas.

These are quite big  as I have used the largest die in the set but they are cerainly a statement piece.

I have added Glitter, feathers, tassels and ribbons as well as my  Diamante from Want2Scrap

This selection is showing some of the ideas that I came up with and the video has been added to the website .... here is the page ...  Spellbinders Heirloom Ornament

The second ornament from  the left has been  decorated with flowers and  butterflies as a more summery theme and  I also think that this could  be  suitable  as a  Bridal arrangement and made to look really  luxurious.

This one has red gingham ribbon for the carrying handle and it has been glittered with Glamour Dust.

 I went on to add the wine coloured feathers  and some wooden snowflakes as a bit more embellishment to this one... it is the second  from the right in the picture.

The Holly paper is from the Crafters Companion  Christmas CD
 
Hugs xx


September 07, 2012

Retro Mod Clocks ...

Here is one of the fun Spellbinder dies that are available from  Save On Hobbies  and this one is called  Retro  Mod  Clocks.

I have used  it to make this  New Home  card and added  in tiny jewels,  for the numbers on the clock  face,  from  Want2Scrap

It has  all been  matted and layered and the cream card has been  embossed to add some  texture.

The ribbon  is from my stash and  matched the colour scheme perfectly.

The same  pink card that has been  used for the matting has  also been made into a  frame for the back of the card to  make it  stand ... and is  one of the ways that will be  in this weekends  video.
Many of you have been over to Save On Hobbies and bought the incredibly cheap dies that are for sale.  I also know that some of you in the UK have had an extra charge added to the cost before you can get your parcel from the post office.
 
I have discussed this with the owner of Save On Hobbies   (Scott)  and he  is deeply concerned that this has happened,  and  he has  made some  changes to the way  the parcels  are being sent out to hopefully solve this problem in the future ... and so keep the cost of the dies at a really good bargain price. 
 
But I have to say that it is neither Scotts ...  nor my fault that this charge is applied ... it is an import duty by Customs and way beyond our control.
 
I have had a few emails telling me that I should have warned everybody about this charge but I can honestly say that I did not know about it or I would.  And I have also had to pay this charge on one occasion.
 
So for now please be aware that if you order the dies there may be an extra cost added that needs to be taken into account .... but having said that ... even with this extra they are still an incredible price and well worth considering as you build up your Spellbinder collection.
 
And if you are in the USA then postage is free for you .... aren't you lucky ????
 
Hugs xx


September 06, 2012

More about Card Stands


These pretty little card stands have certainly sparked your interest.   I first saw these on  Marie-Louises' blog   and  I really liked the look.
Her cards are so pretty and these stands gave them the finishing touch.  So of course I had to go looking for them.
 
They are from a company called  JoyCrafts  but this link direct to ...  Ebay  ...  will take  you straight to the page for the different styles that you can buy.... and they are not expensive.
 
They are a  metal  die that is used with your  die cutting  machine but you will need  to read the instrucions  on layering up the  cutting plates for your  individual cutter.
The result is a very  detailed stand that will take  smaller cards  and hold them perfectly... but it will not hold larger cards... the weight of the card will simply make them fall over. 
 
For that you will need another method .... and guess what ???     Another video on these and making larger stands for any card you make.
 
I have found that it is better to cut two stands the same  and then glue them  together  for extra strength.
The card  in this  photo  is made to an A5 size but it will not stand in Portriat position and so has to be used Landscape.
The stand  can then be tucked inside the envelope for the recipient to display the card on their mantle shelf.... and you can make it in any colour to match your project.
 
Hugs xx


 .