Beautiful Card Designs Made Easy

November 09, 2012

Christmas Scene


This image is coloured with  Spectrum Noir pens  that are  available from  Crafters Companion 
Not  everybody wants, needs or  can afford the complete set  and to be  perfectly  honest you don't need them all.

I have always said ... Start with the six pens sets and build up as you want   from there ... as you can afford to buy them.


So  all I have used here is the set of Ice Greys.

If you are new to these pens then please take a look at Spectrum Noir Introduction  which will give you a better explanation of what they are all about.

But I thought that it would be a good idea to show how each of the colour sets stand alone and just some of the ways that they can work for you.

I am going to put together a series of videos for each set of pens and start with the greys ... and show several cards with them and how they can all look different.  I hope you will find it useful.

This card is a very simplified version and the digital image is from   Just Inklined 

I have used Spellbinders Create a Flake 3 and  I have added  Micro Beads to each flake  and layered them together,  then added a clear gemstone to the centres.

The sentiment tag is Fancy Framed Tags 2

The ribbon is Seam Binding and it is an inexpensive addition to your "Stash". 

The Diamante Swirl is from Want2Scrap  and I have added Glamour Dust to the snow,  trees and the sentiment.... but it doesn't show up very well  on the photgraph.


Hugs xx

November 08, 2012

White on White

Click to Enlarge
 Here is another White on White Card and I did this one for a birthday that is coming up in December.

I have used a thick white stain ribbon to slide under the borders and made a large bow from the same ribbon.

The centrepiece is a Dazzler from   Creative Studios

I have folded an A4 card in half and used it with the fold at the top.


After folding the card in half I cut  the front section in two again and  made it smaller by about  6cms.   I used a piece of acetate that was about 9cms wide to fit into the gap to leave a panel that was see through, with the card adhered around it.

(Unfortunatly the stand, although clear is visible and spoiling the look of the acetate)

I  embossed the Acetate before adding it to front panel.   I cut out three of the Asian Accents borders and added them ... two to the top and one to the bottom of the card.

The embossing folder that I used was the Paisley M-Bossabilities ... and it is a double sided folder from Spellbinders..... but you will need the Raspberry plate to use it in the Grand Calibur.

Between the two top borders I added my white ribbon and the bow with the Dazzler centre, and along each side of the card I added in my beautiful Diamante Bling from Want2Scrap

The sentiment was stamped onto the same white card and then I used the Fancy Tags 3 with the matching Bling and added it to the Acetate panel.

Quite an effective card and the embossed acetate makes it just that little bit different.

Hugs xx

November 07, 2012

Another way to use ....


...  Cherry Blossom from Spellbinders.
It makes you think of summer months and beautiful pink and white flowers.

It is a very useful die for your crafting "Stash" in it's own right  and it will make some beautiful additions to my cards as the weather warms up again.

But because of the cost of these dies I didn't want to waste it in the winter months ...  so it has to work for me to get more from  any  die that I buy.

So on went the thinking cap and this is the result....
A Christmas Wreath
 

I have cut lots of the branches in all the sizes and I have added Glamour Dust to each one to represent ice.

I used the middle sized flowers,   cut  in two shades of red and layered up,  alternating the shades,  and  each has a tiny Diamante in it's centre.

I found some red and white gingham ribbon in my "Stash" which fit the bill perfectly,  and the bobbly cord was added underneath.

I layered up two co-ordinating papers and used the ribbon and bobbles to cover the join then  added the bow with a gemstone to cover the knot.

They have been matted and layered onto Kraft Card.

The sentiment was stamped onto a circular card and then the branches arranged around the circle ... cutting them if needed to make them fit to create the wreath.

I dotted the layered flowers in the branches and glued the bow in place.

The Diamante strip is from  Want2Scrap   and I have cut the two sizes to fill the corners on my card.


So this will be going to somebody this year to wish them a very Merry Christmas

 
Hugs xx

November 06, 2012

Spellbinders Hexagon Pinwheel Box

Click to Enlarge
This pretty little box is ideal for smaller cards or invitations that you may want to send... it's more like an envelope really.

It is very easy to make ...  but you will need a die cutting machine with a larger cutting area as the die is too big to go through the Big Shot that I have.


The die itself is  available from Save On Hobbies at an excellent price.

I have used Centura Pearl  for this one from Crafters Companion  and it has been embossed to add some texture to the card.

It is the Spellbinders Grand Hexagon Pinwheel Top Box  and that title is quite a mouthful ... try saying it fast.

I struggled saying it on the video.
But a  video on this project  is here for you  and it answers  some of the  questions I have had about how to  fold it correctly.

The Diamante is from Want2Scrap

I will also show you how to create the small card that can be placed inside.

 And as long as the embellishmetns are kept low it will fit.

On this one I have cut up some Guipure lace for the leaves and added them behind the flowers.

I like how it looks and they are for  "Thank You" cards for  wedding gifts
Hugs xx

November 05, 2012

WooHoo .... Look what I've got ....


I am so very very pleased with this "Blinkie" that  I have received from  Spectrum Noir  today... it is in recognition of the videos that I have produced on this fantastic colouring system.

I started with an Introduction to these pens and then covered colouring skin tones and hair.  There is also a video on clothes and a specialised one for jeans. The last one was on the  storage system that has been introduced by Crafters Companion to store any of your marker pens.

I am adding it to the very centre of the page ..... and I am so very pleased with my self for the work I did to get this Accreditation.  I shall proudly display it in my side bar and add it to the website too.

It takes pride of place and I will get a certificate too that I can frame  and add to the wall in my craft room.  Oh! I am like the cat with the cream and I can't stop smiling.

                                                       
I am much too excited to add any more so I will close for now and just sit back and savour my award.

Back to some cards tomorrow

Hugs xx

November 03, 2012

Picture Frames


This another project for the  Design Team that I have joined and again uses digital images from  their shop.

Following on from yesterdays suggestion of NOT making cards ... but using your digital images to create something else instead.

Both of these are A4 picture frames from Ikea and the images are already coloured from Paper Creators  and they make excellent pictures which are ideal for a childs bedroom.

The first one is Sassy Sally Clowns Around  and on this one I have glittered the flower and the nose and added Googly eyes to the character.

Then I have added  pearls  to the buttons... and used pearls around the edge of the mount... and Pearl Flourish close to the image.

The picture has been framed with the Asian Accents Border in red and then added under the glass to the frame. This can either be free standing or added to the wall.

This image is  Jennis Purrfect Costume  and for this I have used the Moroccan Accents to frame the picture.

On this I have glittered the bows in her hair, the inside of the ears, and the cuffs.

The Diamante Flourish,  the border around the image and the Pearls in the previous one are all from Want2Scrap

Both are very pretty projects and will given with love at Christmas to two very special children.

Hugs xx

November 02, 2012

Scrapbook Album

Being part of the Paper Creators  DT  means I get to use some very pretty images.  And most of the time I make cards with them.

But this time I thought I would try something other than a card ... and for this project I have used a rather large Scrapbook Album.

The image that I have used is the Conductor  and  he has been decoupaged onto the front.

I stored it in   "Picasa" which means I can now resize the image to suit whatever it is I want to do.

Picasa is a  FREE  photo editing software  that allows you to store all your photos, backing papers and digital images.

The pink link will give you a wider explanation and also a link to their website.

You will never lose a picture again and you can edit, recolour or resize them as you wish.

For this album I have used shades of blue and each panel has been stitched and then  I have  layered them onto the front of the album.

Using the  Donnas' Alphabet  from the Spellbinders set I showed you testerday I have added Tylers' name.

This letters set is available from   Save On Hobbies   and will be a  useful addition  to your  cardmaking "Stash"

The little fence is a Memory Box  Die  from
Oyster Stamps  and just seems to add the finishing touch to the front.

 The Pearl Flourish is from Want2Scrap and adds a touch of luxury to what would otherwise be a plain album.... but not too much as this is for a boy.
 
I have added Glamour Dust to the name and wrapped Bakers Twine around the spine.
 
 I am sure that his mum will add all the special little items to the album that she wishes to treasure as he grows.
 
Hugs xx

November 01, 2012

Pretty Sweet ...

This little girl is from the "Pretty Sweet" CD from  PolkaDoodles  and I love the images on there.

The colour is not very good but it has been photographed under artificial light.

I much prefer them in natural daylight but it was getting late in the day when I did this.

The card has the Braided Ribbon  used along the bottom edge and the background panel has been embossed with the Paisley M-Bossabilities folder.

The flowers are from Wild Orchid Crafts   and the Pearly Flourish is from Want2Scrap  

Before I go I just want to tell you that there are some new Spellbinders in at Save On Hobbies

These are some of them, at an amazing price, and hopefully we have now overcome the problem with the extra Customs charge.

Pictured here are the Donna Salaza Alphabet,  Creative Book Pages 2 ,  Hexagon Pinwheel Top Box,  and the  Square Petal Top Box

I have been making samples for these today and over the weekend I will be making some Videos to show you what I have been up to. 

Hugs xx

October 31, 2012

Green and White

I don't know if I have shared this card with you before ...  so if I have apoplogies and if I haven't then here it is and it is well worth reading the verse on the front of it.

The verse is from Clarity Stamp and it is really lovely and could be sent to many different people for many different occasions.

Send it to your mum for Mothers Day.  To your husbands/boyfriends for Valentines Day or a Birthday.

Send it to your daughter or son for any reason  ...  the posibilities are endless.

The background for this card is from an Embossing folder from Couture Creations and it called Seedling Nouveau ... and it is very pretty.  The fancy edge to the card is created with Spellbinders Classic Triple Scallop.

The centre piece is cut from the Layered Scallopd Posy with the largest die from the  Persian Motifs layered on top.

The ribbon has been threaded through a border created from the Classic Postage Stamp  and the knot covered with a Vintage button.  I love the metal corner piece at the top of the card.

I would also like to share with you a Blog post from Naomi over at  Creative Bug on the Loose  as she has opened a Digital Shop and has some really cute images there for you to buy.... as well as giving away a free image each week .....oh!  I love a "freebie" .... and I bet you do too.

Hugs xx


October 30, 2012

Some news ....

Have you noticed the new button on the right hand side of the Blog page ???? 

I have made it onto the Design Team for Paper Creators  and I have never done anything like this before .... so guess who is really pleased with herself.
 
I entered a card for this before I went on holiday and was very pleasantly  surprised  to have the email, to say I was accepted, waiting for me when I got home.

I am so pleased  and this is one of the cards that I have made for Debbies Blog

It is made from Centura Pearl card from Crafters Companion and the papers are a  lovely shade of green from a magazines' free paper stack

The paper Doily if from my stash and the Bling as always is from Want2Scrap
There is a pretty piece of Guipure lace under the image and it has been wrapped with white ribbon and the bow.   I have added Bakers Twine around the spine.

Pop over there to see the other cards that Collette,  the other new DT member and I have come up with,  and there will be lots more to come in the coming months.
 
This is using the  "Hanging Out To Dry"  image that can be purchased from the Paper Creators shop and there are lots of different characters for you to choose from.
 
Wish me luck  ....
Hugs xx

More on Spectrum Noir

I have been asked some questions concerning the  Spectrum Noir Pen System,  and so the best place to answer them is here,  as many people are starting to collect them.  They filled a real gap in the market for an affordable colouring system and are well within most peoples price range.

There are 12 sets of  6 pens and they are  Pale Hues,  Blues,  Pinks,  Browns,  Reds,  Purples,  Cool Greys,  Warm Greys,   Greens,  Yellows,  Turquoise, and  Essentials.

They also come in packs of  24 and they are Darks.  Lights,  Brights and  Pastels making 168 in the complete collection.


But in the video Spectrum Noir Introduction  I said that you don't need all the pens and that the best way to get started with them was to buy the six pen sets.
These will give you an excellent colour range to get started with ... and when you feel more confident and  you like working with the pens then you can extend your collection.

The set I would advise you to get is the
Pale Hues.... as this is probably going to be the set you will use the most for all your skin tones.
 
Then the Essentials and two more of your choice will get the ball rolling.
Some of the questions were concerning the way the pens are numbered so let me explain  ...
 

When the pens were  first introduced  the numbering system  was different and  it was altered a few months ago.
 
But if you go to the Crafters Companion  website you can order a complete set of tops for your pens with the new numbering system  ... free of charge.
 
The pens are divided up into colour groups and the Letters tell you which group they are in.
 
For example  .....
 
PL is Purple and the numbers are the strength of the colours with 1 being the palest.  
CR is Coral and they go up to CR11 with that being the deepest, strongest colour in that group.
TN is Tan and they are from 1 to 9 with the colours as described ... palest to strongest.
TB is True Blues and they are from 1 to 9
DG is Dark Greens running from 1 to 4
 
To aquaint yourself  more with the groups you can download the  Colour Blends Chart from this link to Crafters Companion and  you don't need to be a member to get it.
 
Scroll down to Spectrum Noir and click  view to find the Colour Chart.... click the link and scroll again to Colour Blends, download it and  print it off  onto the same kind of paper that you will be colouring on and keep it with your pens ... you will find it invaluable when you want to choose colours from the six pen sets. 
 
This is another chart that you can download and this will give you the groups and colours for every pen in the whole collection.  
 
It is the A4 pre coloured Colour Chart and again very useful to keep with your pens ...  and you can see all the groups at a glance.
Storing them horizontally is best and remember that once you have purchased this system ... it is yours for life.
 
They are re-fillable and the nibs are replaceable ...  and if you coat your new pen tops with clear nail varnish the numbers won't wear off.
 
 
This storage system shown here is not just for Spectrum Noir as it can be used for all your pens.
 
One of the questions I was asked was the best way to store Promarkers.... well I stack my system on a slant and place the pens so that the pointed end is to the back.
 
This gives you more to grab hold of to get the pens out but unfortunatly you won't be able to see the pen colours with the Promarker  pen  design.
 
Hugs xx


October 29, 2012

Pen Storage System.

Before I went on holiday I was asked by Crafters Companion if I would like to do a guest blog post for their Spectrum Noir Blogspot ... and of course I was delighted to do so. 

There are many good tips about the pen system and how to get the best from it and if you like Spectrum Noir pens then it will be useful to visit their blog often.

They have featured the videos I made on colouring both pale and  dark skin tones.

As a  "Thank You" to me,  Sara Davies, the owner of CC,  sent me a complete set of the storage trays.

Crafters Companion have developed these for the Spectrum Noir range.... but they will take any pens that you have.

So together with the numbering system to the pens and this neat way to store them I now have a really tidy desk when I have completed colouring in my images.

And it is  easy to see which pen is missing and replace it into the correct spot.

Take a look at the video and maybe this Marker Pens Storage System could be just what you are looking for too.

Hugs xx

October 28, 2012

Vigo

Day 13 Vigo, Spain


This is the last stop now and the next one will be in Southampton and then home. 

It has all passed far too quickly but we have had a wonderful time on board this huge cruise ship.

So this is Vigo and this chap is waiting to greet us outside the port entrance.

He was quite tall and many people had photos taken with him ... but he was not a living statue ... no this a  real solid statue.
This was another big statue near the port but I have no idea what it is supposed to represent.

The weather although not raining was not very warm and we only had till 2.30 pm before we needed to be back on board to sail for home.


This was a little park that we found and we sat for a little while watching and listening to the water.

Every so often the pattern in the water cascade changed to a different formation and it was very pretty to watch.


The view along the main street made us want to see what was there and so we walked all along this shopping area... with the obligatory coffee stop on the way.

We sat and people watched for a while and then set off back to the ship. 

And this cloud in the sky looked just like a bird and so was worthy of a camera shot as we walked.

And so we said our farewells to Vigo and this was the shot from alongside the ship.

The sun was setting later in the day as we sailed away from the land.

The water as it was churned up was the most beautiful shade of turquoise and oh so clean.

This has been a Happy Holiday ...  and tomorrow is Day 14 and back to the Southampton UK ... and the long drive back to Blackpool.

So no more snaps from me till the next  holiday.

 Thank you so much for viewing all my pictures  and leaving me your lovely comments.

I am glad that you have enjoyed seeing them as much as I had taking them.

But now it will be back to work on  Card Making Magic  and to lots of new changes that are happening on the website.

The next posts will be back to card making and another video is on the way. 

Hugs xx

Lisbon in the Rain ...

Day 12 Lisbon


This was the view from our balcony as we sailed up the river, passing the Monument to the Discoveries and on into Lisbon.

It was very early in the morning  and the weather forecast was rain and I promise you it did not disappoint.


We have been to Lisbon before so we had a plan of what we wanted to do and we got the ships shuttle bus from the port into town.
I snapped Griff filming from the balcony and this Monument on the hill was in the background.

It is enormous but we didn't have time to visit this.

You can see how grey the sky was even at this hour in the morning.
The first stop was to go to the Castle on the hill and we walked up a very steep hill to get there.

 As we got to the top the skies opened and down came the rain... so no photos.

We decided to take the small trams back down into the town to rejoin the shuttle bus and go to another part of the city.

But not too worry I had our plastic ponchos and the trusty umbrellas


This is the Monument to the Discoveries that we wanted to photograph but it was so wet we took shelter in the cafe.

I had a welcoming hot chocolate ... looking like a drowned rat ...

.... and Griff had some fresh squeezed juice ... looking his usual handsome self with not a hair out of place and no mascara running down his face.


Then it was out into the rain  to try and get a photo.... complete with the ponchos again and the brollies from Barcelona.... but all was not well !!

The thing decided to blow inside out and here I am trying to fix it without much success.... in fits of giggles as I tried.

Griff said we should go back to Barcelona and complain ....


So I am afraid that this is the best I could do on this very wet day ...  and we made our way back to the shuttle bus.


But as we waited for the bus  we spotted this very beautiful building and the fountain was still flowing even in the rain ... so out came the camera again.

Once back on the ship ... all showered and dry ... we found a cozy spot at the top in the  "Olive or Twist" lounge bar.

We settled into some cozy sofas with a lovely cocktail and watched as we sailed out of Lisbon and past the Monument again.

And would you believe that once back on the ship the rain stopped and the sun came out......

Hugs xx 


October 27, 2012

Fun with towels ...

Day 11 at Sea


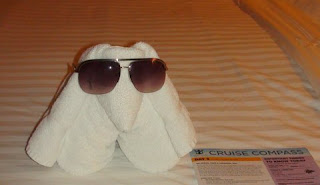
Our cabin steward was a young man from India called Anthony who had an amazing skill with towels.

Every other night he would make a sculpture and leave it in the cabin for us to find.


This was the first one that he did and it really made me laugh as it was wearing a pair of my sunglasses.


Here is me and my new friend and over the next few nights there were many more for me to find.

The snake was very clever and Anthony had even added beady black eyes to him.
 The bat was suspended from a coat hanger and was hovering over the bed waiting to bite ... coz of course it is a vampire bat.
 The monkey was also suspended from the coat hanger and was cleverly done with one of the legs tucked under him.
But the rabbit was the best of all and had the TV's remote control in his front paws.

So thank you Anthony for all the hard work you did to keep us comfortable.

And also for the fun we had seeing these adorable creatures when we returned to our cabin.

Hugs xx