Beautiful Card Designs Made Easy

January 07, 2016

Blue friend ...

Hi Everybody,

Todays card is elegant and perfect to let friends know that they are special.

The blue card is from Papermill Direct and makes a really pretty effect when covered with the embossed parchment I have used

The parchment has been embossed with the Butterfly Folder  and added to the blue card so that the foam tape sits beneath the added oval.

For the oval I have used the Spellbinders Victorian Bow  and I have cut this in antique silver card that I bought from the craft shows

The verse is from a set by JustRite Stampers  and it fits beautifully inside the frame that matches Labels 29

The ribbon is Organza  from Mei Flower and tied in a double bow with a pale blue pearly centre over the knot

The flowers are from Wild Orchid Crafts  and put together to compliment the card.  The centre of each flower has a tiny Glitter ball also from WOC

They have added sparkle from Glitter Magic  and into the display I have added blue Hat Pin that can be removed as a gift for the recipient of your card.

More tomorrow ...

Hugs xx

January 06, 2016

Wedding Card

Hi Everybody,

Todays card is using a die from "Craft Stash" and I have kept the theme to white.

The large heart has been cut from white card several times and layered to the base card to form a pattern layer.

I cut the die again several times and layered them together for depth.

I triple heat embossed the top layer of the heart shape in silver powder to give it a metallic look  that is very pretty and added it towards the bottom of the card

The sentiment has been stamped onto parchment and heat embossed in silver too and then I ran a silver pen along each edge of the parchment

The flowers are from Wild Orchid Crafts and I have curved them around the top of the card.

The sparkle is added with Glitter Magic  and small Diamanté from Want2Scrap dotted around the petals.

More tomorrow ...

Hugs xx


January 05, 2016

Tuesday Tutorial - Bracket Borders One

Hi Everybody,

Todays pretty card is once again using an older die that some of you may already have in your crafting "Stash"  I know that many of you have said that you really appreciate tutorials with older Spellbinders dies as we sometimes forget that we have them stuffed away in a cupboard.

Well it's time to get them out again and put them back to work making you some lovely cards. After all dies from any company are a considered purchase and we want to get as much out of them as we can ... Right ?? Right !!
 Spellbinders Supplies:


With  die #7 Matting Basics A cut two panels in white to  Create a hinged card
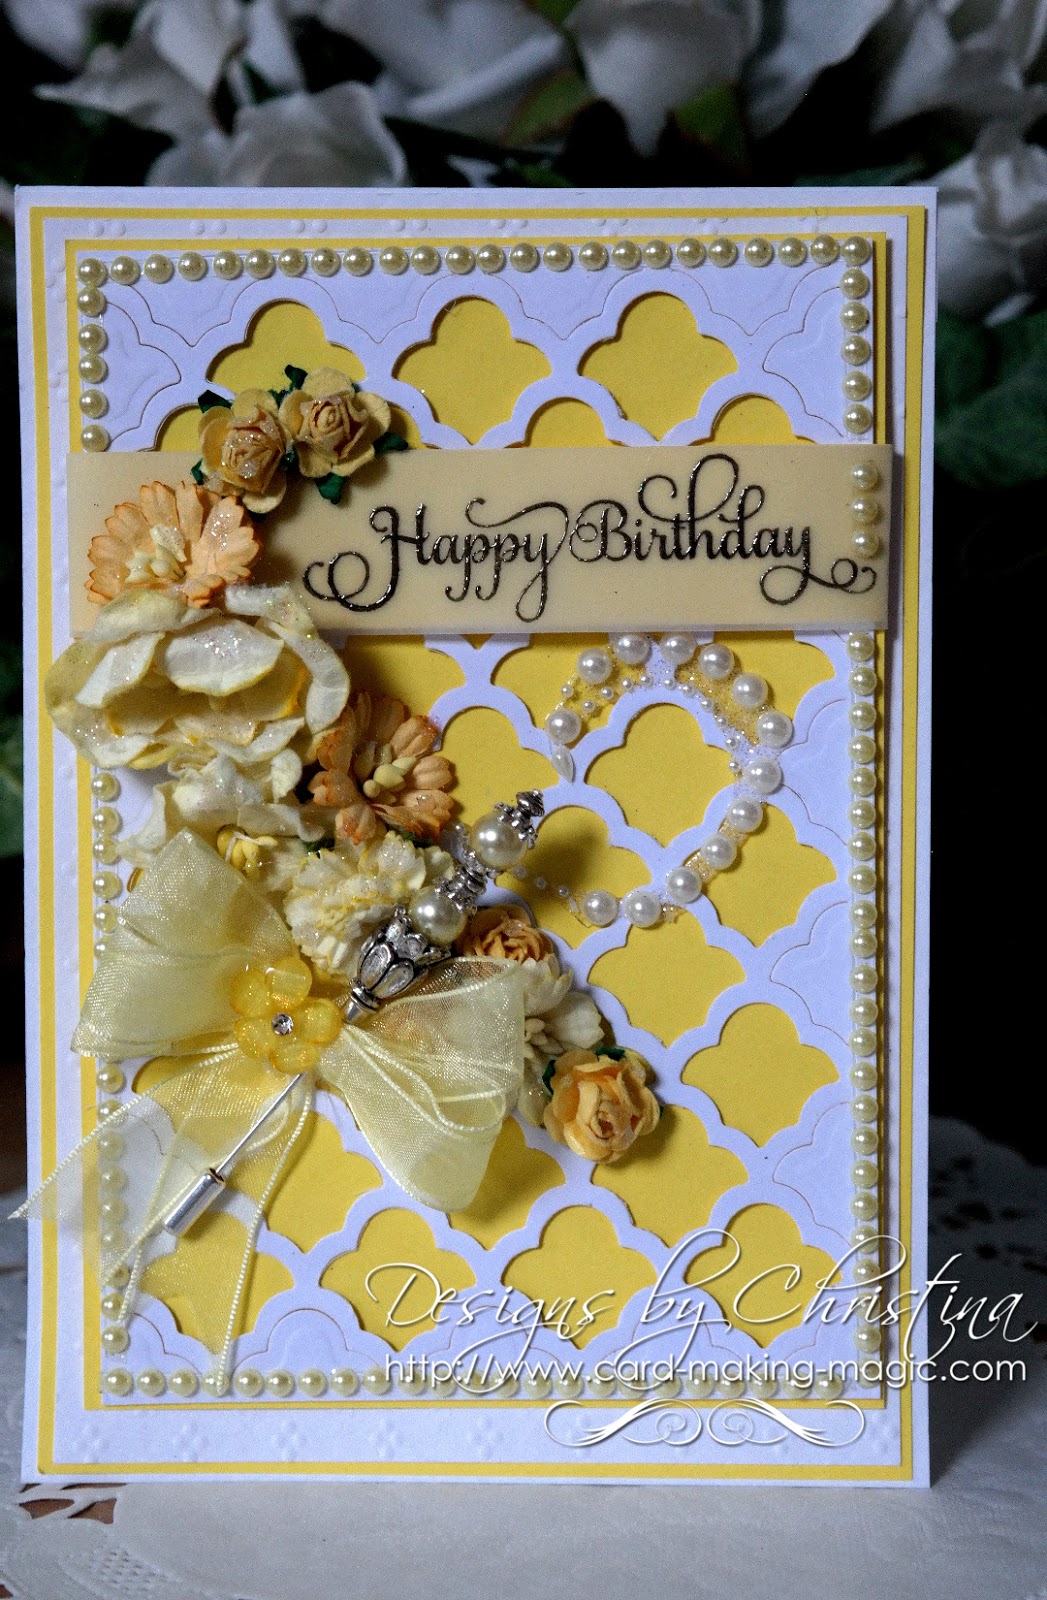
With  die #7 Matting Basics B Cut one layer in pink
With die #6 Matting Basics A cut another panel in white 
(Please remember that #1 is always the smallest die)
With the smaller white panel choose one of the cutting edges and one patterns from the Border dies.
Add them to your card with the cutting edge facing down and tape in place to prevent them crossing over each other.
I placed mine about two thirds of the way down the card. This will give you two pieces once the die is removed
There is no need to emboss with the die as you are going to place these into a lattice folder and dry emboss them
Once embossed lay them onto your pink layer and decide on the sentiment. Stamp and heat emboss this in white leaving enough of a gap in between the two fancy edge to be able to read it 
Trim down these two panels so that a small border of the pink card shows around the edge
Add foam tape to the back  of both pieces and wrap the top and bottom panels with some ribbon.
Secure the ribbon at the back and then add both panels to the pink layer and then add all to the base card
From the ribbon make some small bows to be added to the top and bottom.
Arrange the flowers as you would like them to cross the channel you have created and then finally add a small pearl or gemstone to each of the cross sections in the lattice pattern
Add larger pearls to the knot in the bow

The particular die that I have used is now retired from Spellbinders website but if you don't have one and like the look then you could always go for the  Scalloped Borders Three  which has a very similar shape

More tomorrow...

Hugs xx


January 04, 2016

Seasons Giving Blog Hop Winner

Hi Everybody,

Thank you all for your support through the blog hop and I really hope you enjoyed seeing all the other blogs on route.  The draw was closed at midnight  GMT last night and so if you tried to enter your name after that you will have been disappointed.

The winner has been chosen and an email sent to to notify them of the win and the winner is ...

Brain K ...
Could you please email me 
christina@card-making-magic.com
your postal address and the prize will be on its way to you straight away.

Please let me know when it arrives with you and I really hope you will like it.

More tomorrow ...

Hugs xx

Organising Peerless Water Colours

Hi Everybody,

Water colouring is something that I have started to enjoy doing and I have some Peerless Water Colours that come in swatches

They came in a little organza bag from Jane Davenport  and they are beautiful colours

But I don't want to have to go through all of them each and every time I want to paint and so they needed organising.

I bought an inexpensive plastic book that has pockets inside and I set about storing all my swatches in colour order.  This doesn't have to be complicated but it will take you a little bit of time to do it ... but believe me it will be worth while once the job is done.

I thought it would be better to show you what I did rather than simply tell you and now I can reach for them whenever I want to paint.


I will be adding some videos with these particular paints and hopefully giving you some ideas on how to use them.

So if you have water colours then maybe it is time to get them out for a little practise together and we can create some really pretty cards

More tomorrow ...

Hugs xx

January 03, 2016

Sunny Yellow ...

Hi Everybody,

This is my style of card and I love making these ... full of flowers, ribbons and pearls, and I will be showing you more of this style this week.

The sentiment if from JustRite Stampers and is one on the sheet of many really useful wordings

The background is Spellbinders   Grateful Lattice  and it creates a really pretty backdrop that has been layered over the  Daffodil Yellow card.

All the card I have used is from   Papermill Direct  and is one of their summer colours of 255 gsm card stock.

Clicking any of  the underlined words will take you to the page to view the product featured.

The flowers are from Wild Orchid Crafts and are a lovely mixture of Roses, Carnations, Camellias, Apple Blossom and they have all been sparked with Glitter Magic

The organza ribbon is from Mei Flower and it has been tied in a double bow. Into the bow I have pushed one of my handmade HatPins and it matches the colour scheme

The  flourish coming from the flowers and the edging pearls are from Want2Scrap  anmd add the finishing touch to a lovely card.

Don't forget that the prize on offer in the Seasons Giving Blog Hop is still there until midnight tonight so if you haven't added your link now is the time to do it.

More tomorrow ...

Hugs xx


January 02, 2016

Cute Bunny ...

Hi Everybody,

How cute is this image and it has been coloured with Gansai Tambi water colours.

I added the stripes to the shirt with a white gel pen and the background is created freehand with the paints.

The flower and the patches have been sparkled with the Wink Of Stella clear glitter pen.

The fence and  the birds free hand drawn with a black fine liner to add a little more to my scene

I really enjoyed colouring this one and it took me ages to finish the card.

I added it all to a piece of white craft foam and then layered it onto the base which is a top folded card

This would be ideal for a childs birthday and I will be playing some more with these lovely water colours ... and doing some videos too.

Don't forget to add your name to the  Seasons Giving Blog  list if you would like to win some "Goodies"

More Tomorrow ...

Hugs xx 


January 01, 2016

Seasons Giving Blog Hop year 4

 This is the time of year when I would like to wish you all a really
  Happy New Year 
and to say a massive
Thank You
to every one of you for all the support that you have shown me throughout the past year. 

You are the ones that make all the tutorials, videos and blog posts worth while.

I love to read the comments, that you make the time in your busy days, to leave for me and this is my way of saying a huge thanks to you

 Last year I took part in a really huge Blog Hop that went around the world and introduced you to some really talented artists in many different areas.

This year we have joined forces again to show all our followers how much we care and to take you on a hop to delight your senses.  Many of the people and companies taking part will be giving a little something back as a way to say thanks.

The list is long but a whole lot of fun and please leave them a comment as you visit, and if you would like to leave ME a comment here then please do so at the end of the post. 

You can also become a regular follower by adding your name to "Join This Site"  in the left hand column.

So my "Give Away" for this year to one lucky winner will be the following items....

2 pks Hobby Craft Rhinestones
2 pks Creative Expressions Pearl flourishes
1 pk Glitter
2 Humphreys Corner  un-mounted Stamps
4 reels of ribbon
1 metre length of Guipure Lace
5 Decorative Hat pins

Just leave me a comment and add your name to the InLinkz box at the end of the post  and one name will be chosen from the list and the winner announced in a blog post so please come back and check if it is your name that is shown

The draw will be open until midnight on the 3rd January and then one name will be chosen at random

The winner will be notified by email and the name announced in the blog post on Monday the  4th Jan 2016

It's time to go hopping and I hope you will enjoy the others ...

Christina Griffiths   (You are here)

December 31, 2015

Water Coloured Peonies ...

Hi Everybody,

Water colouring is fast becoming my way to relax and I am thoroughly enjoying playing with the new Gansai Tambi set that Santa brought me

The image is from the stamp set Peony Scrolls from Altenew and it also has a matching die set.

I bought mine from Make the Day Special and at present they are upgrading their website so I will link to them for the stamp and die at a later date.

So tonight is New Years Eve and if you are out and about then take care and have a good time

Please come back to visit tomorrow as there is a really good prize of crafting "Goodies" on offer for you to start the New Year

More tomorrow...

Hugs xx


December 30, 2015

Not a Square !!

Hi Everybody,

On Monday  I featured a card that used the Square dies from Craft Stash and this card is using the exact same dies.

I have used them in a different way that disguise the fact that it is a square die set.

Here we have the Scalloped Square Frames cut across the diagonal and added with foam pads into a diamond shape and added to the top and bottom of the 5x7 card base

The background panel has been dry embossed with European Tapestry  from Spellbinders.

The Diamanté flourish is from Want2Scrap and I have added it either side of the sentiument.

The   "Thank You"  is part of a set of dies also from Spellbinders called Phrases Two  which I have cut several times out of silver mirror card and craft foam to give it height

A pretty card with lots of texture to it and that makes it more interesting than flat, plain, empty spaces.

About Tutorials ...


The other day I gave you the link to the tutorial that was on Spellbinders Blog Post and it did not work ... my apologies ... here it is again 

Making a little gift box with the Flourish Frame Pocket  

Please remember that all the tutorials that I have done are clickable links for you to go to that page

They are also added to the appropriate  sections titled Video Tutorials at the top of the page or Tuesday Tutorials in the right hand column and they will always be accessible for you to use.  The list of tutorials is getting long and I hope you will revisit them for ideas if ever you get stuck

More tomorrow ...

Hugs xx.


December 29, 2015

Tuesday Tutorial - Floral Burst

Hi Everybody,

Do you have any of the Cut, Fold and Tuck dies in your crafting "Stash"? This one is the Floral Burst from Spellbinders and it has been around for quite some time.  

But for me it is time to revisit some of these older dies and put them to good use and for this card I have used several different sets.
I am sure that many of you will have dies that have not seen the light of day for some time too
Spellbinders Supplies:
Other Supplies:
Instructions:

With die #7 from Matting Basics A cut two pieces of white card and Create a Hinged Card
With die #7 from Matting Basics B cut another panel from some patterned paper
(Please remember that die #1 is always the smallest)
Hand cut another layer in plain card to sit in between the die cut ones
Glue the two layers together but don't add to the base card yet

With the largest die from Detained Scallops and Decorative Labels Eight  cut one panel in white and add thin foam tape to the back of each
With #5 Labels Eight cut another plain panel in white and dry emboss this

With Luscious Lime cut the Floral Burst and fold each petal back and tuck under the previous one
Place small foam pads in strategic places at the back of the shape
Stamp and heat emboss the sentiment onto some parchment that is long enough to wrap around all the layers. I placed mine at an angle for a different look this time

Have a practise run to see how you would like the card to look and when you are happy with it remove the backings from the foam tape and complete.

Finish the card with any embellishments that you have 

More tomorrow ...

Hugs xx


December 28, 2015

Friendship Card ...

Hi Everybody,

This card is another one that I made as part of my commitment to  Craft Stash 

With the  Scalloped Square Frames  set I have threaded some thin blue satin ribbon around the edge and added a triple bow to the side.

The centre piece of the set has been cut three times and layered up ... off setting each piece to make it look like a round centre.

The single Lily is from Wild Orchid Crafts and that is all the card really needs to complete the look.

The blue pearls are from Want2Scrap  and are dotted in each corner of the embossed back panel.

Many of the cards that I have made are featured on their Facebook Page so please pop over and take a look


More tomorrow ...

Hugs xx


December 27, 2015

The Isabella Show ....

Hi Everybody,

There have been no blog posts for a couple of days but I have not been idle in the background. 

Yesterday  my blog post for Spellbinders went "live" and I did a tutorial creating a really pretty box with   Flourish Frame Pocket

Fill these with anything that you like and they are the perfect small gift for any time of year.


Yesterday was spent with family and having fun with Isabella. If you have followed me for a while then you will know that Isabella is my adorable and much loved 4 year old Great Granddaughter

 One of her Christmas Gifts was a microphone on a stand and she invited us all to the    "Isabella Show"  where she sang "Rudolph the Red Nose Reindeer"  and "When Santa got stuck up the Chimney" amongst others.

More tomorrow ...

Hugs xx


December 25, 2015

Merry Christmas Everybody ...


This is to each and every one of you and may your Christmas be all you hope for.

Much Love

December 24, 2015

Friends Are ...

 Hi Everybody,

Todays card is one that I made as part of my commitment to Craft Stash and this and some of the other that I have made are featured on their Facebook Page

This die is the Scalloped Circle Frame  and I have cut the large circle several times and layered them together to give height to the die cut.

The sentiment has been added to the centre of the circle and some gingham ribbon placed at the top.

The buckle is from Wild Orchid Crafts and makes a pretty addition to the ribbon which is from Mei Flower

I have cut several flowers from the smaller die in the set and layered them onto the circle with some white leaves

The leaves and the glitter ball centres to the flowers are both from WOC

I have used Spellbinders  5x7 Matting Basics A&B  to create the hinged base card

More tomorrow ...

Hugs xx