Beautiful Card Designs Made Easy

April 16, 2015

Weave Effect ...

Hi Everybody,

This pretty design is using both of the new Weaving dies from Sue Wilson and they give a really unusual effect to your cards

The titles of them are  Weaving Dies Classic  and Weaving Dies Striped   and both are available from Joanna Sheen

They can be used separately or together and the look will be different each time

For this card I have used both together to create the pink and white weaves  and then added a large rose from Spellbinders   Crafty Flower Four

The vine behind the flower is  Foliage Flourish  and the sentiment is  Sentiments Three 

The base card is created from Grand Large Labels but this has been retired from Spellbinders website.

How ever you may still be able to find retired dies if you visit other companies that deal with "Close Out"  dies.

Have a browse around  Save On Hobbies  and the price will be reduced too but once they are gone there will not be any more

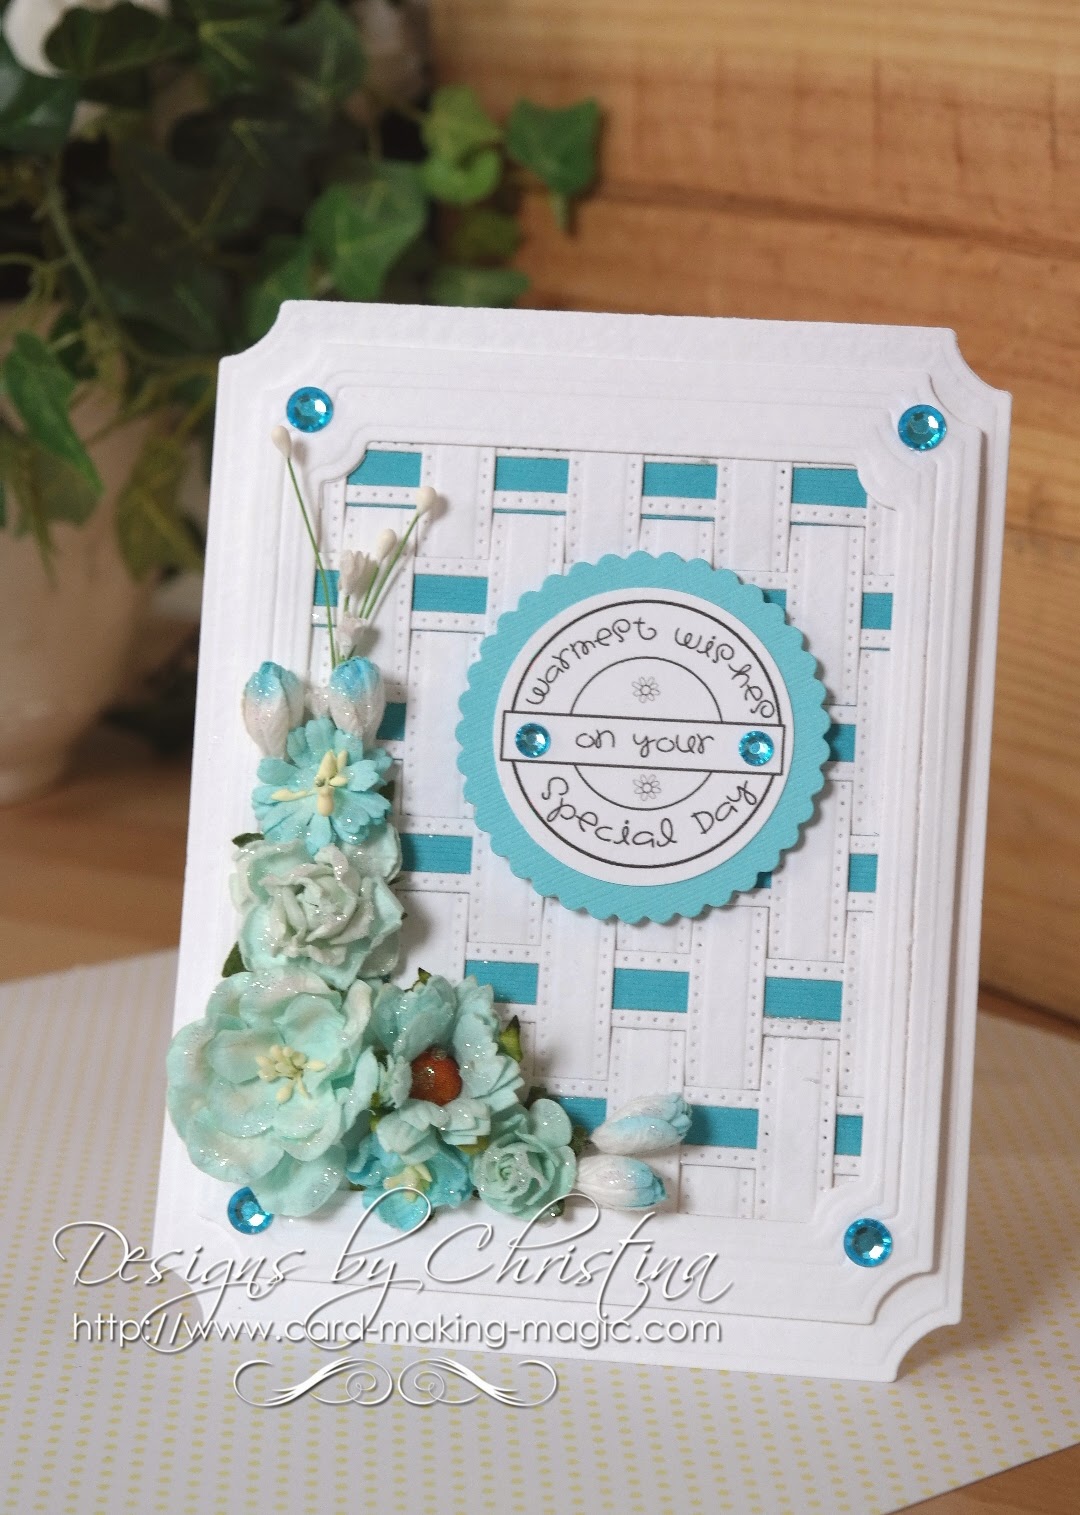
The turquoise card has used both dies again but I have added in the color just once and it gives another look to the design

The flowers are from  Wild Orchid Crafts  and I have added diamante into each corner from   Want2Scrap

The sentiment is from Lili of the Valley  and there are many for all occasions for you to choose from

More tomorrow ...

Hugs xx


April 15, 2015

International Ambassadors Blog Hop ...

Hi Everybody,

It's time for another informal blog hop with the International Ambassadors and this time we are going with the theme of "Spring".  I hope you will join in and pop along to the others as it is a way to get to know each one of us a little more and to see our different styles

We are Linda Lucas from Australia,  Yvonne Van De Grijp from the Netherlands and Christine Emberson and myself from the UK.   I will add the links to their blogs a little later so please leave each of  them a comment to let them know you have been  ... and they will be so pleased if you do.

For my card I have chosen the   Pretty Petals   and used sets A and B

I have cut the flowers from pale pink and white Craft foam and it really is a fun product to play around with and you can use it in many different ways.

The leaves have been handcut from green foam and I have used brads to hold the parts of the flowers together.

I have embossed all the layers to the card with both sides of the Patchwork Embossing Folder

These are the components of my card and the sentiment has been cut from pink foam three times and then layered together

It really is an easy card to make and I think it fits the "Spring" theme beautifully

And now is your chance to visit the other designers and be inspired by their lovely work ...


Christina Griffiths (You are here)
Linda Lucas 
Yvonne van de Grijp  
Christine Emberson

I hope you enjoy your visit to the others and will pop back regularly to see what we are all doing.

More tomorrow ...

Hugs xx


April 14, 2015

Tuesday Tutorial - Swirl Bliss

Hi Everybody,

This is a die set called Swirl Bliss that has been designed for Spellbinders by Becca Feeken and it is such a pretty set to work with.  There are lots of things that you can do with it and this is just one simple idea that you may like to try.


Spellbinders Supplies:

Create a six inch square base card from cream and cut a  slightly smaller mat in gold.

Cut another still slightly smaller mat in cream and emboss this layer.

Glue the embossed cream and gold layers together

From the outside edge of the rectangle die cut three solid shapes in gold

Add the filigree die to the solid die and cut together three shapes from cream 

Layer these together to make the lacy panels and add foam tape to the back

 With the sentiment die press it face down into some Versamark and then cut and emboss it

Then sprinkle it with some gold embossing powder and heat emboss
Add the panels equally spaced to the layers you created

The foam tape will raise them up from the base

Wrap some ribbon around them all before adding to your base 

Add the sentiment with foam pads and add in a matching bow.

Use a sparkly centre for the bow to hide the knot.

More tomorrow ...

Hugs xx

April 13, 2015

My Ladies Cards...

Hi Everybody,

The picture does not do these cards the justice they deserve

Both are from my two ladies in the Card Class last week and in the class we used Acetate to create the front of the cards

I like to try something different each week and it seems to work for all of us.

This week Mary has gone for the more subdued option and Brenda has chosen the lovely blue for hers.

There is a Video Tutorial to show you how the card is made and it is not long ... Acetate Front Card Tutorial   It will take you through the steps we did and there are only slight differences even though the video was made a few years ago

On these cards we have used Wild Orchid Crafts  flowers  and some swirly diamante flourishes from Want2Scrap and both ladies went away happy with their makes

More tomorrow ...

Hugs xx


April 12, 2015

Made for me ...

Hi Everybody,

This beautiful card was made especially for my by Paula Di Giovanni and sent to me all the way from Florida

Paula and I have never met but she is an avid reader of my blog and often leaves me lovely comments

She has also been one of my Friday Freebies winners

Paulas'  card is much prettier in the hand than the picture shows and I will add it to my "Keepsake" with the other cards that I have had.

I have had lots of cards from you ladies out there and each one is treasured.  But please have faith in your own abilities because most of the cards I have had have all said more or less the same thing and that is the lack of confidence you have in yourselves.

Each card I have received is beautiful and I thank you from the bottom of my heart for taking the time to make and send them to me, and I am happy to show them to the world

More tomorrow ...

Hugs xx