Beautiful Card Designs Made Easy

July 12, 2015

Blue Birthday Card

Hi Everybody,

Todays cards is another of my designs that is featured on the Craft Stash website.

This is using the Ornate Hearts from their Apple Blossom collection of dies and it can be used in several ways

For this card I have chosen to use the dies as a frame and added it to an embossed background ... that sadly has just been retired from Spellbinders website

The flowers are from Wild Orchid Crafts and are a lovely mixture of blue and white flowers.

The ribbon is slotted through the lace and added to the bottom of the layers.

The words are Spellbinders Sentiments Three  and I have cut it from Craft foam and a dark blue card and layered them together

More tomorrow ...

Hugs xx


July 11, 2015

The Winner Is ...

Hi Everybody,

What a beautiful day this is and this afternoon Griff and I are going to help my daughter Vickie put up a trampoline in her back garden for the delightful Isabella. 

I will take some photos to share with you as she is coming to play at her Nana Vickies house later.

But for now the draw has been done and a name chosen to win the lovely sparkly gold card from yesterday.  It is much nicer in real life and up close you will be able to see the smudged effect a lot better.

It is part of the stamp and not my mistake and it looks really good. The card is coming to live with you ...

Ruth M ...
and so can you please email me with your full postal address to
christina@card-making-magic.com
You have 48 hours in which to claim the card and I hope you will like it when it arrives with you.

I am back at Create and Craft on Monday 13th July with the Spellbinders One Day Wonder so I am hoping you can join me at 4pm and 7pm 

More tomorrow  ...

Hugs xx

July 10, 2015

Friday Freebie - 068

HI Everybody,

This card is truly sparkly and the photo does not do it the justice it deserves.

The stamp is from the Sheena Douglass  "Little Bit Sketchy"  range and this is her  Through The rain  stamp set

When I first showed this card somebody wrote to me and said  "What a pity you smudged it ...."

Nope !!  I didn't it is supposed to be like rain dripping off the words and I embossed them in gold.

The background is also stamped and then added with sparkly glitter ...  but you will see what it is like if you add your name and leave me a comment to win it

You wont be disappointed with it.

A name will be chosen from those comments and the winner announced tomorrow.

You will have 48 hours in which to claim the card and then I will need your full name and address complete with country and post/zip code.

More tomorrow...

Hugs xx

July 09, 2015

Text Stamped Background ...

Hi Everybody,

This is another of those fun backgrounds and as promised I have done a video  on the making of this card.

I have used the stamp set from Spellbinders Celebration Collection called   Your Day    and it has several stamps on the sheet

Part of the stamp set was used to create the background and this is something that you can do with any text stamps that you have in your own "Stash"

You see the thing to do is simply .... Play !!  get out your stuff and see what you come up with and if you don't like it then start again.

But you may surprise yourself and end up with some thing that you really like and may want to repeat gain on another project.


The other card on the tutorial was made the same way for the background but the Wizard image is one of those from the CD The Next Big Thing from Just Inklined and I am sorry to say that the CD is no longer around.

You may be lucky to find one for sale privately but you will have to search long and hard to find it.  I colored mine with Spectrum Noir pens

I fussy cut him out and added him with a double layer of foam tape along the centre part of the image and he stands proud of the card for effect.

I added in extra peals to both cards for a little extra embellishment and the elephant has the Googly Eye added too.

More tomorrow ...

Hugs xx

July 08, 2015

British Grand Prix ...

Hi Everybody,

Thank you so much for all your good wishes for a really pleasant day out for us

We went to see the Formula One Grand Prix at Silverstone on Sunday and it was fabulous.

There was a little rain towards the end but it did nothing to dampen the atmosphere

The race was exciting from start to finish and Lewis Hamilton won and the crowd went wild

Griff chose the seats well and we were right opposite the new Pit lane.

This was the view we had of all the action as they lined up the cars on the grid and a perfect view of the lights calling them to action and then they were off.

We went a few years ago and it was really noisy but this time with the modifications that have been made to the cars it wasn't too bad.

Over the course of the weekend it was said that 250,000 people had visited Silverstone and the audience for the actual race was 175,000

Some crowd ... of very enthusiastic supporters all cheering for their individual drivers.

These are jut a very small portion of the people in part of the stand that we were in
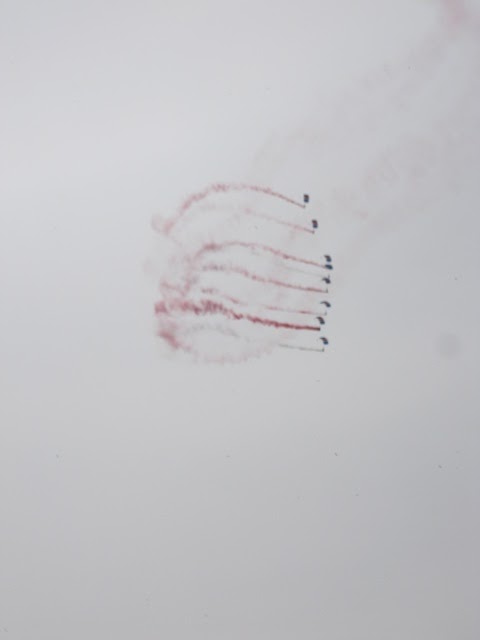
During the day we had a parachute display team, a very noisy air display, a brass band and Alesha Dixon sang the National Anthem

There was food stalls everywhere and lots of places to buy F1 souvenirs.

Other races went ahead during the day,  it wasn't just F1,  and we watched some of them too.

Some famous faces included Jackie Stewart, Stirling Moss, Damon Hill, some of the Spice Girls and the usual faces that introduce the F1 on TV each time there is a race

 It was interesting to walk around and see other things and there was even fairground rides for the children.

This is the vehicle that holds the land speed record and it is very impressive and Griff was particularly interested in this

There was even a big red double decker bus that had been turned into a bar and that got really busy later on in the day.

So yes we had a really good weekend and it was good to get back home again yesterday.

I am glad that my blog posts have gone out as scheduled ... especially my Tuesday Tutorial

And today we have completed two videos that will be with you shortly.

Next weeks Tuesday Tutorial is a fun card that I hope you will enjoy.

More tomorrow ...

Hugs xx


July 07, 2015

Tuesday Tutorial - Labels 41 Decorative Accents

Hi Everybody,

I have a pretty Gatefold Card in black and white for you today and as always all the steps  are shown so that you can  get this look for yourself.

When working with any of the Spellbinders die sets please remember that number one (#1)  is always the smallest 

Spellbinders Supplies:


Other Supplies :

Take an A4 piece of card and trim along the long side to 15cms and then from each of the short sides measure in by 7.5 cms You should then have a gate-fold card that meets equally in the middle 

With die # 8 from Matting Basic B cut one black panel, this is to line the inside of the card.

With die # 5 from Matting Basics A cut another black panel and with #5 Matting basics B cut a patterned panel ...  glue these two together for the front of the card and you will have a thin border around the edges 

With #7 Matting Basics A I decided to cut another patterned panel to layer on top of the black liner. These can be glued to the inside of the card

For the Gate fold panels at the front of the card measure two black panels and two patterned panels so that they fit one on top of the other with a small border around the edges. Glue them in place

Once you have the inside and the side panels glued in place you can add the topper to the front. Add glue to one half of the panel only and add the panel carefully to one of the gate folds.  Adding glue across all of it will glue your gate folds shut .... Ah! Ah! not right !!

With #4 Labels 41 Decorative Accents cut the shape in black. We are going to use the frame but keep the centre part for another project

Stamp and emboss a sentiment and cut it out with die #3 Labels 41
For the panel you need to layer it onto you can use die #3 from Decorative Accents but I chose to use #3 from Decorative Elements because it is slightly larger

Add glue to the frame work panel and place it on the panel at the front and then layer up the sentiment and add that to the centre with foam tape to raise it up. 
Result --- one pretty card for any occasion 

More tomorrow ...

Hugs xx

July 06, 2015

Distress Inks .....

Hi Everybody,

Todays card is created by playing around with Distress Inks to create this Bokeh Effect background for my card.

This is a technique that has been around for ever and it is very easy to do.

Translated Bokeh simply means Blurred and it is a photographic term.

Have you ever looked at a film,  a photo or a magazine page when they have all the lights in the background blurred and running in to each other?   Well that is Bokeh

The sentiment is stamped onto a  Classic Circle and then mounted onto  Spellbinders  Symbology Frame

I have simply turned the orientation of the frame around for a different look

Around the sentiment I have added in some faux stitching and tucked some silver twine behind it

Then I dotted sequins around the card and mounted the panel onto black card before adding to my base.

More tomorrow ...

Hugs xx

July 05, 2015

Two techniques - One card

Hi Everybody,

On todays card I have combined two very different techniques to give a really pretty look.

The background is called Caught In Crystal and the video for this will be with you soon.

The Roses are water colored with Aqua Tints from Spectrum Noir 

The stamp is the Vintage Flowers  from Make The Day Special  website and they have some beautiful stamps to choose from

The panel is layered onto black card and added with foam behind it to raise it up.

I am playing a lot with these Aqua Tints and really liking the effect and I will get better as I learn more about water coloring ... I promise !!

More tomorrow ...

Hugs xx

July 04, 2015

This weeks Winner ...

Hi Everybody,

A rainy start here in the North West but hope fully it will brighten up later.  This is a short post today and both tomorrow and Mondays post are scheduled because once this post is done I am off to pack to go to Silverstone.

Tomorrow is the Formula One British Grand Prix  and there are two little seats with our names on them.  Griff is an avid F1 fan and I am going along just to keep him company you understand.  

We made a deal a long time ago that he supports me with cards and Harry Potter Films  and I support him with F1 and I have to go any Mission Impossible or James Bond films too
. Not a bad deal eh??

So on to todays winner and the name drawn this week is ...

Ramona Burns ...

Please email me 
christina@card-making-magic.com
with your postal address and the card will be on it's way to you
You have 48 hours to claim the card and then it is gone to someone else.

Have a good weekend wherever you are 

More tomorrow ...

Hugs xx

July 03, 2015

Friday Freebie - 067

Hi Everybody,

Todays Friday Freebie is in a lovely shade of peach and it has self adhesive pearls from  Want2Scrap  on all the cross sections of the top panel.

The bottom detailed part is cut from the peach card and the bit that is left over has created the top panel.

Can you see where it would fit?

I have used the Petite Monarch  which is such a pretty die from Spellbinders

Both panels have been embossed using a different pattern and the peach one is raised with foam tape

The sentiment is from my "Stash"  and the pretty flowers is from Samaflora and is created from a pearly card.

Now if this is a card that you would like to win then join the group of followers and leave me a comment.

From those comments a name will be drawn in the morning and the winner announced in the blog post.

Please do not add your name if you are going to be unable to check the  Saturday Blog post as you only have 48 hours in which to claim the card. 

More tomorrow ...

Hugs x

July 02, 2015

Celebrate Background ...

Hi Everybody,

Todays cards are created with the stamps from Spellbinders Celebrations Collection

These are from the "Your Day"  stamp set and I have chosen to use the Elephant and her parcels for one card and the tortoise for the other

I have used one of the text stamps stamp, set at an angle,  to create the background and then stamped and heat embossed the animals onto other smaller pieces of card.

They have been colored with Spectrum Noir pens and then the text and the animal panels mounted onto black card.

The background layers have been laid flat to the card base but the animal panels are raised with foam tape.

The little splashes of color are enamel dots from Want2Scrap  and they come in other colors. And finally the addition of Googly Eyes make the characters a little special

A stray away from flowers, ribbons and pearls ... but a novel card all the same.

I like to try different things from time to time to keep the crafters block away.

More tomorrow ...

Hugs xx

July 01, 2015

Blue Roses ... Labels Forty

Hi Everybody,

This lovely blue card is in several different patterns but they all work nicely together.

Don't be afraid to mix stripes and ginghams with spots and florals because as long as the tones ore the same the patterns will work.

Both of these are from Lime Tree Craft and I bought them at the craft shows I go to. The card is a smooth, matt, top quality feel and it smells nice too

For this card I have created a 5x7 hinged card  and then layered it with gingham

The detailed panels are from Spellbinders Labels Forty and is the Classic Collection

I have added flowers from  Wild Orchid Crafts  threaded  blue ribbon through the white lace which is also from WOC

Altogether a pleasing little card suitable for any occasion.

More tomorrow ...

Hugs xx


June 30, 2015

Tuesday Tutorial - Victorian Arch

Hi Everybody,

Todays tutorial use the Victorian Arch from Spellbinders and this is quite a large die and can be used in lots of different ways.

For my card I have created the design in turquoise and white and added in some really pretty flowers.


Spellbinders Supplies:

Instructions:


 Cut two pieces of white card to create the base  with #8 die from  6x6 Matting Basics A and two layers in the color of your choice from #8 from 6x6 Matting Basics B  One of these will be to line the inside      (Please remember that #1 is always the smallest die)

 Cut another layer of white card from the #7 die from Matting Basics A and this is the layer we are using first


With the centre part of the Victorian Arch add it to this white layer and keep it close to the edge ... tape it in place so it won't move and run it through the Grand Calibur 


Flip the die over and tape in place again to line it up with the first cut circle and then add foam pads to the back where they cannot be seen from the front


Attach this piece to the colored layer leaving a small border around the edges and then cover the join with some ribbon


From the Royal Circle #2 cut one shape and add foam pads to the back of this (You can use any circle die that you have )


With the chipboard word I have colored it with a deep turquoise ink pad and then covered it with clear embossing powder and heated it ... then repeated the process to deepen the color

Add in the flowers and a bow into the position you want them and add a sparkler to cover the bows knot.  Line the inside of the card with the second piece of colored card for a really pretty finish. 

 More tomorrow ...

Hugs xx


June 29, 2015

We are all Special ...

Hi Everybody,

Todays card uses a mixture of striped card from  AnnaMarie Designs  and some silver foiled card from  Hunkydory  and although completely different they play nicely together.

I have created the card from 5x7 Matting Basics A&B from Spellbinders  and the foiled card is Labels Twenty

I have used the matching Diamanté from Want2Scrap  to surround both layers of the label

The satin ribbon around all the layers is from  Mei Flower and the lovely sentiment is from  Lili Of The Valley  which has been stamped in black and clear embossed

The bows centrepiece and the flowers are from Wild Orchid Crafts  and are a mixture of Roses, Gypsophillia, Lilies, Apple Blossom and Magnolias.

Just a couple of things I would like to say ... First is that I am going to be stuck with three blue card if the ladies whose names were added as an extra on Saturday to win them don't come forward.  Here are the names again ... and then I give up ....
 Donna Sherman ... Jayne Buckley ... Sandra Smith ...
I know we humans like to skim a page but you will miss out if you don't read the blog post completely

Secondly the link to the
Inspiration Page is at the top left of the page and it is a video card collection. Click the photo at the top and it will take you to another page.

It is NOT the  "My Designs"  which I have now moved to the bottom of the column.  That is simply a slideshow from Photobucket and there is nothing to click there and you may get an error message if you try to open that. 

And to the ladies who have already found it Thank You for the lovely comments you have left for us. We will be adding more as often as we can

And don't forget that the card photo under the heading Tuesday Tutorial is also clickable and will take you to another new page with lots of tutorials from this blog ... a new one every week ...and Spellbinders with a new one every month. 

More tomorrow ...

Hugs xx


June 28, 2015

Batch Card Making

Hi Everybody,

Sometimes when you have a lot of cards to make it can be a good idea to make them in a batch

Here I have four card that are created in this way and it is a quick and easy way to work.

By that I mean do all the stamping ... all the die cutting ... all the embossing ... adding all the flowers from Wild Orchid Crafts  last and arranging them as you please

The first thing I did was stamp the sentiments on each of the cards.

They are part of a collection from  Make The Day Special 

MTDS is a UK based company but they have a lot the US stamps. This is where I have bought the stamps that I have been water coloring

Here is one of the new Avery Elle stamps called  Simply Said    and there all of these and more are on one sheet.  It matches the die that says  You   which I cut from Craft Foam and again in card.  I used double sided tape between the foam and card to glue them together.

I have created my base card and layers with  Pierced Rectangles from Spellbinders  and the smallest layer has been embossed with  Framed Canvas  and both are part of the  Celebrations Collection

Making cards in this way is excellent if you are making a batch of Thank You cards or invitations. Please click the links to view the products.

More tomorrow ...

Hugs xx