Beautiful Card Designs Made Easy

April 27, 2017

Spellbinders Curled Grace Ovals

Hi Everybody,

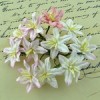
Today I am joining forces with Olga Direktorenko and in this collaboration video we have each made a shaped floral card.

I have tried to use an unusual shape for mine and in the video I show you how to fold the card to get the same look

It's not new it has been around for many years and I did this in a video about six years ago now.

But this will refresh your memory if you tried it then and show you a new idea if you didn't
It is really easy to do and you can dress it up any way you like.

But if you add this many flowers to it then the chances are you will need to make a box for it even though it will fold flat.

I think it looks really attractive and would look good for any occasion.

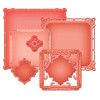
Here is the  Spellbinders Curled Grace Ovals video for you to view


There is space on the back or the inside of the card for you to add your own verse or sentiment ... or even a note to the recipient if that is what you want to do.

But whatever you do have fun making it and leave both Olga and I a comment if you have popped along for a visit.

Here is the link to Olga Direktorenko - Flower Cart    to see what she has designed for you. 

Her Cards are so elegant and  this one is no exception  and well worth a visit


More tomorrow ...

Hugs xx


April 26, 2017

Water Colour Wednesday . Blue Flower

Hi Everybody,

Todays card is created with the gift that came free with Simply Cards and Papercraft 160

I did a video using this Hydrangea Set set in February for another way to use the stencil that came in the collection

For this card I have created a background with shaving foam and then coloured the stamped flower with water colours

I used a glue pen on the petals and then covered them with silver foil.

The outline to the flower has been done in a pale grey to shadow it and make it stand out from the background a little.

Apology ...


Now before I close todays post I have an apology to make to everybody .... and that is with regards to the floating cup I featured a while ago.

I promised to make a video on how I made this when I was given this pretty tea set by my daughter.

I took out one cup and one saucer to complete the one shown.

Then I put the rest back in the box and put it somewhere safe until I was ready to use it. And now that time has come .... and it's so safe even  I can't find it !!

I wonder how many are nodding at me now knowing that you have done the same thing ????  So once I DO find it I will do a video to show the process.

More tomorrow ...

Hugs xx

April 25, 2017

Tuesday Tutorial - Dies and Birds !!

Hi Everybody,

I thought I would have a little fun today with the Crazy Birds and I sat and coloured some with bright water colours for this card.  I add them to some ornate dies cuts and the result would be ideal for a male birthday card
Spellbinders Supplies
  • S$-383 Marvellous Squares
  • 6x6 Matting basics A
  • 6x6 Matting Basics B
  • Platinum die cutting and embossing machine
Other Supplies:
  • Crazy Birds
Instructions:
With die =7 from Matting Basics A cut two pieces in white to create a base card
With die #7 from Matting Basics B cut another layer in grey 
With die =6 from the A set cut another in some patterned paper
Cut a smaller layer in another pattern and distress the edges with your scissors.
Glue these layers together
With dies #4 and 5 cut three frames and layer them together with glue
Add the smaller distressed panel to the base with foam pads underneath 
Add the layered squares to the card front with foam pads cut into strips under them
Add a Crazy Birds of your choice to a die cut circle and carefully cut around part of the wing to tuck the sentiment under it
Layer up the other birds to fit around the central image
Add to the card front with foam pads underneath to raise them up.
And there you have a fun card that would be suitable for the men in your life

More tomorrow ...

Hugs xx


April 24, 2017

Autumn Flowers

Hi Everybody,

Last week I made a card for the magazine freebies and in it I water coloured some flowers in shades of brown and mustard and I really liked the look that they gave.

The video was SC&P162 Build a Bouquet  and these are the flowers that were started in the film

So I decided to make a card from the whole panel and I quite like this one with the added lace along the bottom

I simply cut the flowers out with circle die from the piece that I started to colour in the video and then used a larger circle to cut the gold mat

I used the piece as part of my design and matted it onto more gold card

Once layered up with the circle elements no one will know that there is a hole in the under layer ... but I have made use of the embossing and splattering that was done in the film

So two birds with one stone really as nothing has been wasted, and it makes a really pretty focal point for my card.   Swap out the sentiment and it could be for any occasion

More tomorrow ...

Hugs xx

April 23, 2017

Ruby Update

Hi Everyone,

S'me again with more tales of my adventures this week. I am so glad that you like my stories and for those who don't know me I am Ruby the most beautiful English Cocker Spaniel  and I am now eight months old. My colouring is Blue Roan Sable

Here I am soaking up the sun in my front garden and it was lovely and warm.

I have just had a haircut and that keeps me so much cooler

 
I get up to all sorts of mischief and here I was caught in the act of shredding up this sponge all over my mums carpet

She said I looked guilty enough and she laughed at all the mess.


The other day my best friend Dougal came to play and we went to the beach.

We found an old branch on there and we tugged at it to see which of us could keep it

I won of course coz I am the boss even if he is bigger than me !!
My food had been delivered here and my mum opened up the bag so that I could smell the flavours

It was lovely and so in I went to try some more.

I am going to the vets to be weighed this week and have my regular monthly treatments so I will let you know how much I have gained next time

I will be back again soon with more stories to tell you.

More tomorrow ...

Hugs xx