Beautiful Card Designs Made Easy

Showing posts with label Glitter Magic. Show all posts

June 13, 2017

Tuesday Tutorial - Framed Floral Card Front

Hi Everybody,

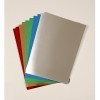
This pretty card is made with a complete card front die and that has to make life more simple when you need a card in a hurry.  I have used bright silver mirror card to create the front and that adds the sparkle that I was looking for
Spellbinders Supplies:
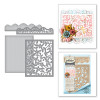
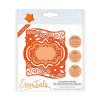
  • S6-117 Framed Floral Card Front
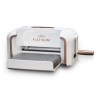
  • Platinum Die Cutting Machine
Other Supplies:
  • Distress Inks
  • Dries Clear clue
  • Foam pads
  • Flowers from Wild Orchid Crafts
  • Glitter from Glitter Magic
Instructions:
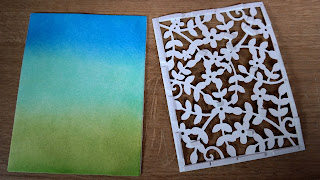
With the outer die of the Framed Floral die cut  three pieces of white stamping card and use two to create the base card
With the third piece and the Distress Inks blend all three colours on to the panel.
I have started at the top and used Salty Ocean, Cracked Pistachio and Shabby Shutters
It looks smoother one it is dry
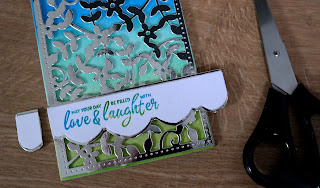
With the Silver mirror card I have cut the two dies together to create two panels ... one for the card front and the other to give me extra leaves to tuck behind my flower
Add small piece of foam to the filigree panel so that they cannot be seen from the front and add to the blended panel
Stamp a sentiment of your choice on to some white card.
 ( I used two of the inks I had blended earlier to create a two tone effect for my words) 
Cut this out with the long solid solid strip.
Then cut another solid strip in the silver and divide this in two.
Arrange around the sentiment strip to leave a small border at the top and bottom
Add this sentiment strip to the filigree panel and trim as needed on each side.
Trimming from the back give a neater finish
Add all this to the base card
Trim some f the leaves from the other piece of mirror card and choose a flower to blend with your colour scheme
Arrange the leaves around your flower and dot the flower with glue and sprinkle with glitter
Dot each of the flower centres with a pearl

More tomorrow ...

Hugs xx 


June 12, 2017

Cassandras Garden from Tonic ...

Hi Everybody,

This pretty in pink card is using a beautiful Tonic die called Cassandras Garden and it is a very detailed and filigree die

It is a six piece die set and it can make three different designs for you just by placing the dies in different positions

I have simply cut and layered the dies up in pink and white card and added the lace at the bottom of the card

The Best Wishes is another Tonic die and altogether this was an easy card to make and the result is easy on the eye.

The addition of the lace at the bottom is just a little touch of luxury and as so little is used at any one time then a metre goes a long way.

More tomorrow ...

Hugs xx


June 02, 2017

Friday Freebie 21 - Shabby Chic

Hi Everybody,

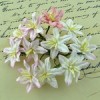
Todays FF is another of the Shabby Chic ones that seem to be going so well.

And this one is really pretty in the hand as the picture does not show the full extent of the sparkle in this card

There is a lot going on and I am sure that you will like it once you have it with you.

So if this is a card that you would like to have then all you need to do is leave me a comment at the end of the post.

One name will be chosen at random and added to tomorrows blog post.

And as I always say .... PLEASE come back and check if it is you.

The name will also be added to the Winners Page in the sidebar to your left.

I cannot chase you up because until you send me your details as the winner I don't know where you are.

I am happy to send the card to you wherever you live ... YOU just need to claim it if yours is the name shown

More tomorrow ...

Hugs xx
May 24, 2017

Beautiful Backgrounds

Hi Everybody,

Todays card was shown in the video that I added last week using stencils that are available from Craft Stash

I really loved this little card once it was finished and it was very quick and easy to do.

The longest part was waiting for the embossing paste to dry ... and I left that overnight to make sure it was really dry.

I mixed Dusty Concord Distress Ink with my paste and added it to the card than dressed it up with my usual Flowers,  Ribbons and Pearls

The flowers and lace are from Wild Orchid Crafts  and the ribbon is from Mei Flower

All the layers are raised up with foam pads and that gives depth and interest to the card.

It is much prettier in the hand that the photo shows ... hope you like it

More tomorrow ...

Hugs xx

May 09, 2017

Tuesday Tutorial - Floral Swirls Strip

Hi Everybody,

Todays card is using one of the strip dies from Spellbinders and this die comes in two parts to make it a very versatile addition to your collection.
 I have used it in two different ways to create the beautiful backdrop for my flowers.
 I have added in all the links at the bottom of the page
Spellbinders Supplies:
  • S4-659 Floral Swirls Strip
  • S6-001 5x7 Matting Basics A
  • S6-002 5x7 Matting Basics B
  • PL-001 Platinum Die cutting machine
Other Supplies:
  • Card from Papermill Direct
  • Flowers from Wild Orchid Crafts
  • Glitter from Glitter Magic
  • Patterned Card from the £££Shop
  • Cosmic Shimmer Glue from Craft Stash
  • Distress Inks from Craft Stash
Instructions:
With die #7 from Matting Basics A cut two panels in white to create the base card
With die #7 from Matting Basics B cut another layer in patterned card
(Please remember that die #1 is always the smallest)
With die #6 from Matting Baiscs A cut another panel in white
Place the centre part of the Floral Swirls Strip onto one side of the card and tape in place ... die cut
Then move it over to the other side of the card and repeat the process
With the outer part of the die cut a panel in patterned paper.
Then with the two dies together cut another panel in white
Ink through this piece before removing it from the die. (I used Dusty Concord & Bundled Sage)
Flat glue the patterned paper to the base card
Add foam pads in strategic places to the filigree panels so that they cannot be seen from the front
Add this to the base layers
With foam pads between these two layer add the filigree to the solid layer and add these two to the centre of the card front.

And this is what it will look like once you have done those steps, and if you wanted to leave it at this stage it is a lovely card and not too fussy for the men in your life.
But I wanted to dress mine up a little more and add in the flowers that I like to use...
From left to right:
Tulips in two different shades of purple ... Rosebuds in two shades 
Roses in 10mm and 20mm ... Lily and one Anemone
Stamp the sentiment onto white card and layered it onto left over piece of patterned paper
Arrange the flowers as you like them and tuck the sentiment into the display
Dot with glue and sprinkle with glitter for a sparkly effect.

More tomorrow ...

Hugs xx


May 03, 2017

I Know .. I Know ...

Hi Everybody,

I know it's not Christmas but this image is one that has been sitting on my desk and so I thought I would add a little water colour to her and make her into a card.

I have used some of the card stack that I bought from the £££shop as a layer on both of the base cards

The background to my image is created with a light water colour wash and then the stars added with a stencil and embossing paste
The bears have been coloured with Gansai Tambi water colours and then I added glue pen and glitter to the hats and stocking tops

The one on the left is slightly different colours for bear, mouse and background but the stars are done the same way.

On both of the card bases I rounded two opposite corners.

Both panels are cut with a stitched border die from the Stitched and Pierced Collection  from Craft Stash and there are lots of shapes for you to choose from


More tomorrow ...

Hugs xx

April 21, 2017

Friday Freebie 015 - Especially for You

Hi Everybody,

This really lovely card is in shades of lilac and white and is lined inside too.

It has a selection of flowers along the side and I have added in a matching hat pin to the display.

The flowers are sparkled and diamante has been added to the centre and also to the double organza bow.

This is on offer today and so if you would like to own this card then all you need to do is leave me a comment at the end of the post.

From those comments a name will be chosen and the winner announced in tomorrows blog post.

I am happy to send the card wherever you live and you don't need to ahve your own blog. Nor does it matter if you have won a card before you can still enter.

Good luck everyone 

More tomorrow ...

Hugs xx

April 11, 2017

Tuesday Tutorial - Acanthus Leaf Card Front

Hi Everybody,

This pretty card is created with a relatively new die from Spellbinders and this is an A2 size. To make this one I have started with the card front itself and worked my way back to make the base at the end.  The overall effect is very pretty in shades of lilac and purple
Spellbinders Supplies:
Other Supplies:
With both dies from the Acanthus Leaf cut one panel in white and ink through the die before removing the card (I used Dusty Concord)
Add foam tape to the back of the die cut in areas that cannot be seen from the front
Add this to some text paper
Layer this panel onto some darker purple paper and leave a border around the edge the size you want it to be
The paper that I have used is  called Vintage Notes and is available in the Poundland Shops in the UK
There are 32 sheets of 200 gsm paper with some lovely designs 
Wrap these with some white ribbon and secure on the back
Tie a small bow for the front
Stamp and heat emboss the sentiment of your choice
Now you can create the base card to add these layers too and make it the size that you want it to be
The flowers I have used are from left to right:
Heather, Anemone, Chrysanthemum, Tulips, Roses and Rosebuds
Add to the left of the card and tuck the sentiment in place with the flowers
Add the Dazzler to the bow
Dot the flowers with some glue and sprinkle with glitter
Line the inside of the card with the same papers for a really pretty look.

More tomorrow ...

Hugs xx