Beautiful Card Designs Made Easy

Showing posts with label Want2Scrap. Show all posts

January 10, 2017

Tuesday Tutorial-Sapphire Basic Set A

Hi Everybody,

This little starter set of small dies are designed to be used with the Sapphire, but they can be used in any of the small die cutting machines that are on the market.  

These little machines are so handy to keep on your work top to cut sentiments, tags or even some flowers. They take up no space at all but are just as strong as the bigger die cutters

You may have been lucky enough to get your Sapphire from C&C and this is the set of dies that came with the machine at that time. That machine is exclusive to C&C but the Prizm is the same concept and both are by Spellbinders
So here is a really quick and simple card idea for those little dies

Spellbinders Supplies:

Other Supplies:

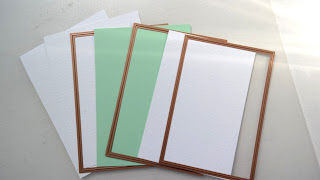
Cut two panels with die #7 from Matting Basics A and create a hinged card
With die #7 from Matting Basics B cut another panel in dotty blue card
With die #6 from Matting Baiscs A cut another white panel and emboss in the folder that you have
(Please remember that die #1 is always the smallest)
Add the embossed panel to the dotty card with foam pads between the layers
Cut all the square dies together to create two frames and the other pieces as you need
Stamp your sentiment onto the small oval and layer it onto the tag die
Add the tag with foam pads to the embossed panel
Add ribbon through the loops on the tag and secure behind the panel
Layer up the frames to overlap each other with foam pads were needed
Layer up the butterflies along the body line and add the flourish as the butterfly trail
Add all this to the base card

More tomorrow ...

Hugs xx


January 06, 2017

Friday Freebie 001/17

Hi Everybody,

Here is the first Friday Freebie of the year and we start with this really pretty pink card.

The flowers on the front are roses, rosebuds. Sweetheart blossom and Gypsophilia and all have been sparkled with glitter.

If you are new to my blog then this is what you need to do to be in with a chance to win this card.

Leave me a comment at the end of this post and from those comments one name will be drawn and announced in tomorrows blog post.

You have 72 hours in which to claim the card and YOU will need to come back and check if it is your name that is shown.

I cannot chase you up to collect it so if you dont check then you will lose it after that time and it will be offered to someone else.

I will send the card to you wherever you live and you don't need to have your own blog to enter. And even if you have won a card last year you can still try again asd some of my readers have actually won two or even three cards from the FF

Good luck everybody.

More tomorrow ...

Hugs xx

January 03, 2017

Tuesday Tutorial - Floral Trellis

Hi Everybody,

This is the first tutorial to start off the New Year and I thought we would make this one in lilac and add those beautiful flowers to it.  I even used the same die to create the box and I have many tutorials on boxes of different shapes and sizes on Card Making Magic
Spellbinders Supplies:

Other Supplies:

With white card create top folded base card measuring 41/4 x 6"
With the Dotty card create another mat slightly smaller to leave a thin border around the edges
With both oarts to the Trellis die cut one panel in white and add small pieces of foam tape around the edges and onto the floral parts 
Add this to the Dotty card and trim around the edges
Wrap these panels with ribbon and add to the base card with foam pads
With the sentiment die cut twice in white and once in silver glitter card and layer them together with the silver glitter card on the top 
Add this to the  trellis just above the ribbon 
Tie a neat bow and add to the ribbon
Dress with flowers as you like and sprinkle them with glitter.
Use the inner portion of the Trellis die to make the panel in the top of the box and line with acetate
Use the Dotty card for the lid and white card for the box base
Dress with flowers to match the card if desired.

More tomorrow ...

Hugs


December 06, 2016

Tuesday Tutorial - Romantic Vine

Hi Everybody,

Todays card is in a really pretty shade of pale green and I ahve teamed it with crisp white.
 The card itself is easy to make and is quite effective once it is finished.
 The tiny spots of pink just give it that little lift and it could be for any occasion that you wanted.
Spellbinders Supplies:
Other Supplies:
With die #7 from Matting Basics A cut two panels in white and create a hinged card
With die #7 from Matting Basics B cut another panel in green  and emboss in any folder that you have
With die #6 from Matting Basics a cut another panel in white and emboss this also
(Die #1 is always the smallest)
With the two embossed panels remove a#bout an inch from the white one so that it will create a channel
Add foam tape to the back of each piece
Thread some ribbon though a piece of lace that will wrap around the bottom panel and secure in place then add both of these pieces to the green layer
Cut the flowers and leaves that you need and inkt through the die before removing the card to give the shade portion on the flower
Add these across the open channel in your card just adding glue to the parts that will touch the main panel
Cut the sentiment several times and glue them together for extra strength and position the words across the card front

Alter the sentiment, colours or dies for an different look but keeping the basic method the same

More tomorrow ...

Hugs xx

November 29, 2016

Tuesday Tutorial - Tudor Rose

Hi Everybody,

This pretty pale blue and white card would be suitable for all occasions and is not too frill for male cards either
 It is another that is easy to do as the die does all the work  for you all you have to do is cut and assemble the layers. 
 The centre shape matches the older Labels One that you may already have in your collection
Spellbinders Supplies:
Other Supplies:
Instructions:

With die #7 from the Matting Basics  A set cut two pieces of white card and create the base
With die #7 from the Matting Basics B set cut one layer in blue
With the two largest dies from the Tudor Rose Card Creator cut two panels in white and trim one of them so that the bottom flower and the leaves are separate 
Add foam pads to the back of the separated piece so that they cannot be seen from the front
Add the full panel to the blue layer and add to the base card
Cut the flowers from the Tudor Rose collection that match the flowers on the separated panel
(The photograph shows you where I have attached my flowers in blue and white layers)
Stamp and emboss the sentiment and cut out with Labels One then layer that on to die #3 from Luscious Labels One with foam tape in between
This shape fits beautifully into the centre part of the Tudor Rose Card Creator
Layer up the additional flowers on to the card front as you like and trim as needed

More tomorrow ...

Hugs xx

November 18, 2016

Friday Freebie 145

Hi Everybody,

This is a card that was created in a video in 2013 and there is a page on my website about it 

With a title like that you can rightly assume that there are two other cards made with the same set of dies but in different styles and colours

You will find the links to all three videos on my website if you click the link above

I used the  Grand Decorative Ovals  which are now not available on the Spellbinders website.

It is quite a big card and has an A Frame back to make it stand. 

The video will show you exactly what I mean and it is another way to finish off your own cards.

So if this is a card that you would like to have then you know what to do .... leave me a comment at the end of the post.

I will choose a name from those comments and the card will be yours once you email me your postal address. So if you add a comment then please come back in the morning to see if it is your name that is shown

More tomorrow ...

Hugs xx


November 17, 2016

3D Stamping with Spellbinders ...

Hi Everybody,

This is a really new concept to stamping and it has been brought to the market by Spellbinders.

At first glance you may think that there is something wrong with your stamp but as you stamp it out it will add shadow and shading to your images without any help from you.

This is the Poinsettia that is in the collection of  3D stamps    and there are other designs for you to choose

Although the Poinsettia is traditionally for Christmas I just wanted to show you that it can be used for other occasions also.

How about a Winter Wedding in colours of the wedding theme, or an engagement card for the happy couple

I have added a Diamante corner to this card as that extra touch of luxury to the design.

And all the cards have been stamped with Distress Inks and the blue one is Blueprint Sketch


This one is Picked Raspberry and I have added the Birthday sentiment to this one with Diamante flourishes around the  centre panel

If you have any of these new stamps I hope you will enjoy playing with them and creating your own designs

More tomorrow ...

Hugs xx


November 11, 2016

Friday Freebie 144

Hi Everybody,

So here we are with another Friday and the card this week is in peach and white

It is a 5x7 and the flower blend with the colour scheme beautifully.

What isn't shown on the photo is the hatpin that has been pushed into the flowers on the left and that really finishes the card off to perfection

I am sure that whoever wins this one will be pleased with the result.

Would you like this card to be on its way to you? Then all you need to do is leave me a comment at the end of the post and from those comments a name will be drawn and announced in tomorrows blog post.

You will need to come back and check if it is you and then email me with your postal address and the card will be on its way to you.

More tomorrow ...

Hugs xx

November 08, 2016

Tuesday Tutorial - Botanical Heart Pair

Hi Everybody,

Today we have another quick and easy card to make in soft blue and white and all I have used is the Botanical Heart Pair die and one embossing folder. 
The card is so pretty and could be for any occasion.
Spellbinders Supplies:

Other supplies:
Instructions:
This is the most simple way to create your card base ....
Simply fold it in half along the long side and then cut in half to create two card bases with the fold at the top. 
Then mark the blue card leaving a small border around each edge and create the mat.
 Repeat with more white card and then emboss this piece
From each piece of the Botanical heart Pair die cut one in blue one in white of the largest and glue these together with the blue layer on top.
Cut the solid die in blue and the filigree die in white and layer together

Add the mats and layers to the base card and then with foam pads under the largest heart add this to the top. Add the smaller heart on this again with foam pads.
Stamp onto black card the sentiment of your choice and heat emboss with white powder.
 Cut it out and add to the card with foampads
Dress the card with flowers as you like and add some pearls around the hearts and some glitter to the flowers

More tomorrow ...

Hugs xx

November 04, 2016

Friday Freebie 143

Hi Everybody,

My apologies for the poor quality of the photo but don't let that out you off because the card is really pretty.

It is in shades of pale pink and lemon teamed with white and I have added a hatpin into the floral display.

The finished size is A2 and I have used the Labels Eight for the layers.

Do you think you would like this card? Well if you do all you need to do is leave me a comment at the end of the post

From those comments a name will be chosen and announced in the blog post tomorrow.  So you will need to come back and see if you are the winner

You will have till Wednesday to claim the card and then it will be gone to someone else.

Good luck to all and I am happy to send the card wherever you are in the world.  And boy have my cards gone to some far away places over the years.

More tomorrow ...

Hugs xx


October 31, 2016

With Love in Pink ...

Hi Everybody,

These pretty papers are from the Blissful Paper Pads from AnnaMarie Designs 

This is obviously the pink but there are other colours for you to choose from and sentiment tags to match also

I have used Circular dies to create an aperture and then filled the gap with Floral Trellis

Each of the petal shapes has been dotted with tiny pink pearl from Want2Scrap

The flowers are a mixture of stamped images, die cut flowers and leaves from the  Quite Contrary stamp and die set  by Spellbinders with paper flowers from Wild Orchid Crafts

More tomorrow ...

Hugs xx

October 28, 2016

Friday Freebie 141

Hi Everybody,

This pretty card  was made earlier this year and it is Letterpressed in Lilac and is a 5x7 size.

The flowers compliment the scheme

I have added in one of my hatpins to the display after the photo was taken so you won't see it here.

I have added lace and ribbon to the bottom of the card and lace leaves in with the flowers.

The inside is finished on this one

So if you would like to have this card then all you need to do is leave me a comment.

From those comments a name will be chosen as the winner.

I will add that name to tomorrows blog post so you need to come back and check if it is yours that is listed.

More tomorrow ...

Hugs xx


October 27, 2016

Autumn Colours

Hi Everybody,

I used to be a real sun fan at one time but as I got older the heat bothers me more and I can no longer sit in it for long.

So these cards are reflecting my love of  Autumn and the beuatiful colours that go with this season

The leaves turning to golds and browns and there seems to be a softness about everything before the winter takes hold.

The first two cards are using the Woodland Leaves and the Acorns  both of which are from the Woodland Collection from Spellbinders

For the top card I have used the Brick pattern and the card to the left I have used the Bark and both these patterns are in one folder.

They both make for an unusual type of backdrop and are especially useful for male cards.

Then with a more feminine touch I have created the card base with Cascading Grace and layered up with some portions of the die cut with foam pads

The flowers and leaves on this card are from Wild Orchid Crafts and there is a hatpin pushed into the display.

The petals have been sparkled with glitter. Then either pearls or enamel dots finish off the cards

More tomorrow ...

Hugs xx


October 25, 2016

Tuesday Tutorial - Labels 56 Decorative Accents

Hi Everybody,

Todays card is a really easy simple layered card and I have used some white cream and red spotty card for mine. I have separated the layers with foam pads and for those of you who are asking where I get my foam tape and pads from they are £££ shop buys and I buy loads for them every time I go in to the shop
Spellbinders Supplies:
Other Supplies:

With Matting Basic A die #7 cut two panels in white and create a hinged card
With #7 from Matting Basics B cut another panel in cream
With #6 from Matting Basics A cut a patterned panel
From Labels 56 cut each piece in cream and add foam pads to the back of them
Stamp and emboss your sentiment and layer it on to some matching cream card and add the foam pads to this also
Add the red dotty card to the cream layer and wrap with red ribbon
Layer all the Labels 56 together  and add on top of the other layers
Glue a bow in place and add the bows cetnre piece
Decorate with flowers and pearls as you like and sprinkle the petals with fine glitter.

More tomorrow ....

Hugs xx